
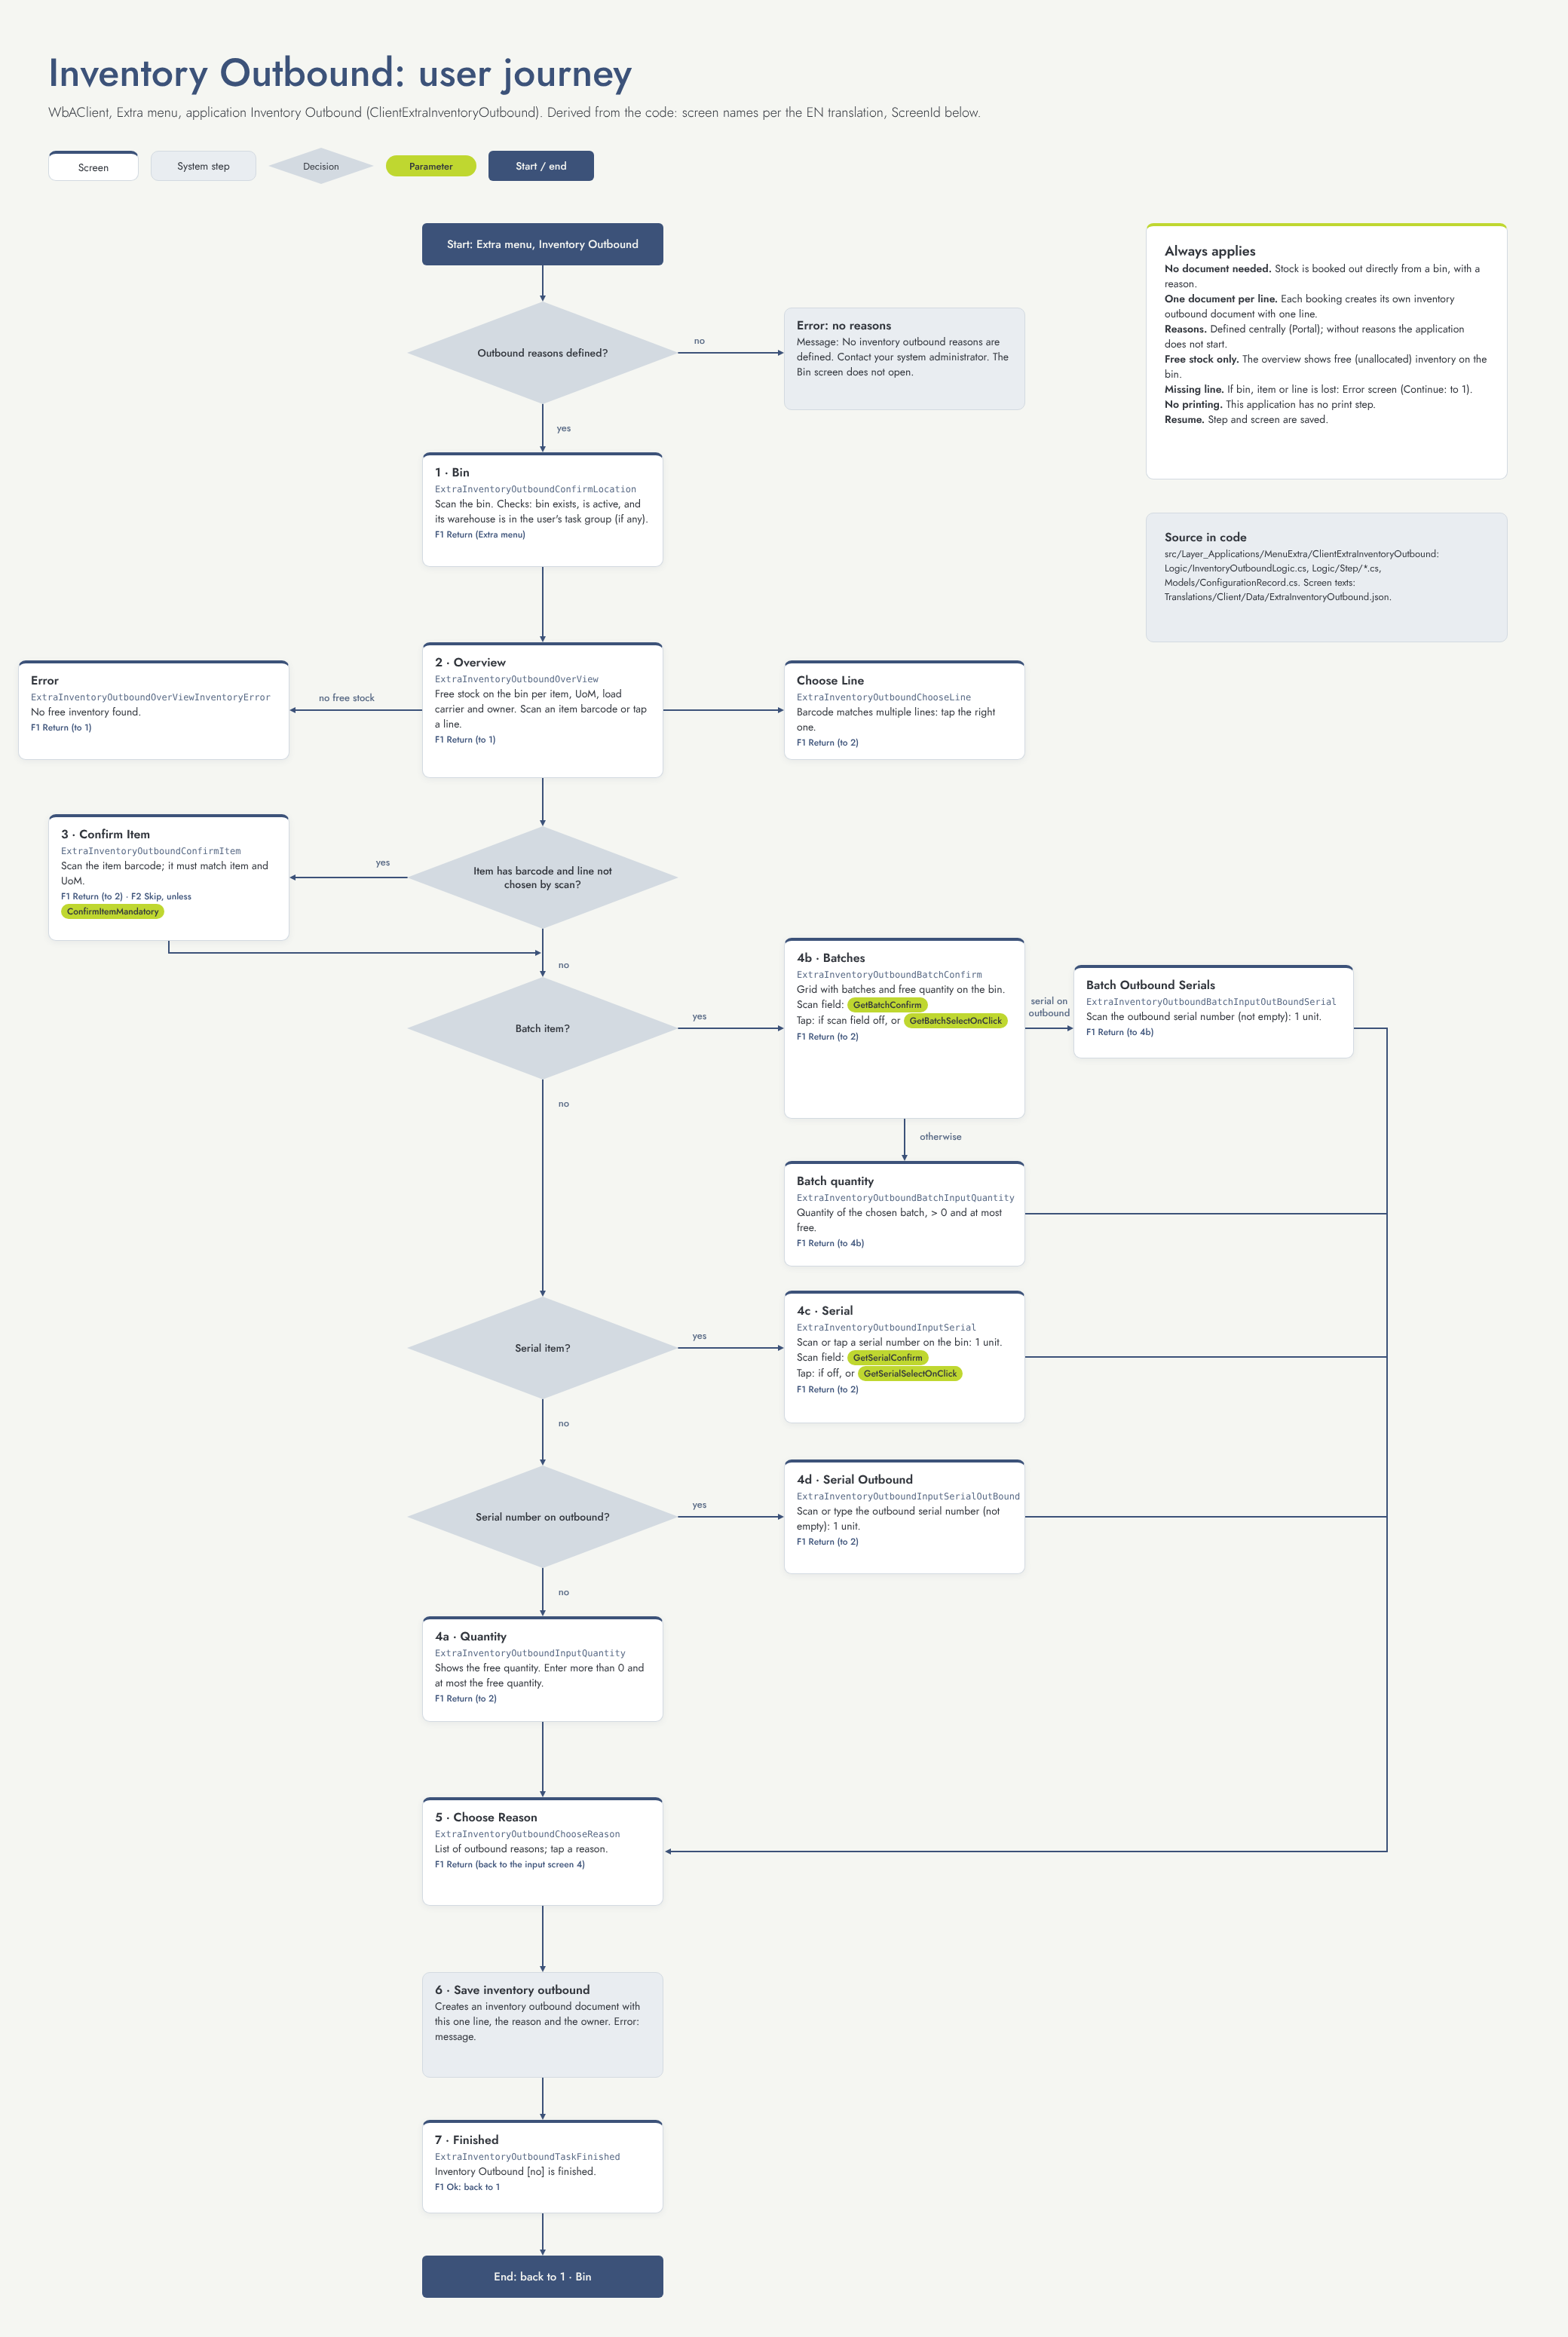
With Inventory Outbound you book stock out of a location without a source document, for example damaged goods. You always give a reason. Each booking creates its own inventory outbound document with one line.
At least one inventory outbound reason must be set up in the Portal. When there are none, you get the message No inventory outbound reasons are defined and the application does not start.
Step by step
1. Location (screen Inventory Outbound - Bin)
Scan the location you book the stock out of. The location must exist and be active, and its warehouse must be allowed by your task group. F1 Return takes you back to the Menu Extra.
2. Overview (screen Inventory Outbound - Overview)
The stock on the location is shown per item, unit, load carrier and owner. Tap a line or scan an item barcode. When a barcode matches several lines, you choose the right line (Inventory Outbound - Choose Line). When there is no free stock on the location, you get the message No free inventory found and go back to step 1. F1 Return takes you back to step 1.
3. Confirm Item (screen Inventory Outbound - Confirm Item)
Scan the item barcode; it must match the item and unit of the line. This screen only appears when you tapped the line instead of scanning it, and the item has a barcode. F2 Skip skips the confirmation, unless confirmation is mandatory. F1 Return takes you back to step 2.
4. Quantity, batch or serial number
-
Inventory Outbound - Quantity: enter the quantity, up to the free quantity.
-
Inventory Outbound - Batches: scan or tap the batch, then enter the quantity (Inventory Outbound - Batches - Quantity). For items that register a serial number on outbound, you scan that serial number instead (Inventory Outbound - Batch Outbound Serials).
-
Inventory Outbound - Serial: scan or tap a serial number on the location. The quantity is 1.
-
Inventory Outbound - Serial Outbound: for items that register a serial number on outbound, scan or type that serial number. The quantity is 1.
F1 Return takes you back to step 2.
5. Reason (screen Inventory Outbound - Choose Reason)
Tap the reason for the booking. F1 Return takes you back to step 4.
6. Save and finish (screen Inventory Outbound - Finished)
The inventory outbound document is created. The screen shows its number. Ok takes you back to step 1 for the next booking.
Flow diagram
Settings that change this flow
|
Setting |
Default |
Effect |
Step |
|---|---|---|---|
|
ConfirmItemMandatory |
Off |
When on, the item confirmation cannot be skipped (F2 Skip is hidden). |
3 |
|
GetBatchConfirm |
On |
Show a scan field for the batch. When off, tap the batch in the list. |
4 |
|
GetBatchSelectOnClick |
Off |
Also allow tapping a batch while the scan field is shown. |
4 |
|
GetSerialConfirm |
On |
Show a scan field for the serial number. When off, tap it in the list. |
4 |
|
GetSerialSelectOnClick |
Off |
Also allow tapping a serial number while the scan field is shown. |
4 |
Other things that change the flow
-
Outbound reasons: set up in the Portal; all are shown in step 5.
-
Task groups: limit the warehouses where you can book stock out.
-
Item settings: barcodes decide whether step 3 appears; batch, serial and serial number on outbound decide which screen you get in step 4.
-
Owner: the owner of the stock line is copied to the document.
-
There is no printing in this application.