
With Packaging you pack picked goods into carriers (boxes, pallets) and complete the packaging task. There are two ways of working: the normal flow, where you register which item goes into which carrier, and a simple flow, where you only register the carriers.
Step by step: starting
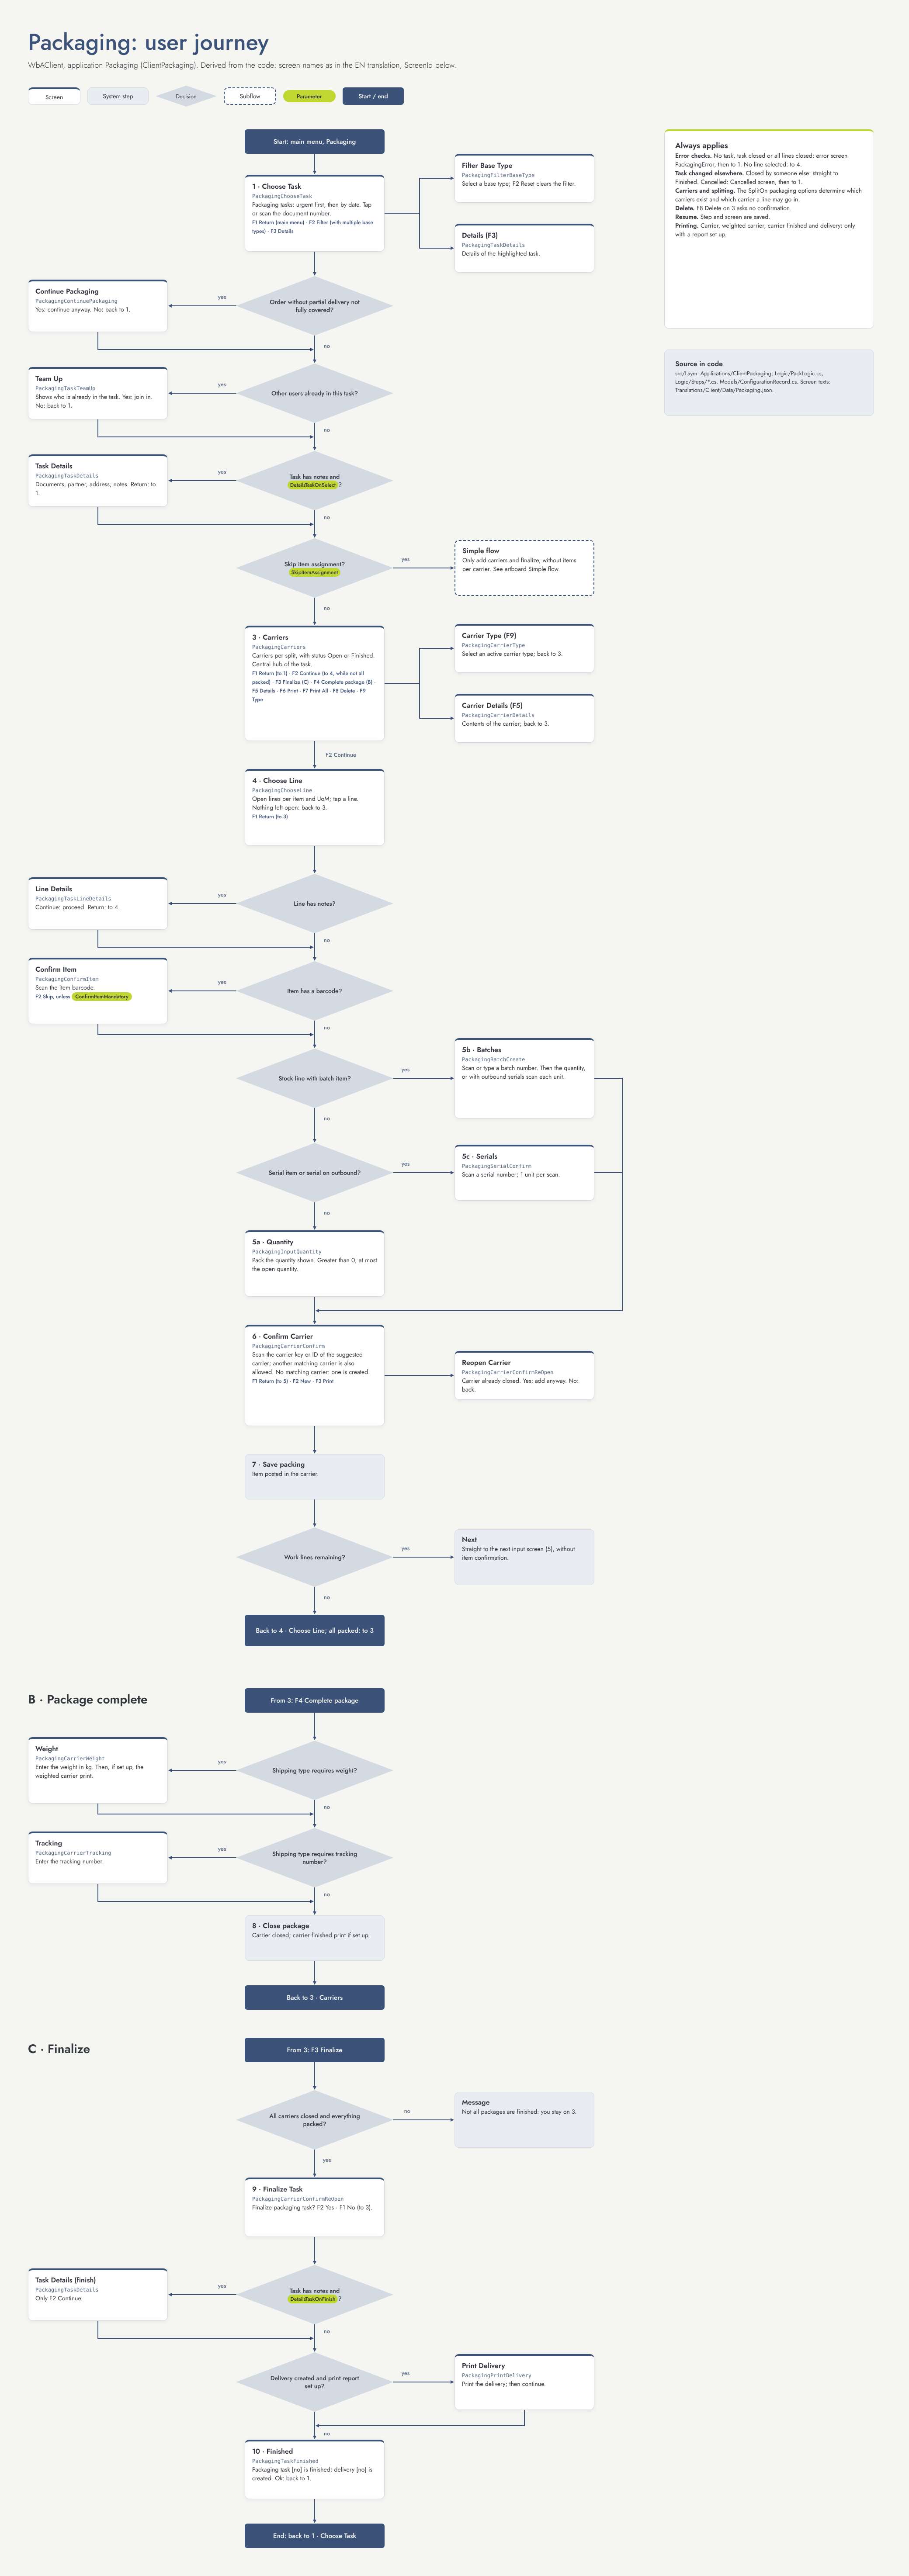
1. Choose Task (screen Packaging - Choose Task)
The packaging tasks are sorted with urgent tasks first, then by date. Tap a task or scan its number. F2 Filter appears when your task groups contain more than one base type; F3 Details shows the details of the highlighted task.
-
When an order that does not allow partial delivery is not fully covered, the Continue Packaging screen asks if you want to continue.
-
When someone else is already working on the task, you can team up.
-
When the task has notes, the Details screen shows them first.
Then the application continues with the normal flow or, when item assignment is skipped, with the simple flow.
Normal flow
2. Carriers (screen Packaging - Carriers)
This is the central screen of the task. It lists the carriers with their status (open or finished).
-
F2 Continue: pack items (step 3). Only shown while not everything is packed.
-
F3 Finalize: finish the task (step 8).
-
F4 Complete package: close the highlighted carrier (step 7).
-
F5 Details, F6 Print, F7 Print All, F8 Delete, F9 Type: view, print, delete or change the type of a carrier.
3. Choose Line (screen Packaging - Choose Line)
The open lines are grouped per item and unit. Tap a line. When nothing is left to pack, you go back to step 2. When the line has notes, the Line Details screen shows them first.
4. Confirm Item (screen Packaging - Confirm - Item)
Scan the item barcode. This screen appears when the item has a barcode. F2 Skip skips the confirmation, unless confirmation is mandatory.
5. Quantity, batch or serial number
-
Packaging - Quantity: enter the quantity you pack.
-
Packaging - Batches: scan or type a batch number, then enter the quantity or scan the outbound serial numbers.
-
Packaging - Serials: scan a serial number; each scan is one piece.
6. Confirm Carrier (screen Packaging - Confirm - Carrier)
Scan the key or ID of the suggested carrier, or of another carrier that fits. When no carrier fits, a new one is created. F2 New creates a new carrier; F3 Print prints its label. When the carrier is already finished, the application asks if you want to reopen it.
After saving, you continue with the next quantity (step 5) until the line is done, and then go back to step 3.
7. Complete package (from step 2, F4)
When the shipping type requires it, you enter the weight (Packaging - Carriers - Weight) and the tracking number (Packaging - Carriers - Tracking). The carrier is then closed and its label can be printed. You return to step 2.
8. Finalize (from step 2, F3)
All carriers must be closed and all lines packed. After confirming (Packaging - Finalize), the application can show the details again and print the delivery. The Packaging - Finished screen shows which delivery was created. Ok takes you back to step 1.
Simple flow
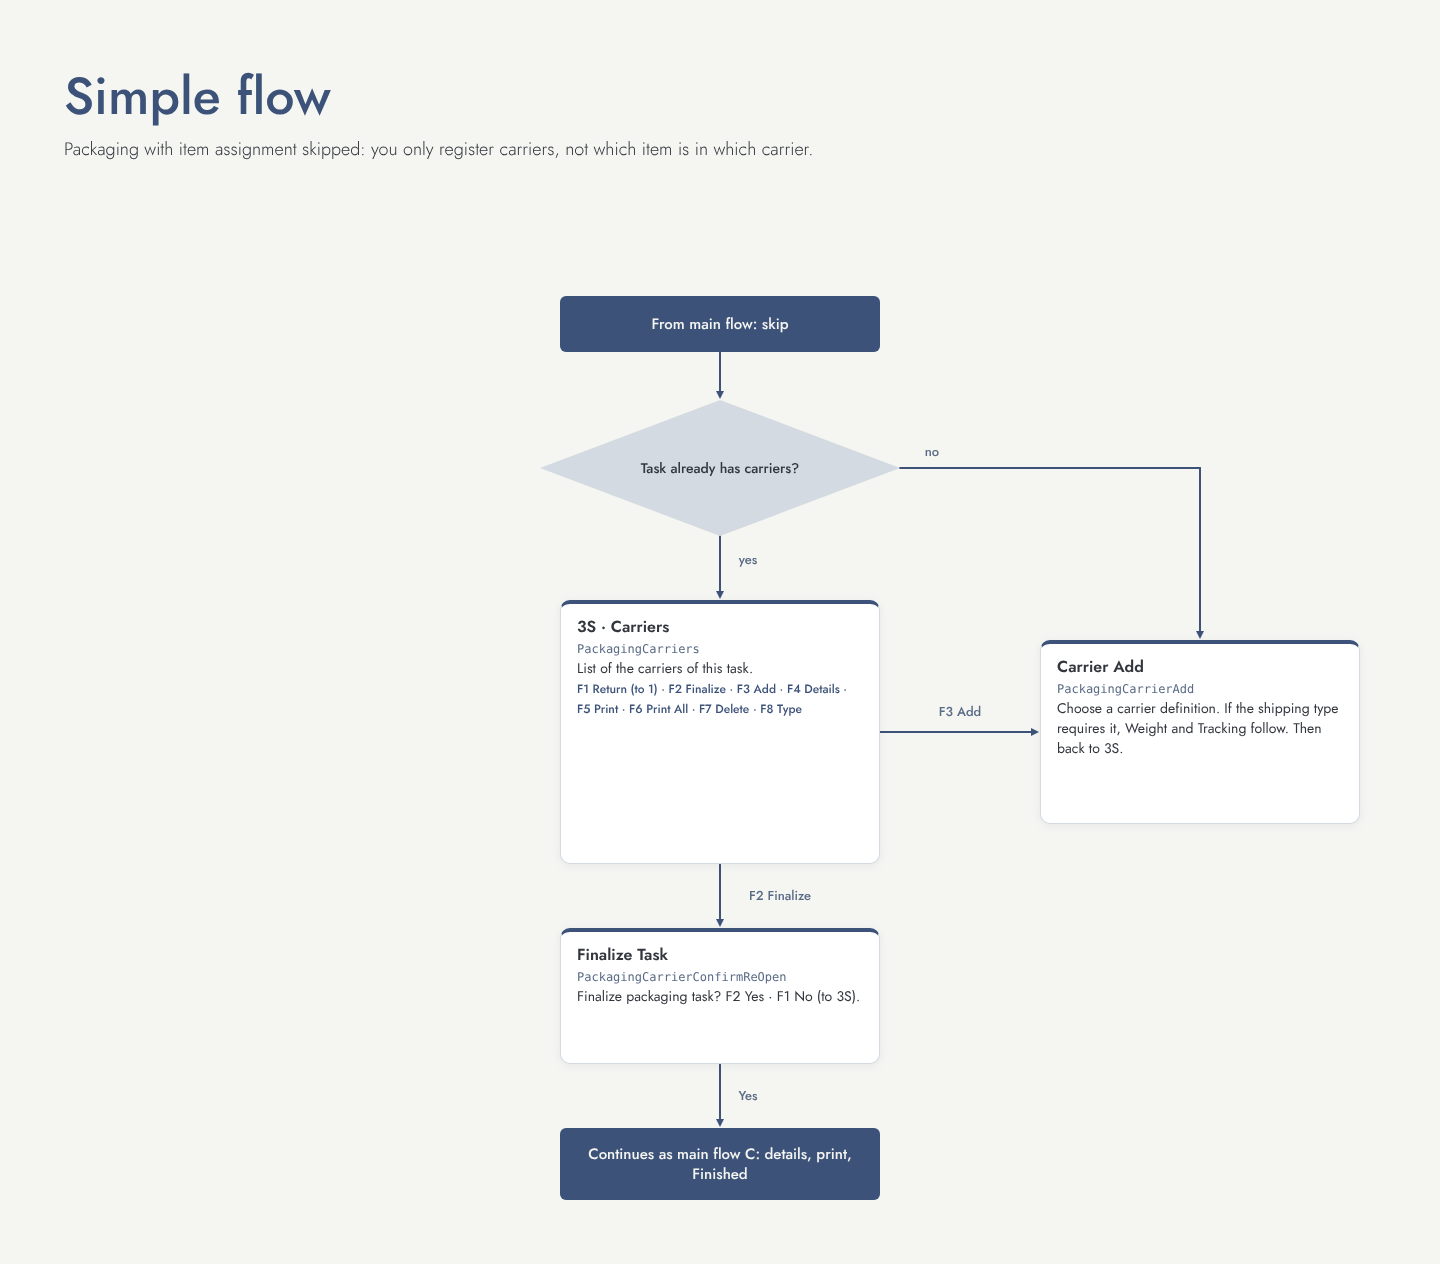
When item assignment is skipped, you only register carriers:
-
When the task has no carriers yet, you start with Packaging - Carrier Add: choose a carrier definition and, when required, enter weight and tracking number.
-
On Packaging - Carriers you use F3 Add to add more carriers and F2 Finalize to finish the task.
Flow diagram
Simple flow
Settings that change this flow
|
Setting |
Default |
Effect |
Step |
|---|---|---|---|
|
DetailsTaskOnSelect |
On |
Show task details after choosing a task, when it has notes. |
1 |
|
SkipItemAssignment |
Off |
When on, use the simple flow. A setting on the document takes priority; when items are already packed in carriers, the normal flow is always used. |
1 |
|
ConfirmItemMandatory |
Off |
When on, the item confirmation cannot be skipped. |
4 |
|
DetailsTaskOnFinish |
Off |
Show the task details again when the task is finished. |
8 |
Other things that change the flow
-
Packaging split options (document, business partner, address, shipping type, owner): which carriers exist and which carrier a line may go into.
-
Shipping type: whether weight and tracking number are required.
-
Orders without partial delivery: the Continue Packaging question.
-
Item settings: barcodes, batch, serial and serial number on delivery.
-
Print reports: carrier, weighed carrier, finished carrier and delivery prints only appear when a report is set up.