
Finishing
If one or more items have been added to the current transaction, a finish button will appear at the bottom of the screen. This is a multi-function button. By pressing the little down icon on the bottom right of the button itself you can see available options (Finish (default), Save as Quote, Pause/Park). When clicking the general finalize button the default action will be executed i.e. showing the finalize screen with payment options (Finish). See also figure 1.
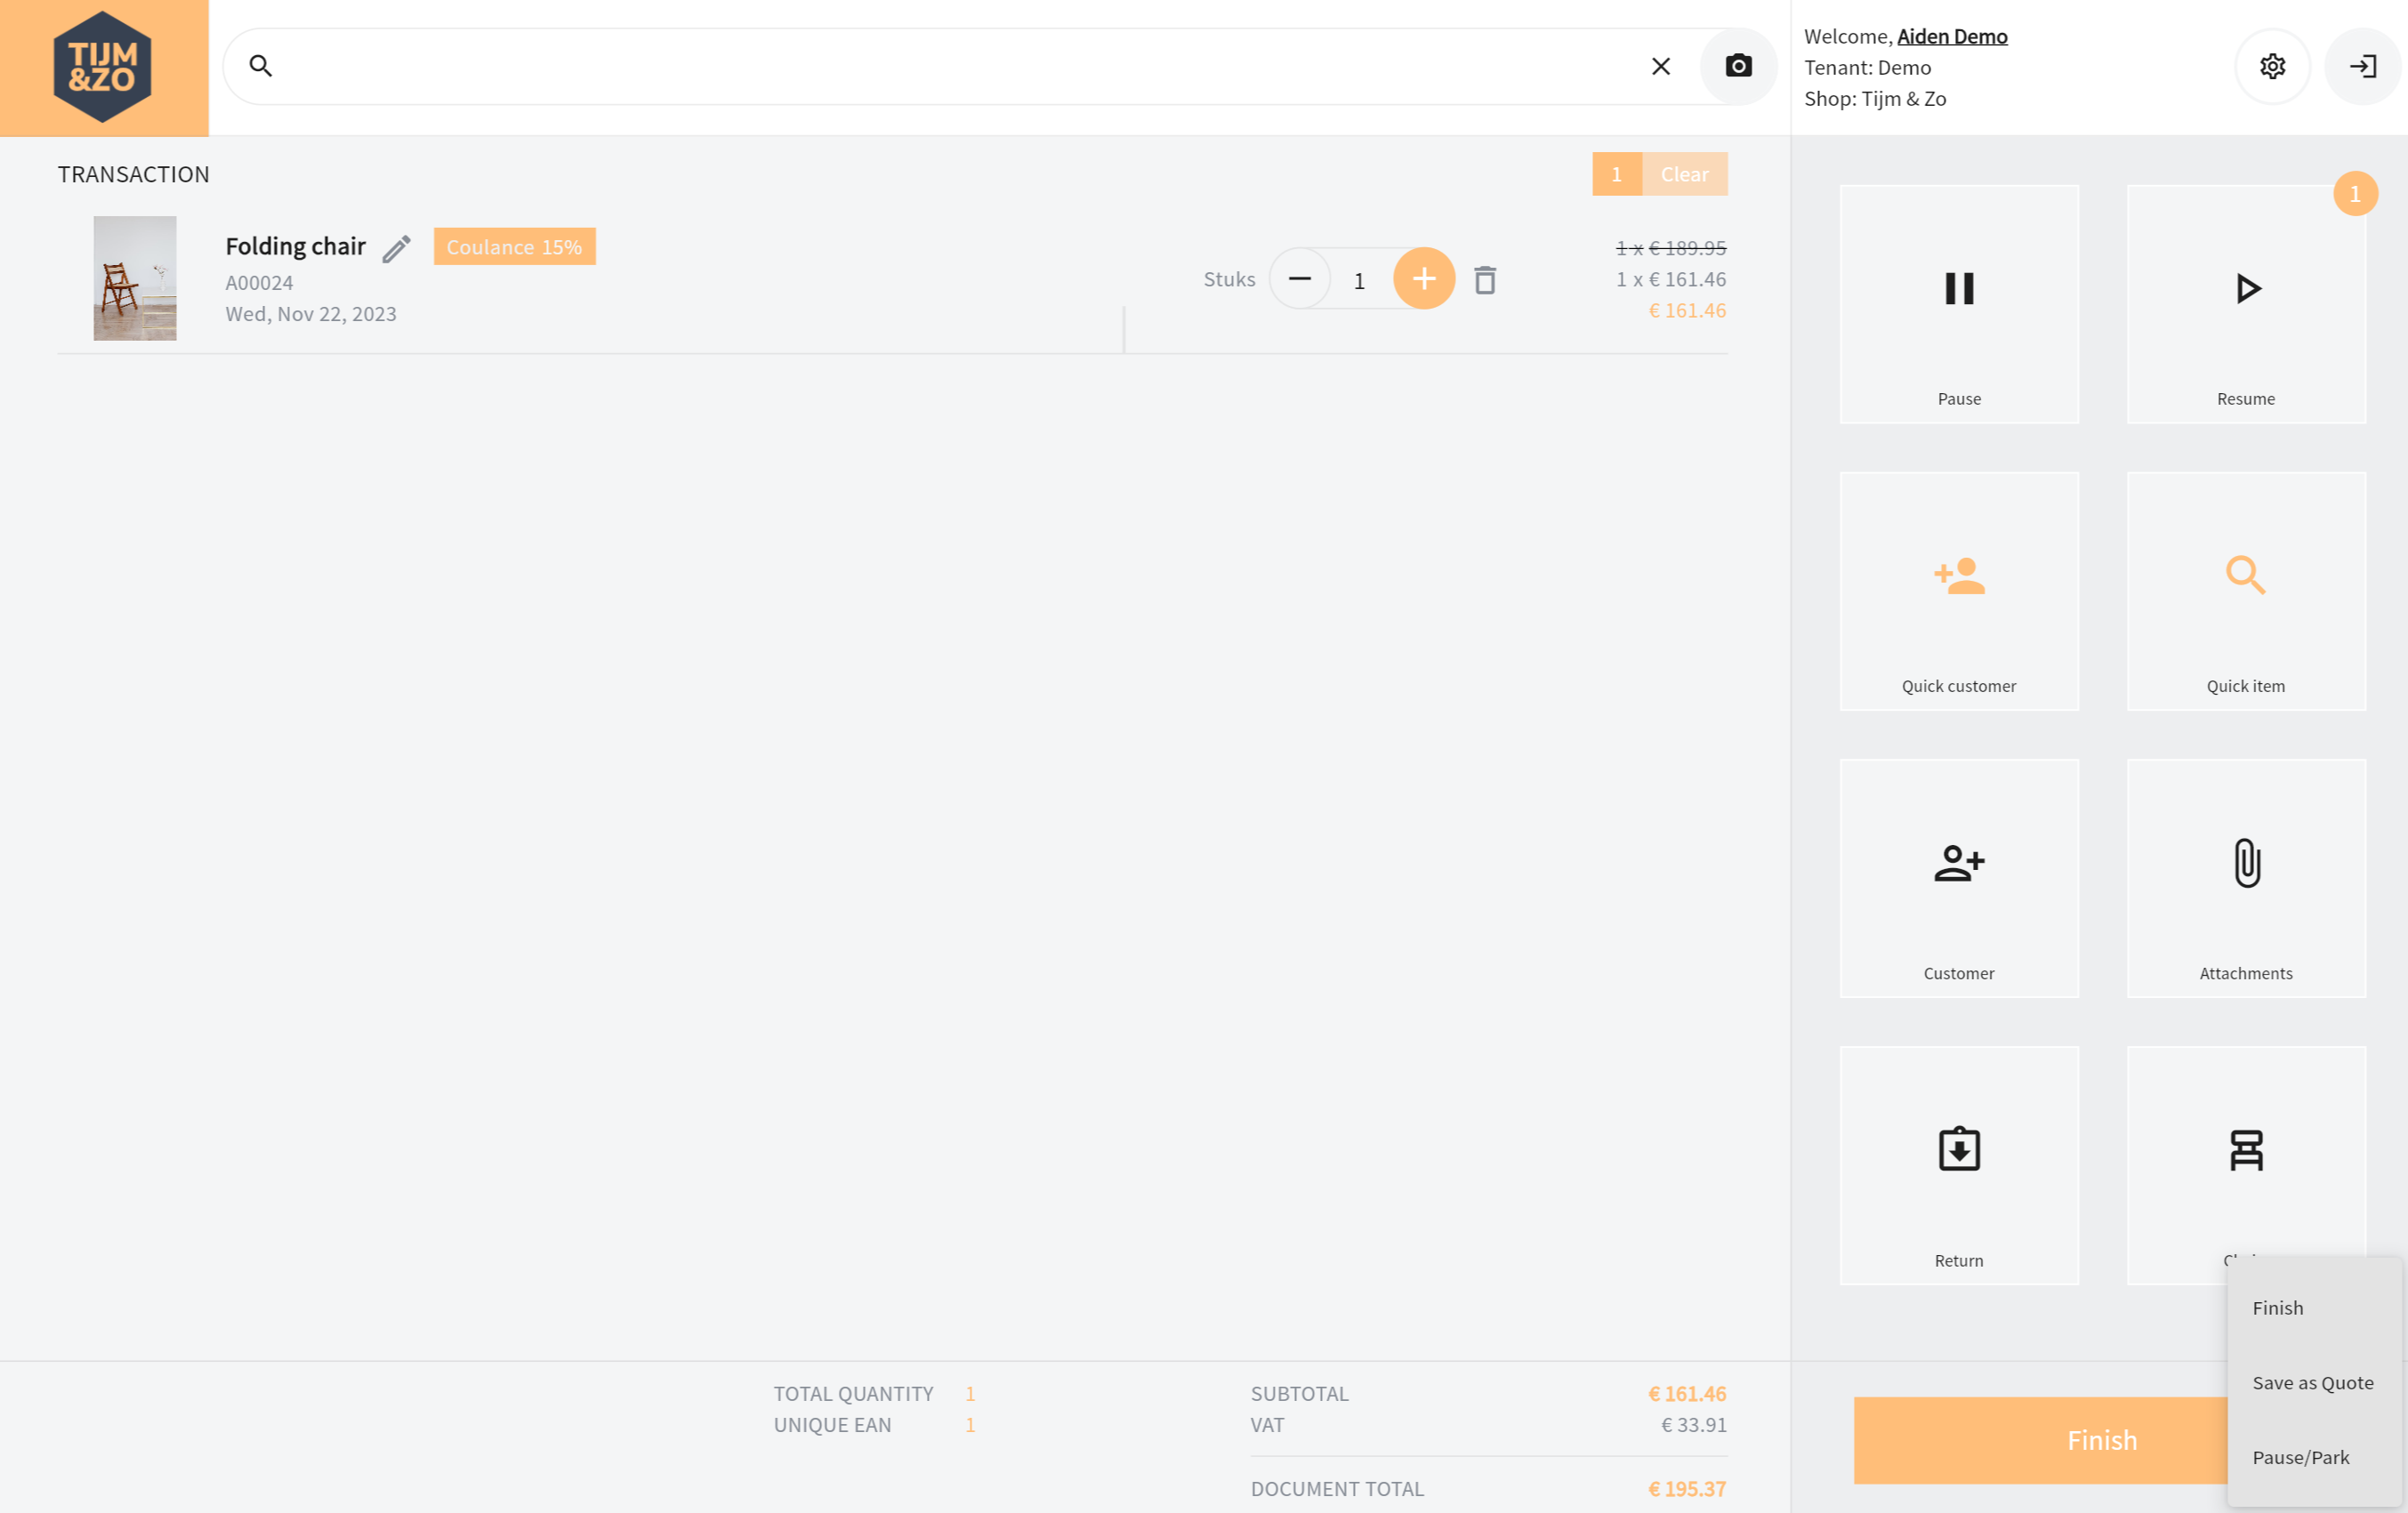
Figure 1. The Finish button and it’s options
Save as quote
When choosing the “Save as quote option”, the payment screen will open but you do not have the possibility to add payments. When saving the transaction, the transaction will be saved as a quote (transactiontype = quote). When the transaction is saved a a quote, it is mandatory to add a customer (you will be prompted to do so).
Pause/Park
When choosing the Pause/Park option you will have the option to pause the current transaction. See Pausing or Resuming a transaction for details.
Finish
When clicking the Finish button or the finish option you will be presented the finish page. See figure 2.
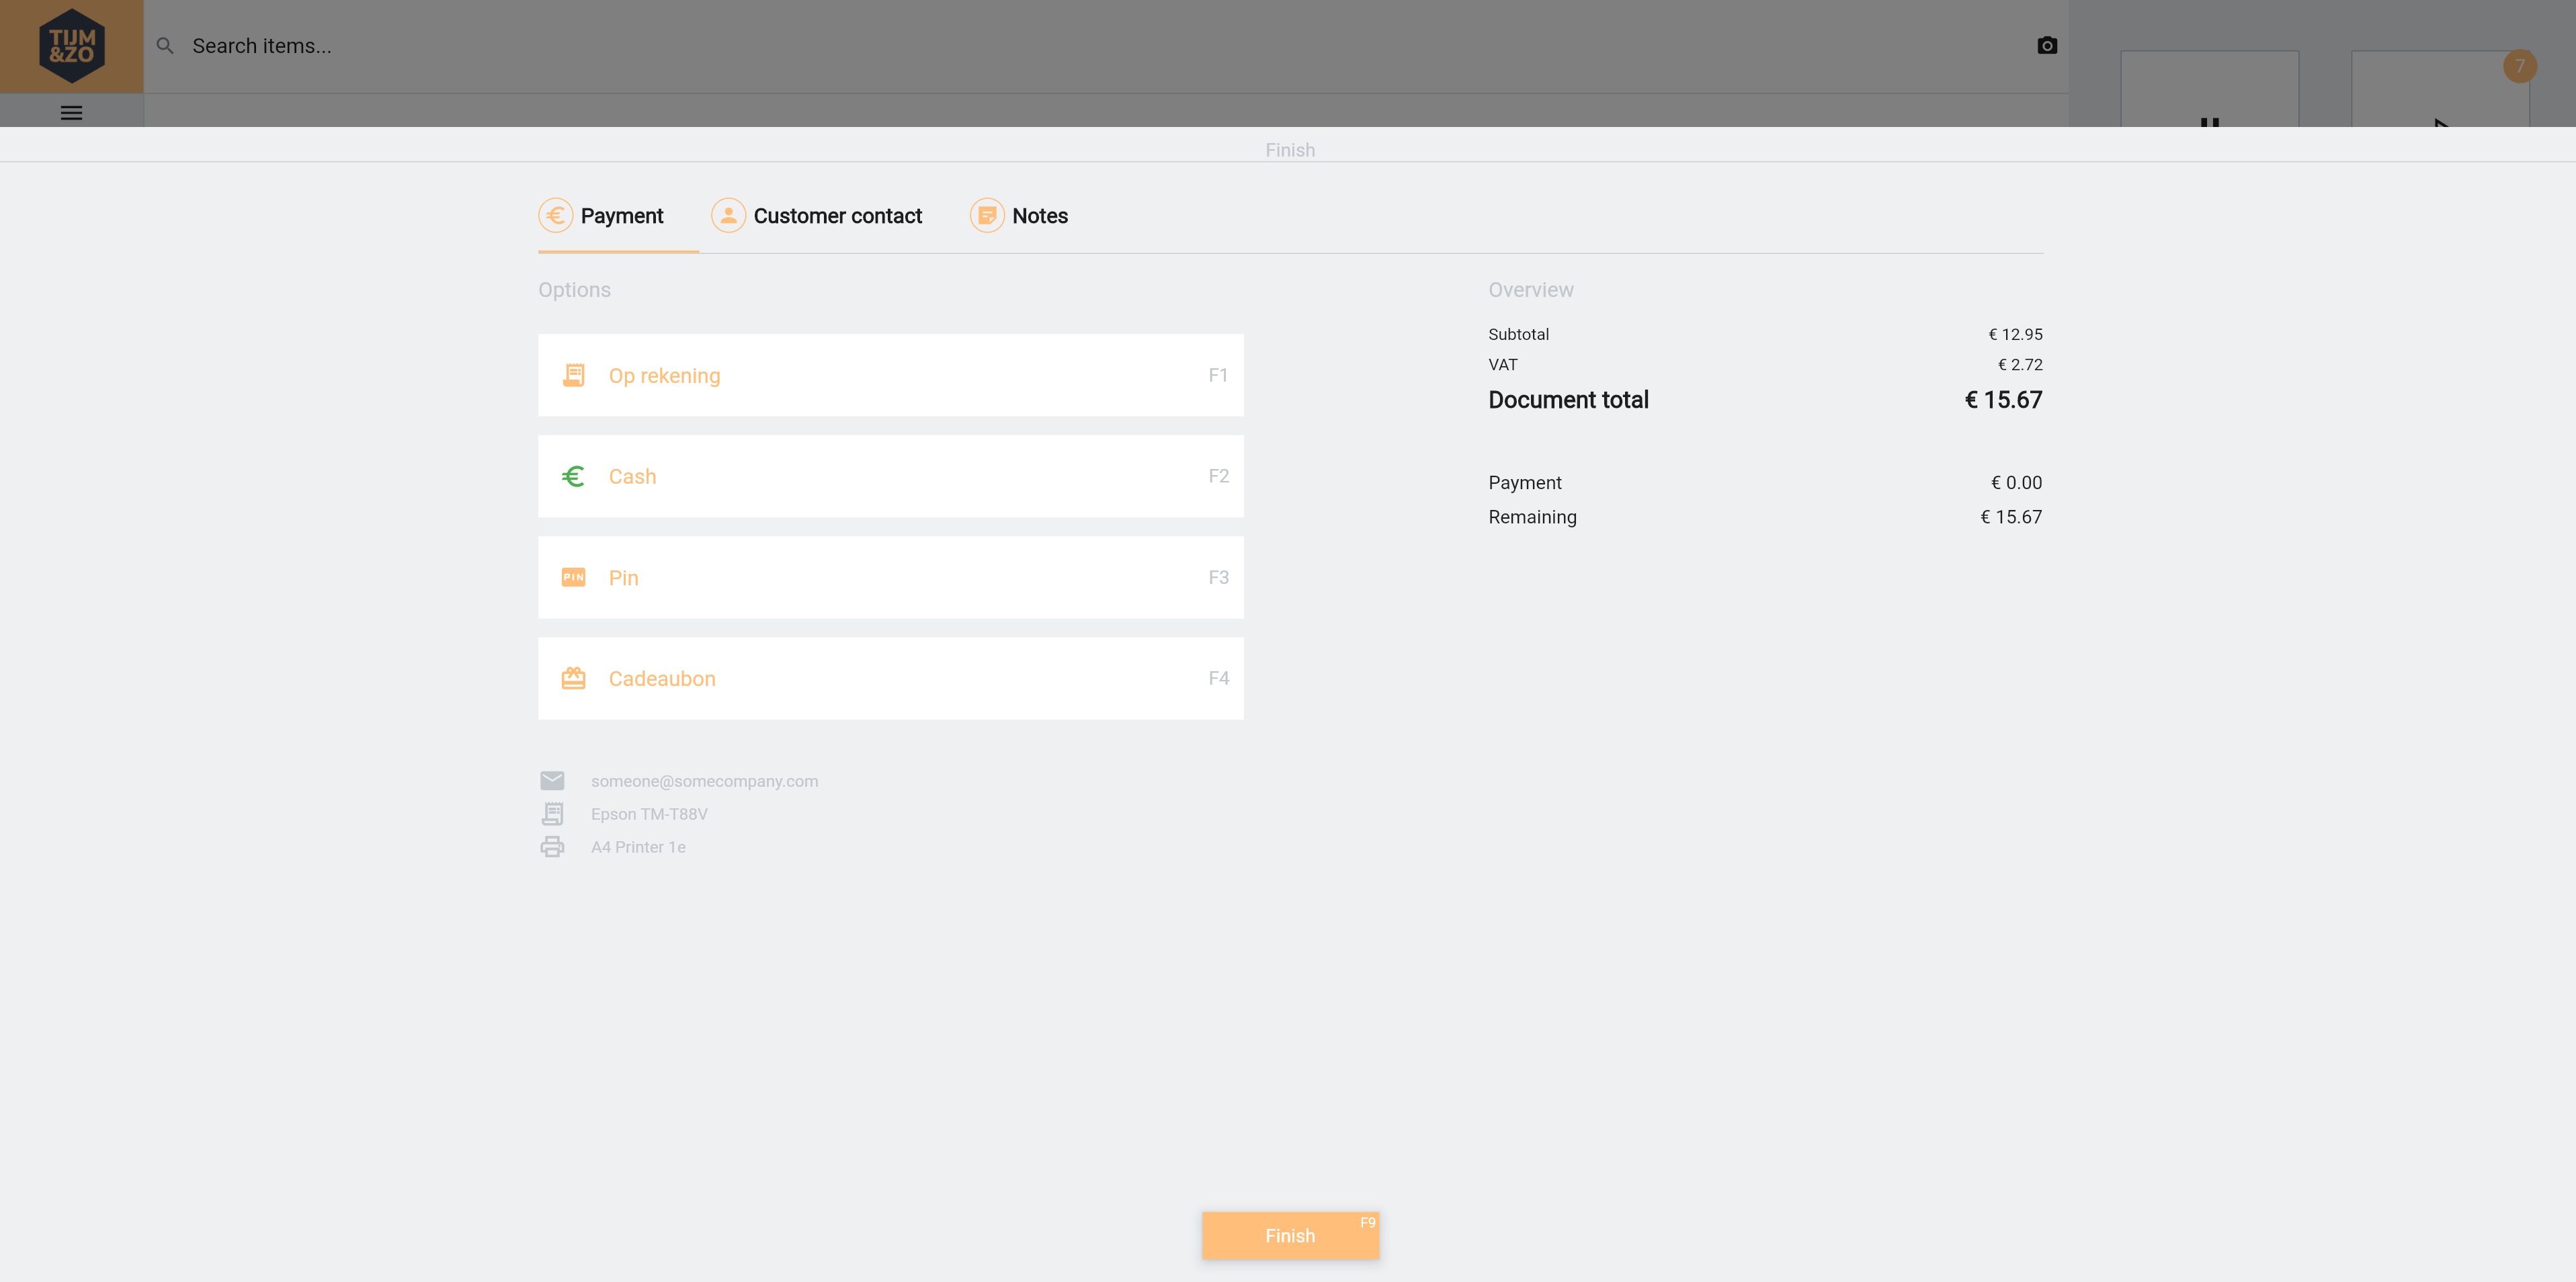
Figure 2. Finish page
Finish Page
The finish page consists of three tab pages, Payment, Customer contact and Notes.
Payment
See figure 2.
On the payment page you can add payments. All configured active and selectable payment types are shown. If no active, selectable payments are configured a manual payment type is available instead. See Store Management Portal how to configure payment types.
When you select a payment type, the selected payment type will become active and you can add this payment by clicking the plus icon. You can also start typing a number to overwrite the default value (remaining amount). After you have added a payment the added payment is visible at the right side of the screen below the overview section. You can also delete payments when the payment type is cancelable.
Below the available payment types, in the grey text selection the output options are shown which can be configured at the Customer Contact tab page. This because you can check in one view of current selected output options are correct and you can finish/save the transaction. These output options consist of which label printer, invoice printer and e-mail address will be chosen to print or mail the transaction data while saving.
The refund is rounded to 5 cents when the refund type is set to rounded.
Payment type of Pin and GiftCard or payment types that have Pin or GiftCard as a parent payment type are not combined when a second one is added.
The amount to be paid of the “on account” payment option is automatically set to the complete amount to be paid. When an other payment method is added first, such as cash or card, the remaining amount will automatically be chosen. The amount cannot be changed in this payment type. In addition other payment types cannot be added after adding an on account payment, therefore an on account payment should be the only payment type or should be added last.
On account payments are only usable for customers that have the “mayPayOnAccount” flag set to “true”. All anonymous users cannot use the on account payment method. When an on account payment has been made and the customer is removed from the transaction the on account payment will be automatically removed.
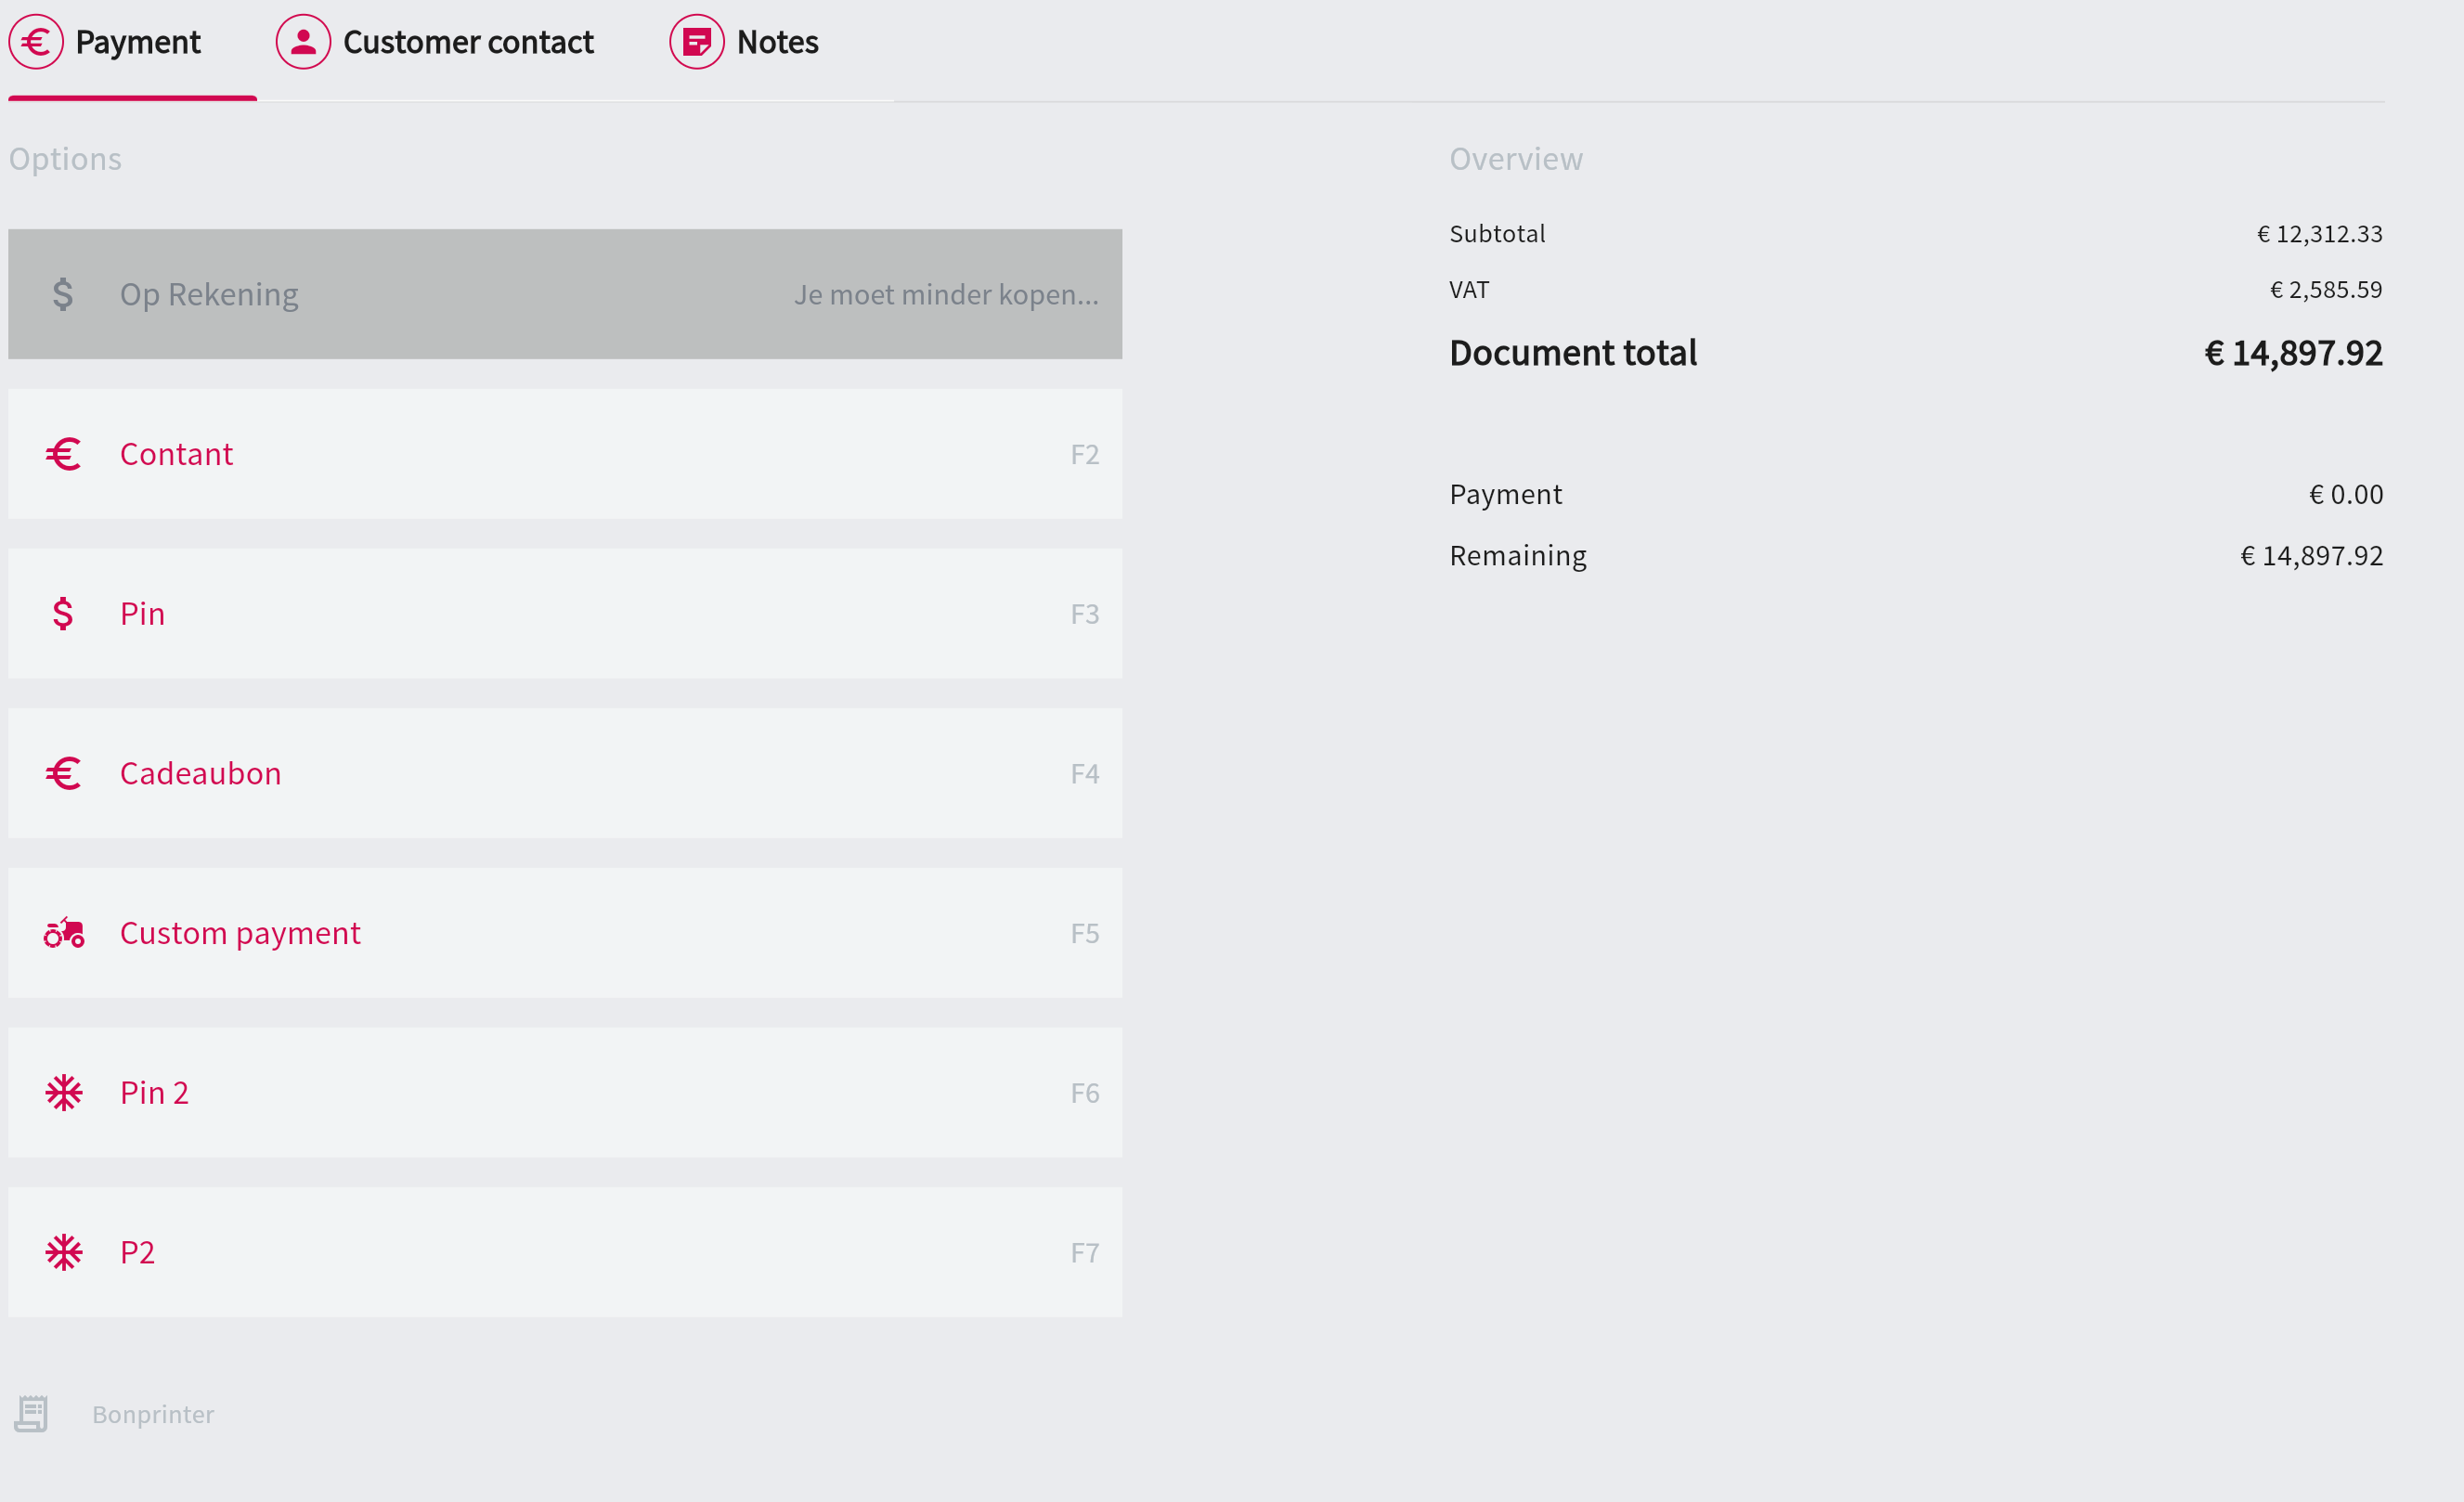
On account payment types (i.e. type=AC) have some additional functionality. First of all this payment type is only selectable when a customer is added and when this customer has the flag mayPayOnAccount to true (default). Also when the custom PayOnAccount API is configured in the store management portal, this API is queried to determine if the on account payment type will be enabled or disabled. When the payment type is disabled because of this API a reason message is shown on this not-selectable payment type. See below screenshot.
Customer contact
On the customer contact tab page you can select the devices the transaction data will be printed to and whether or not you want print or e-mail at all. Depending on store settings you will be able to see these individual settings and whether you can adjust these settings (e-mail confirmation, receipt print, windows print). You can also overwrite default values for delivery and invoice address by selecting the appropriate pull down sections. This is a one-time adjustment, so customer data will not be overwritten, just the data for this transaction only.
See figure 3.
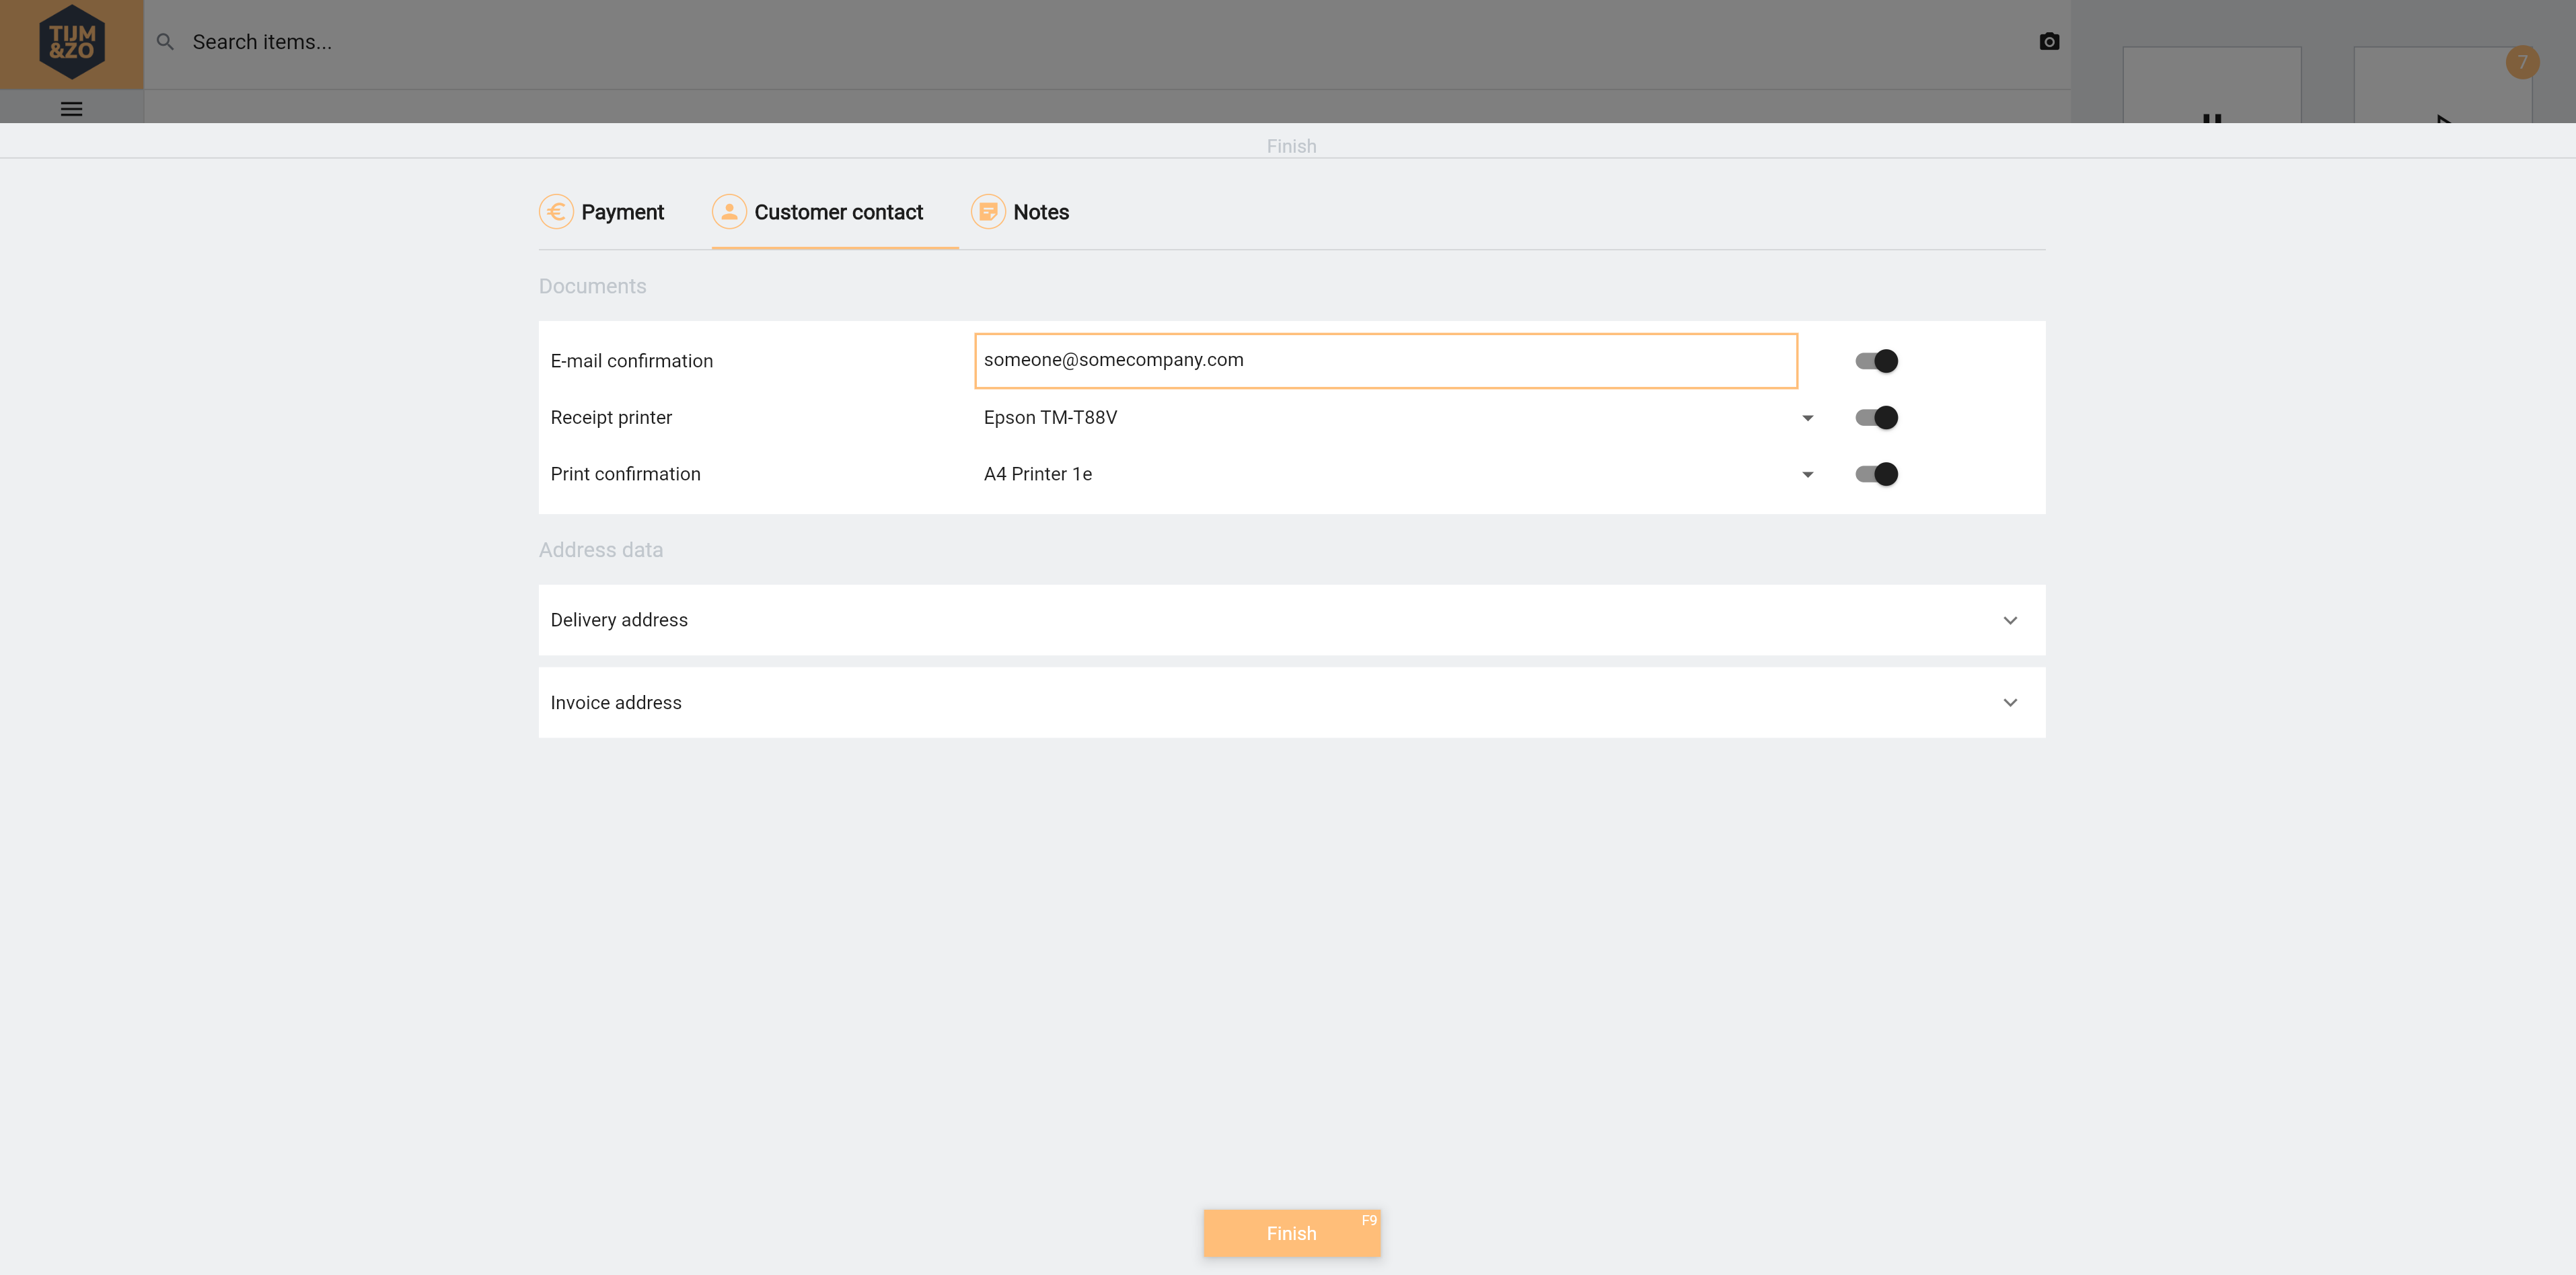
Figure 3. Customer Contact Page
Notes
In the notes tab you have the option to record additional non-mandatory information. Two fields can be edited, notes and reference. You can use these fields as you wish and they will be saved along the transaction data. See figure 4.
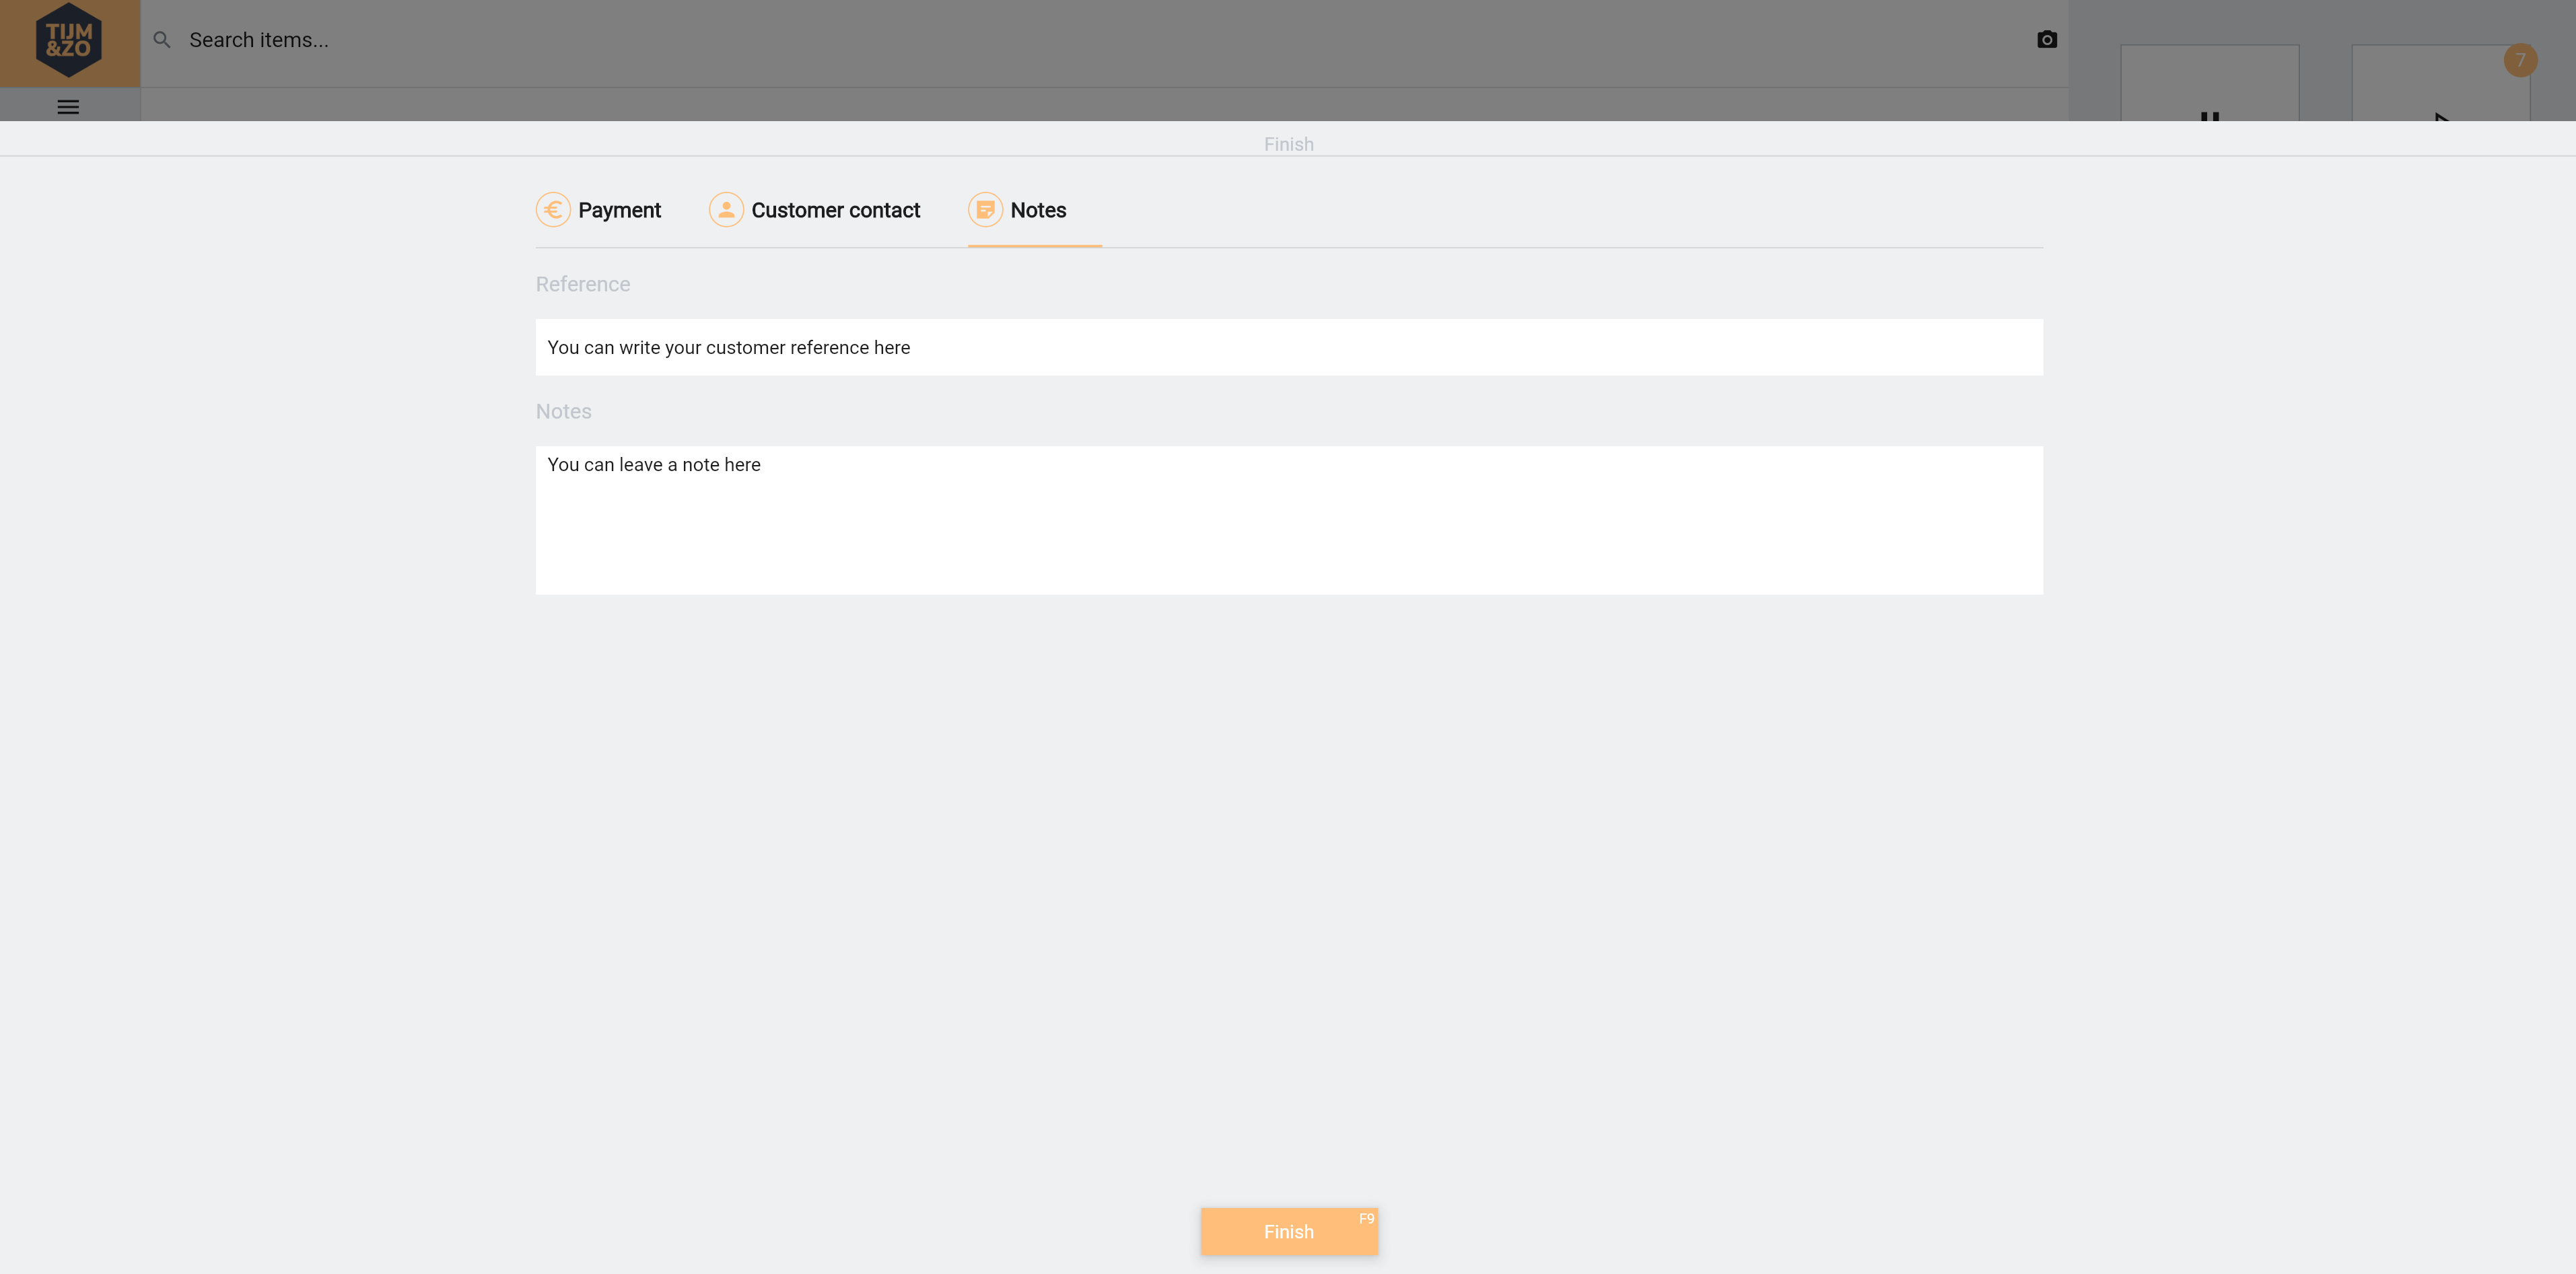
Figure 4. Notes page
Finish button
When selecting the finish button on the finish page the system will check for mandatory fields, payments and customer selection and will then start saving the transactions and mail/or print if selected. After all actions are completed an empty main screen will be shown to start a new transaction.
When a payment method is selected that has the flag “Should be signed” checked an extra procedure to finished the signing process is started before the finish continues.
At this moment only one choice for signature type is available “Signature Pad”
This will only work when the POS in running in the “AidenPOS” Shell application on a Windows 10 or 11 PC.
When finished is pressed the transaction is saved with status : WaitForSignature and the invoice is generated and uploaded to GCP.
If this is finished the POS downloads the invoice and sends it to the Signature pad so the customer can sign the invoice.
Once the signing is confirmed the signed invoice is uploaded and the transaction is finished.