
Selecting an item
From main screen
You can start selecting an item in the main screen top searchbar (see figure 1) if store setting ‘Customer Select Option’ is set to values None (in this case no customer can be selected), Additional but Optional or Additional but Mandatory (see Store Management Portal for more info). For any other value you can only start adding items after you have selected a customer (see for more info on Selecting a customer ).
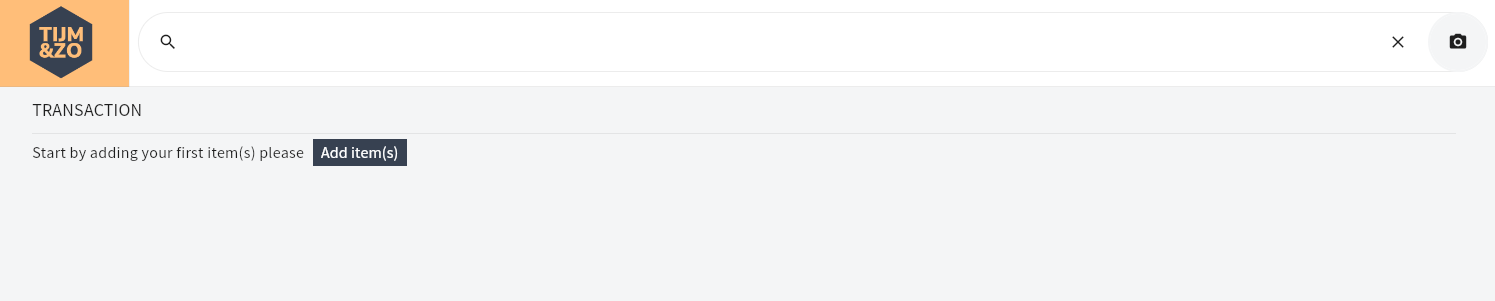
Figure 1: Search Items in main screen
When you see hint text ‘Search items…' you know you are going to select items. You have three options to start selecting items:
Click the search icon on the left of the searchbar to open item the select item page which will show the first 100 results for all found and active items (see figure 2). Any entered search terms are ignored when clicking this icon.
Press enter on the search bar without entering any search terms. This will have the same effect as clicking the search icon from above.
Enter a searchterm and press enter to open item select screen which will show a maximum of 100 items that match the searchterm (see figure 3)
By entering a searchterm that returns one unique item. This item will be added to the transaction automatically (Figure 6) without showing item result screen (Figure 3) and will clear entered searchterm in search bar. This is expected behavor when entering barcodes (while scanning for instance)
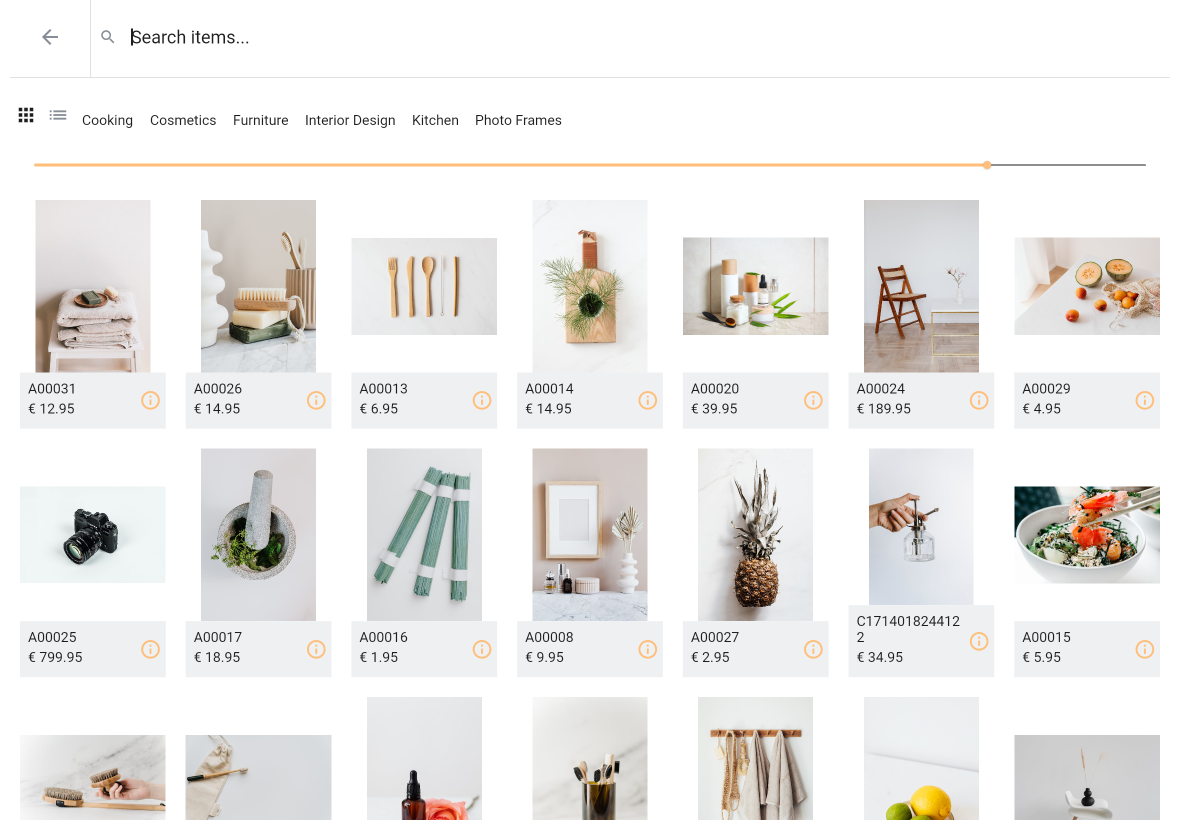
Figure 2: Search result after pressing search icon without search terms

Figure 3: Search result after entering search term
Searching from item result page
After you have searched for an item with or without entering a searchterm and not one result is found, the item result screen is showed (as mentioned when one result is found this item is automatically added to the transaction).
If you have entered a searchterm this searchterm is again showed on the item result screen in the top search bar (see figure 3).
You can now select an item by simply clicking the item tile (when pressing the info icon you will be redirected to the item details page).
If your search did not result in showing the item you are looking for you can edit your searchterm. After editing your searchterm the result list is updated automatically after a very short delay.
If configured, just below the searchbar an item categories bar is shown. This is a ‘swipeable’ list of categories that will narrow down your search. If you have entered a searchterm it will search for search term for all items that matches the selected item category. You can select or deselect an item category by pressing the category name (see figure 4). Item categories can be set in SAP (item groups option).
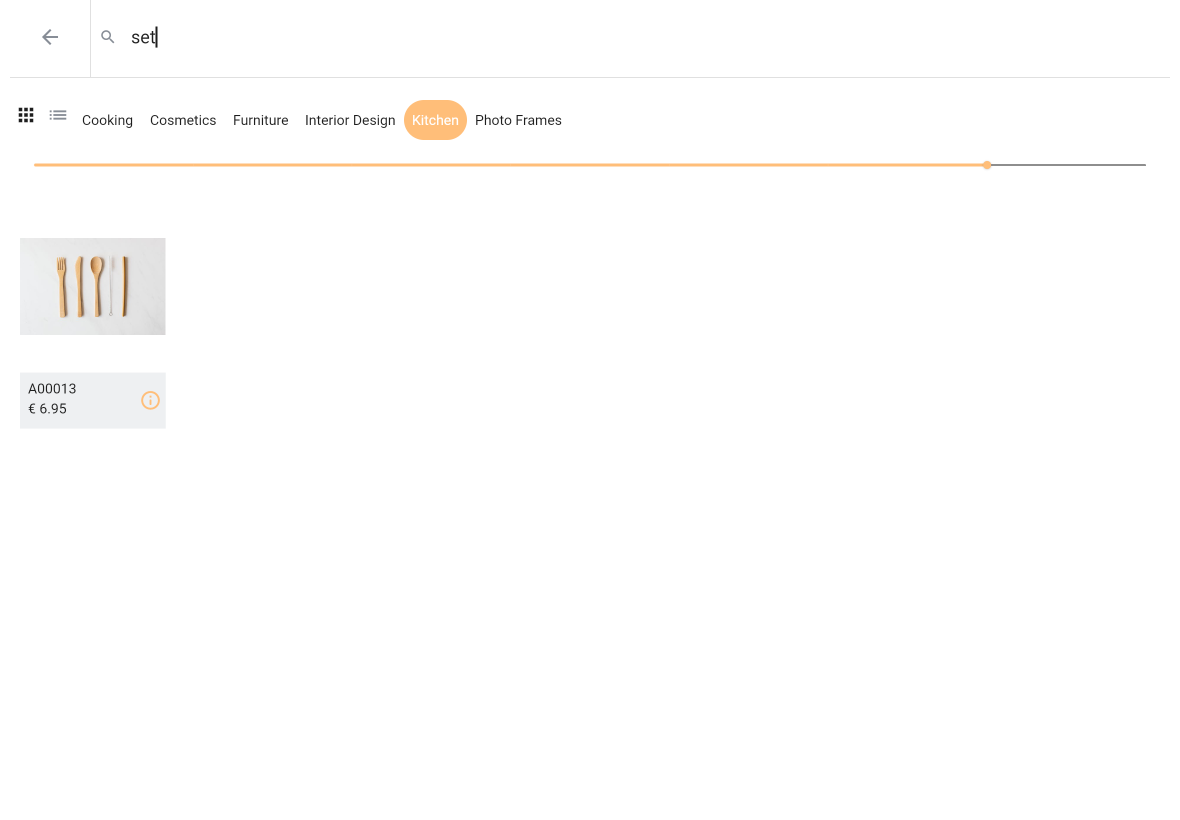
Figure 4: Searching for items in a category
Grid view or list view
You can switch between items list view or grid view by pressing the appropriate button on the top left, just below the arrow left icon. List view or grid view is stored locally and will be remembered between different POS sessions. See figure 5.
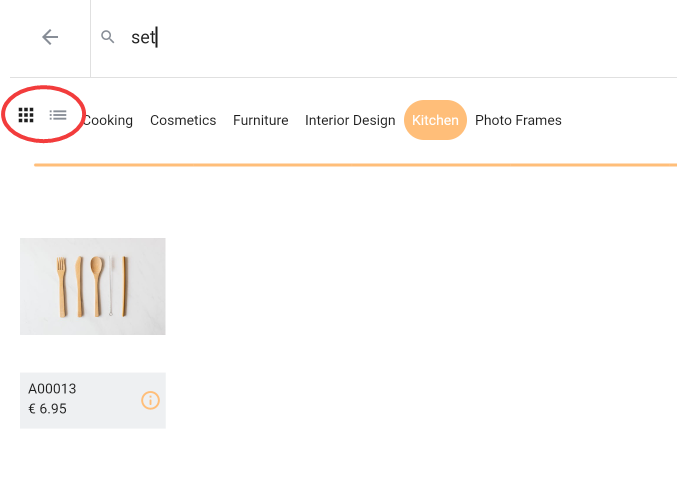
Figure 5: Select grid or list view
If you have chosen to set current view to grid view a slider is shown. When selecting list view this slider is not shown. Using the slider you can determine the item tile size i.e. how many tiles are shown per row. By default the application determines how many tiles are shown in grid view mode. Slider position is not saved and reset every time you (re)open the item select page.
Finally, after selecting an item from the item result page this item is added to your transaction line and the application navigates back to the main page (see Figure 6). You can now start adding another item again if you like.
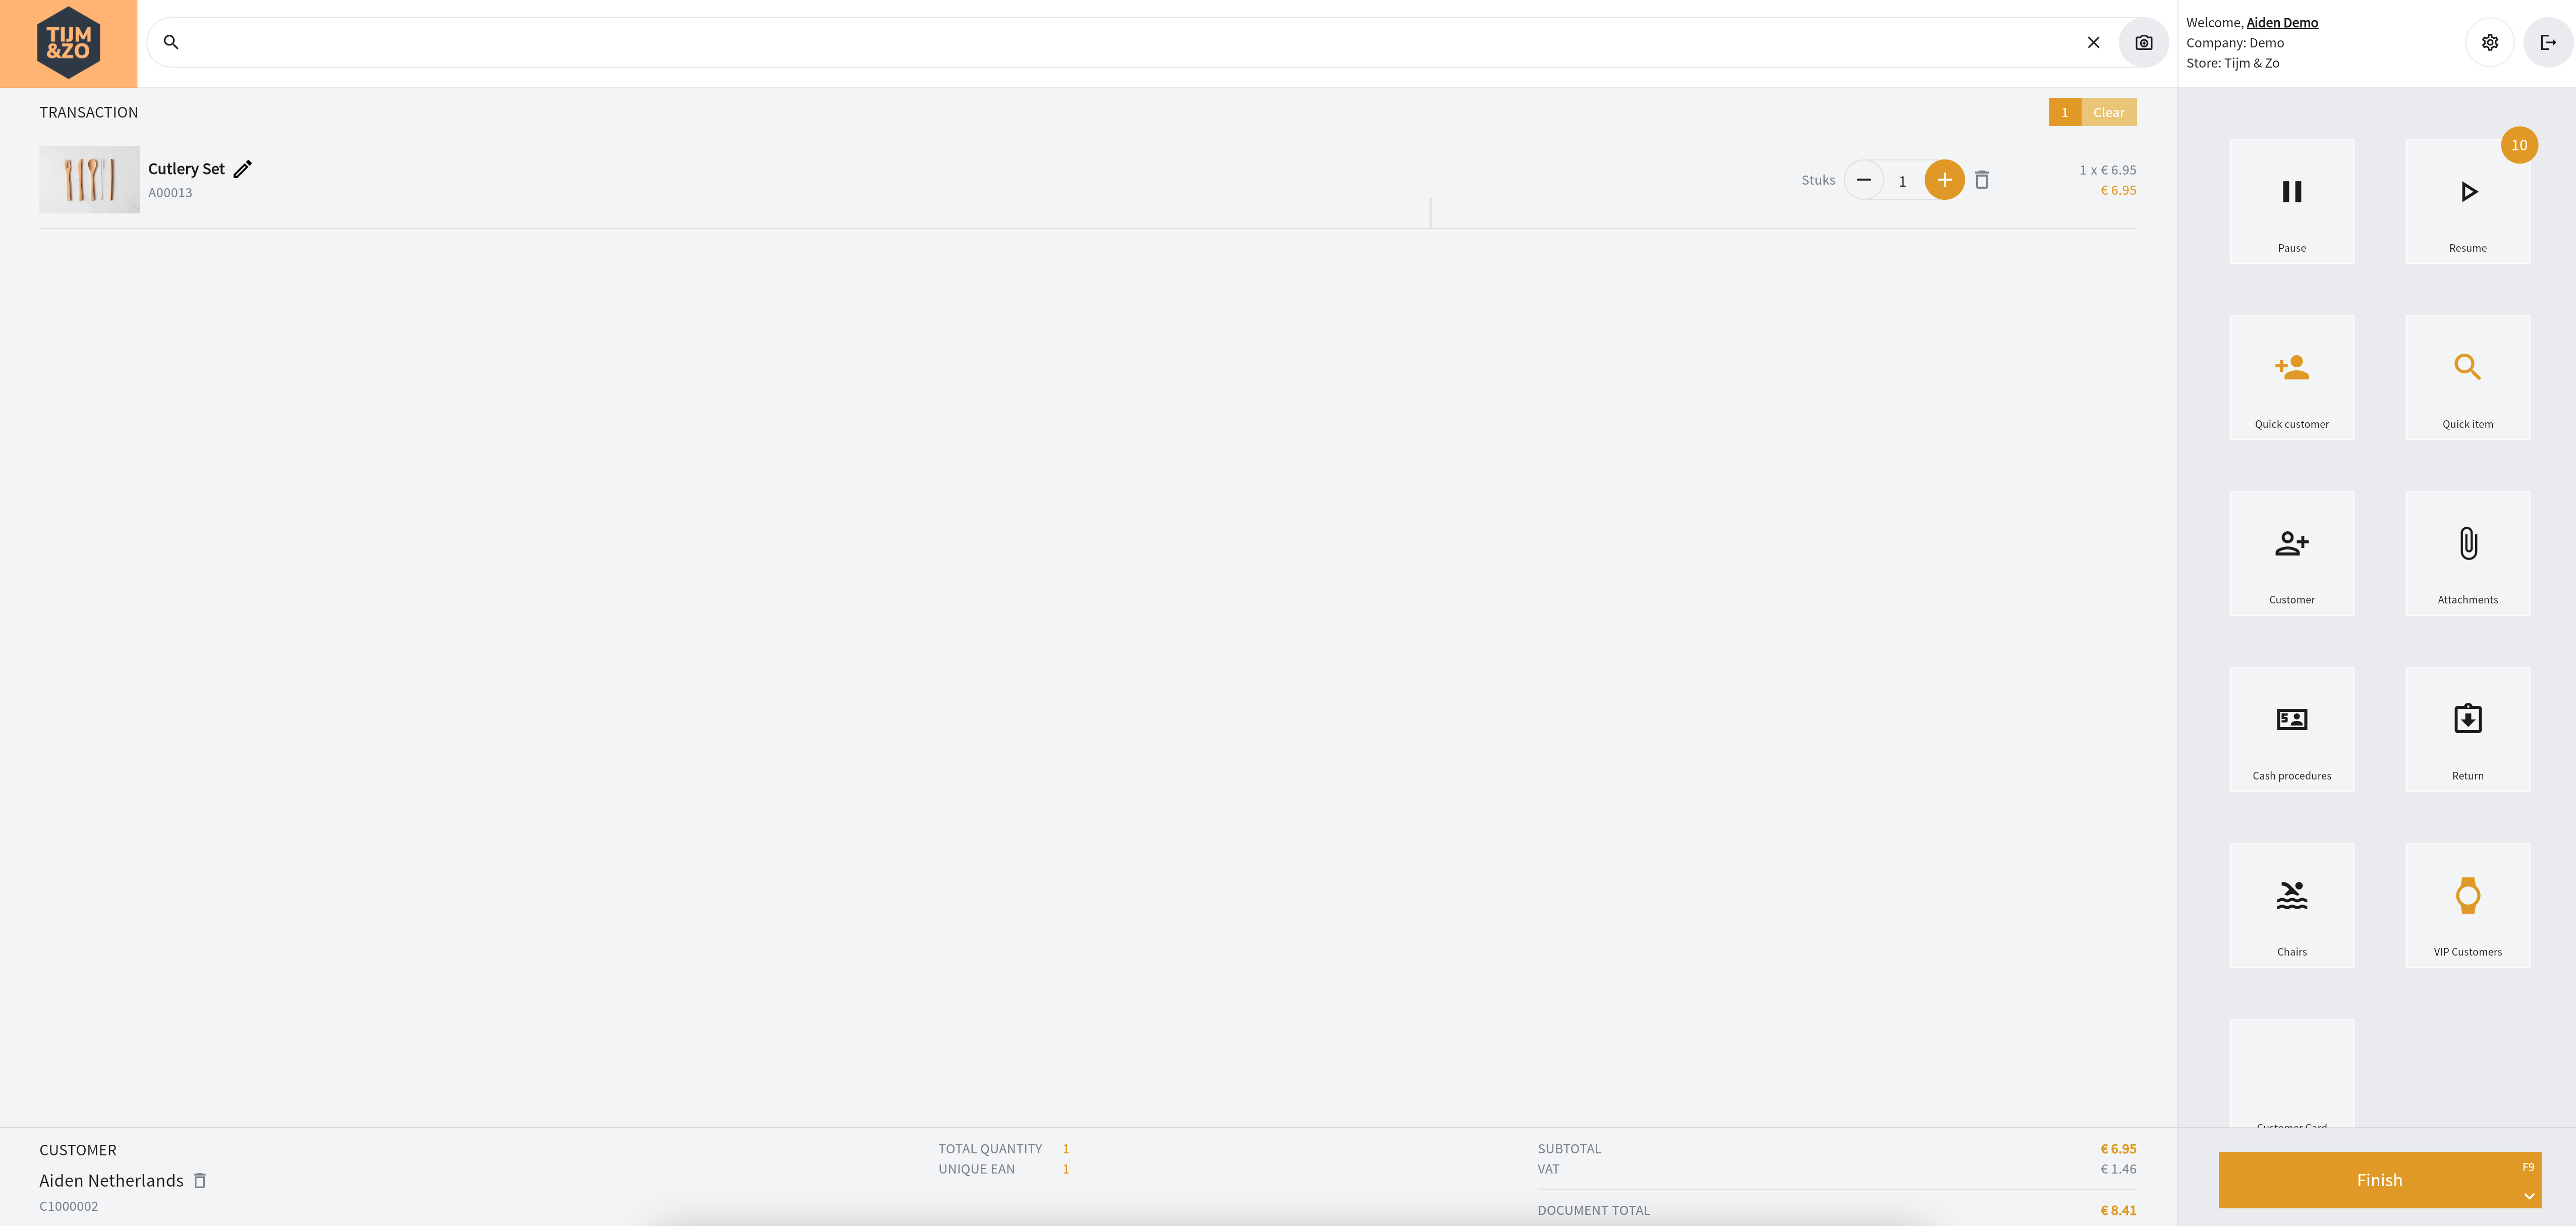
Figure 6. Main screen after adding an item
Selecting a variable price item
If the item selected is marked as a variable price item, a dialog screen is showed (see figure 7). If a price can be retrieved the default price for the selected item is pre-filled into this dialog screen. Otherwise empyt prices will be shown.
You can enter an ex VAT price or inc VAT price and the dialog will automatically recalculate ex VAT and inc VAT prices. Pressing Cancel cancels this pop-up and closed the dialog screen. Selecting OK confirms adding the selected item with the entered price.
This dialog screen will pop-up in three different scenario’s: selecting an item from the mainscreen, selecting an item from the item select screen and selecting an item from the item detail page.
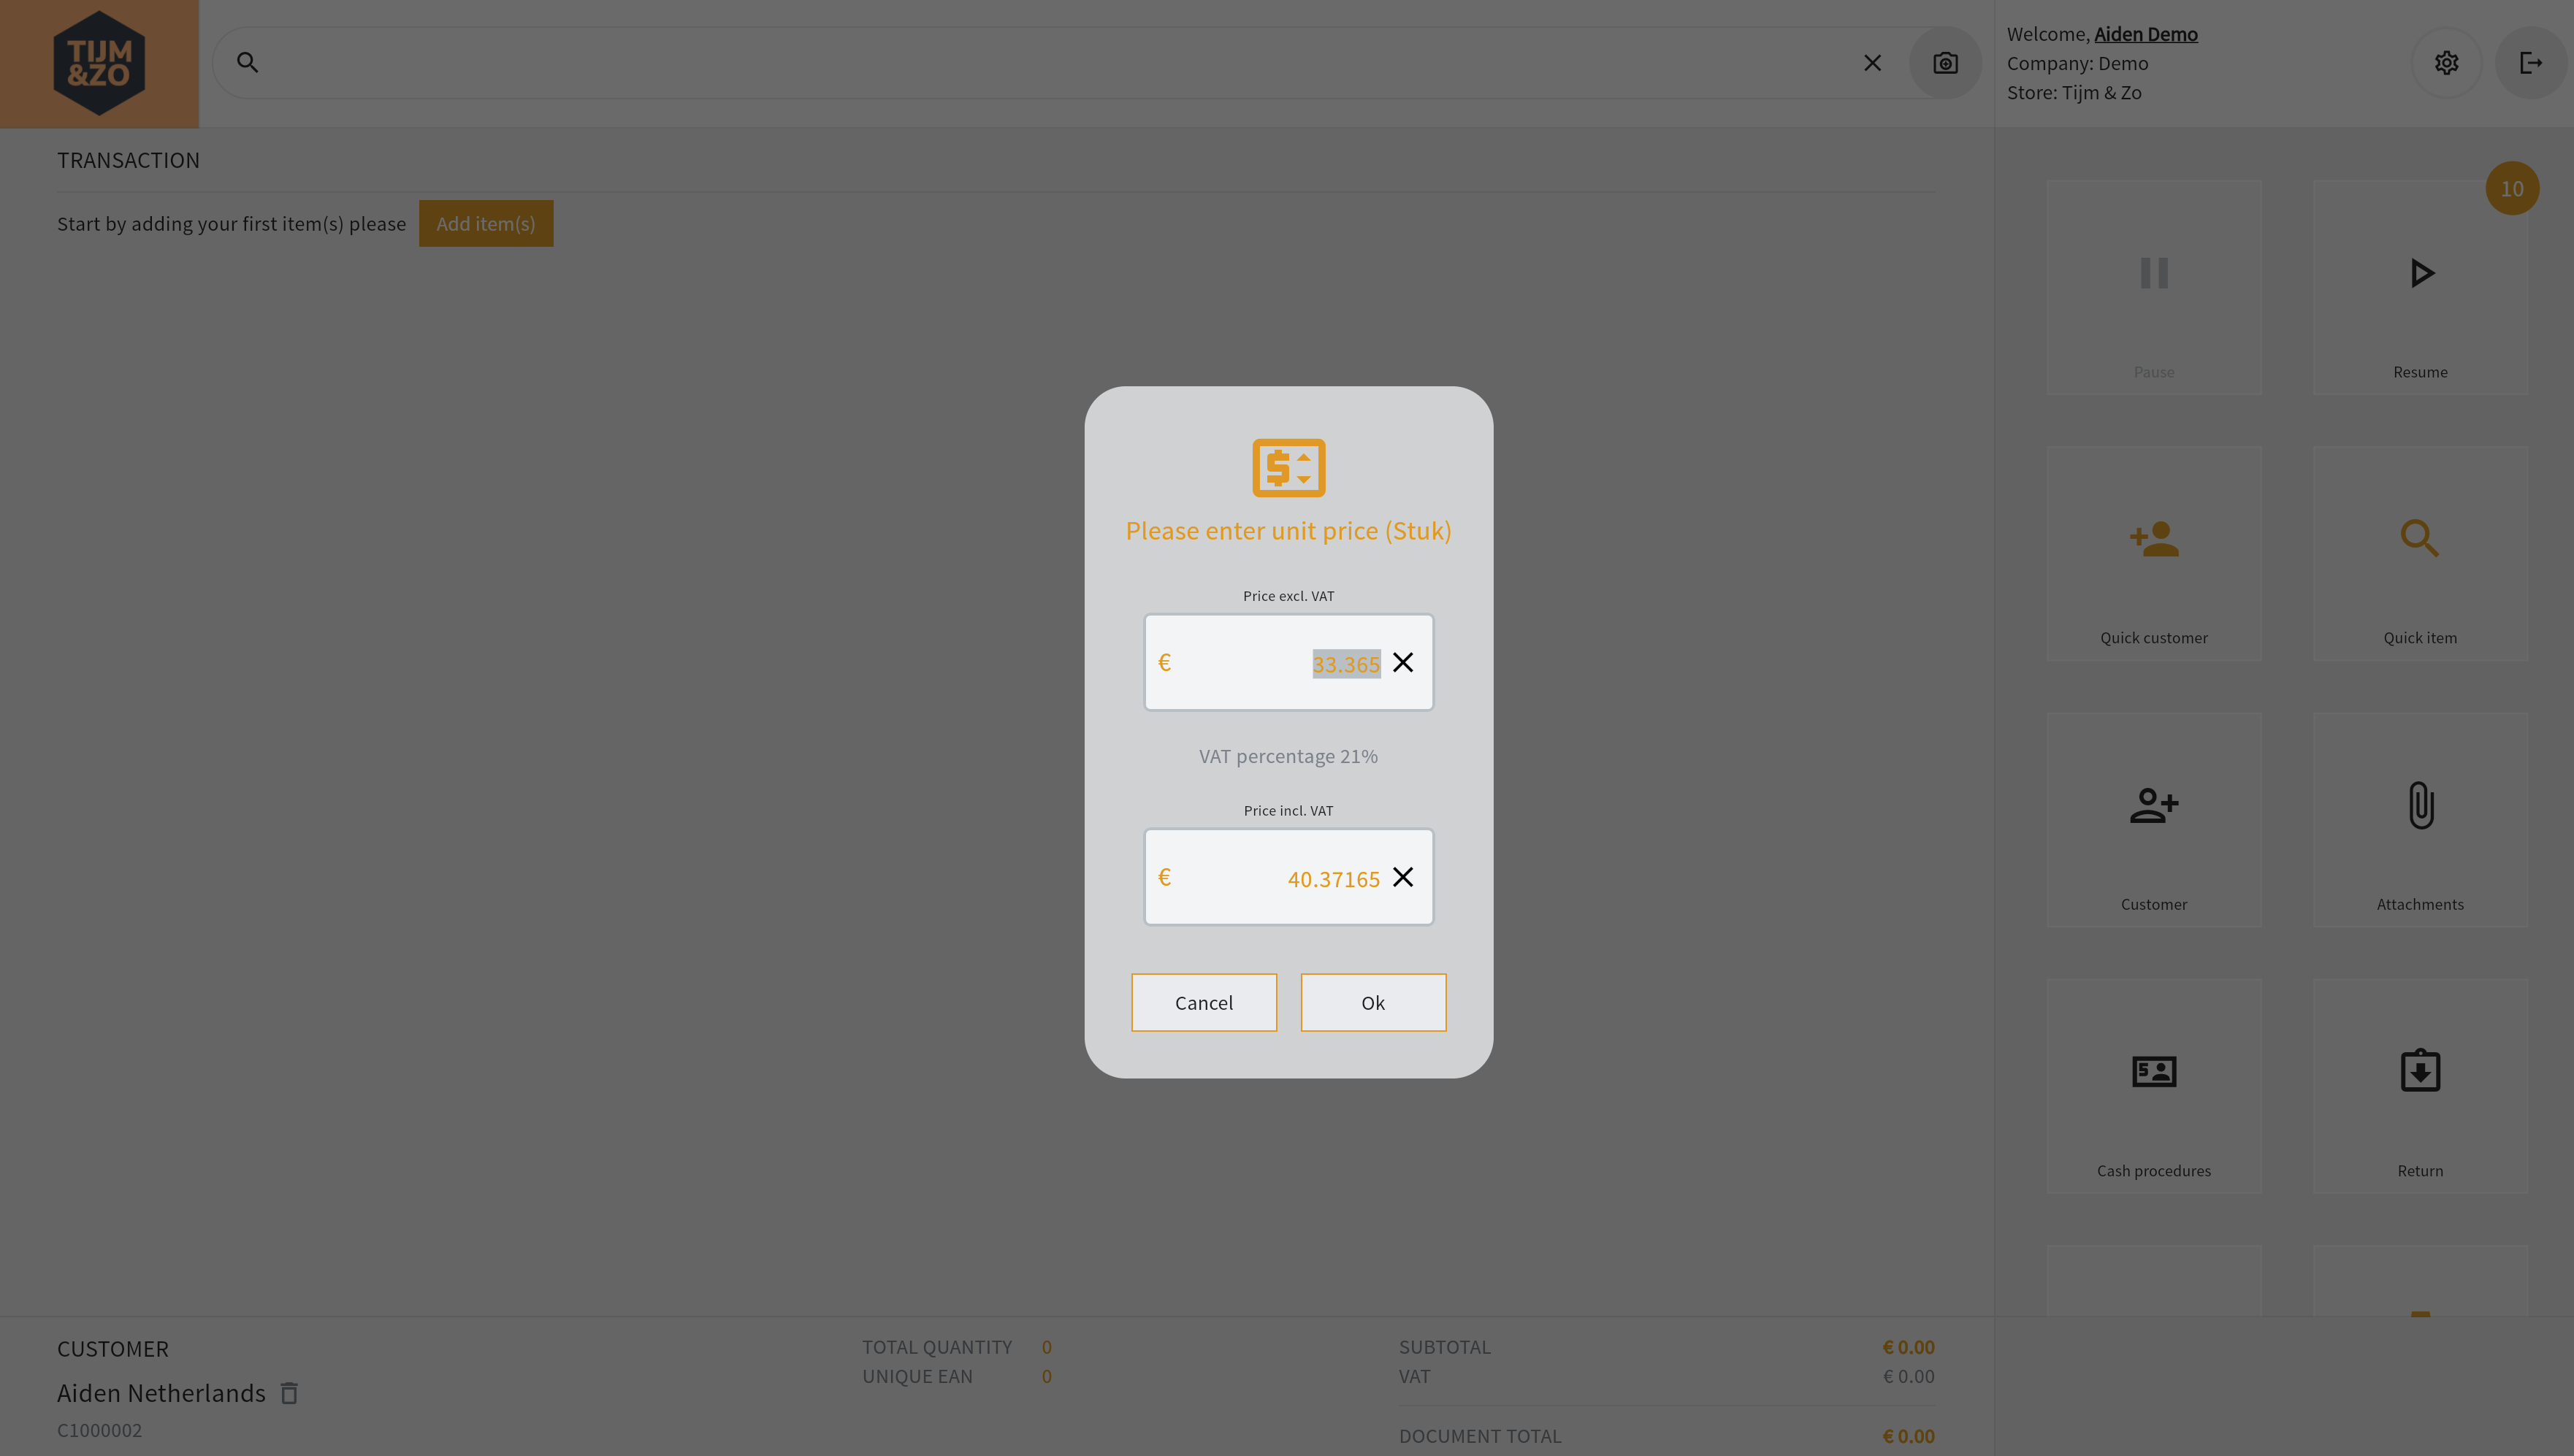
Figure 7. Adding a variable price item
Selecting a serial or batch item
If the item selected is marked as a serial or batch item, a new screen is shown in which you can select batch or serial numbers (see figure 8). For more information please visit the page Serial or batch items
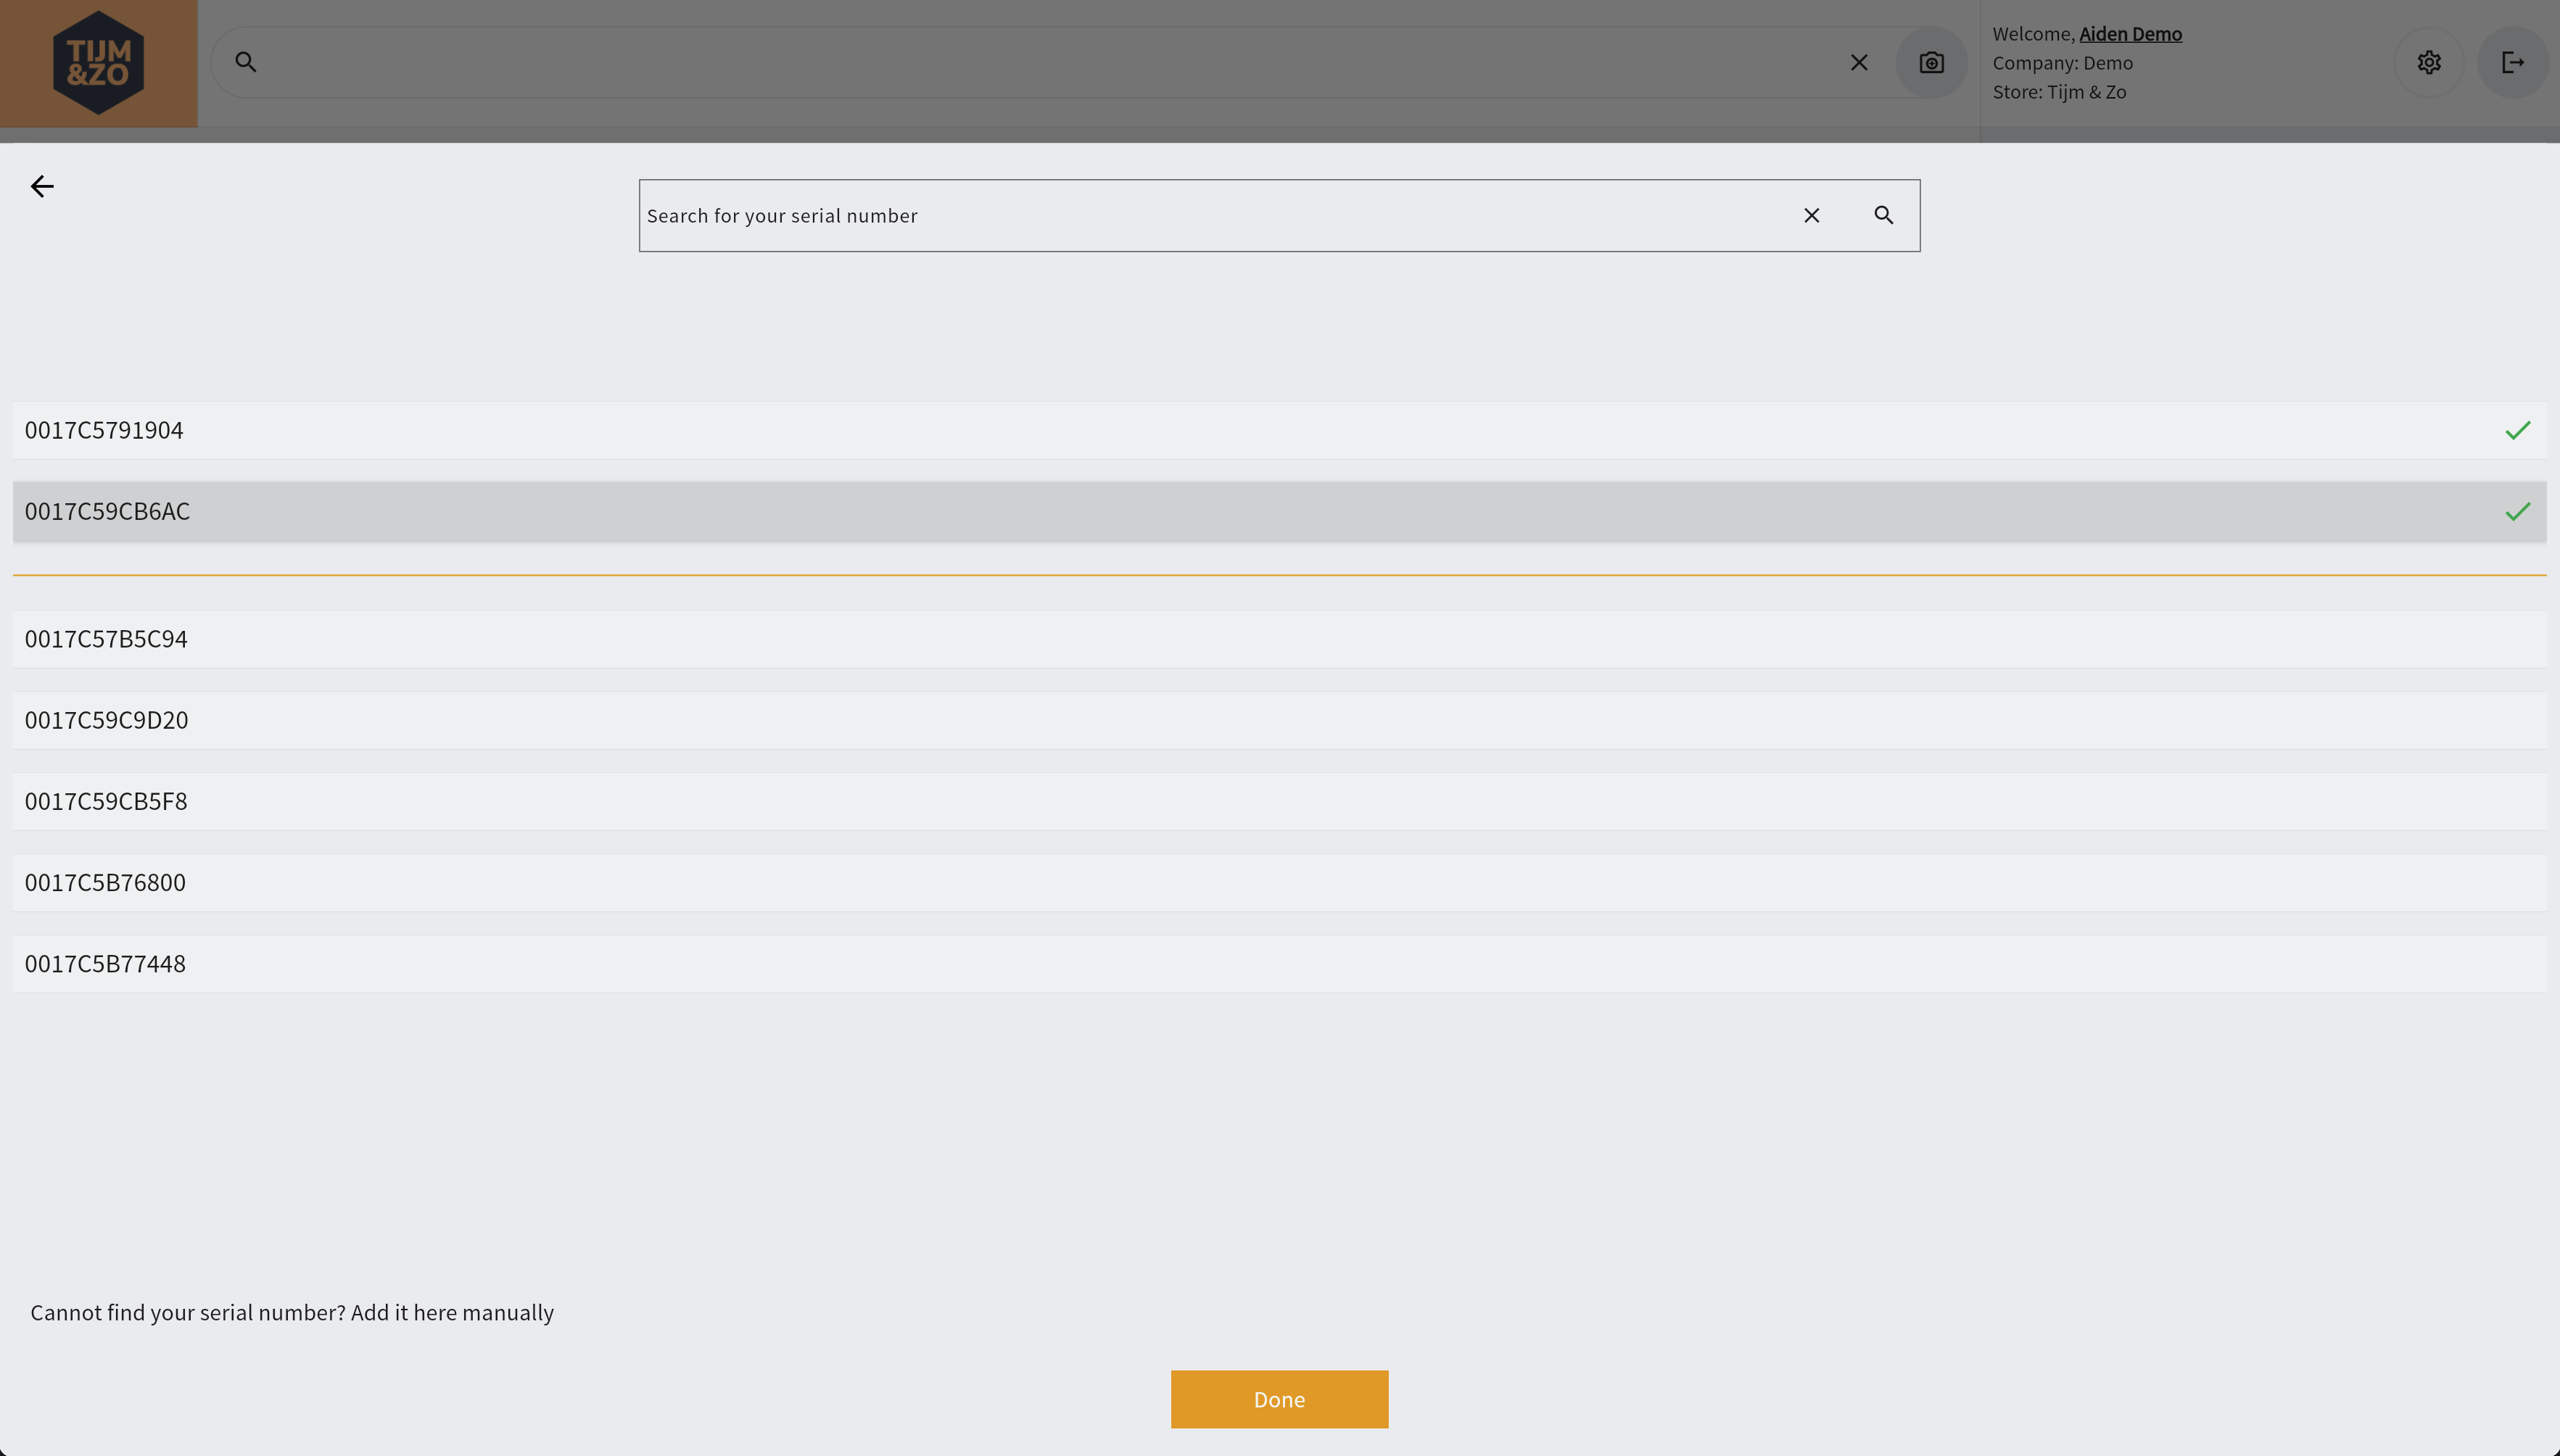
Figure 8. Selecting a serial or batch number item