
Working with Routes
Route Introduction
WarehousePro has features to link and plan documents for transport. This functionality also adds features to Order Picking and Shipping functions. Using the Route function it is possible to automatically add new sales orders for a customer to a specific recurring route or add them manually to another route when necessary.
Routes can be linked to Sales Orders, Purchase Orders and Return Requests.
To edit route settings or use planning functionality the SAP Business One user must run WarehousePro add-on.
Route Configuration
When working with Routes you can enable displaying and editing options directly from the document per document type.
Navigate to Administration > Setup > WarehousePro Settings > Routes and open Route Configuration to change these settings.
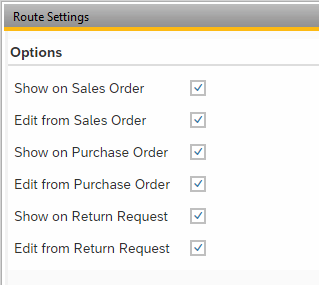
Per document type it is possible to determine if users can view route information in documents directly. It also possible to make route selection adjustable directly from the documents. Settings can be changed for Sales Order, Purchase Order and Sales Return Request document types.
Route Definitions
The Route Definitions window displays a list of all (active) routes. From this windows routes can be edited or new routes can be added.
Navigate to Administration > Setup > WarehousePro Settings > Routes and open Route Definition.
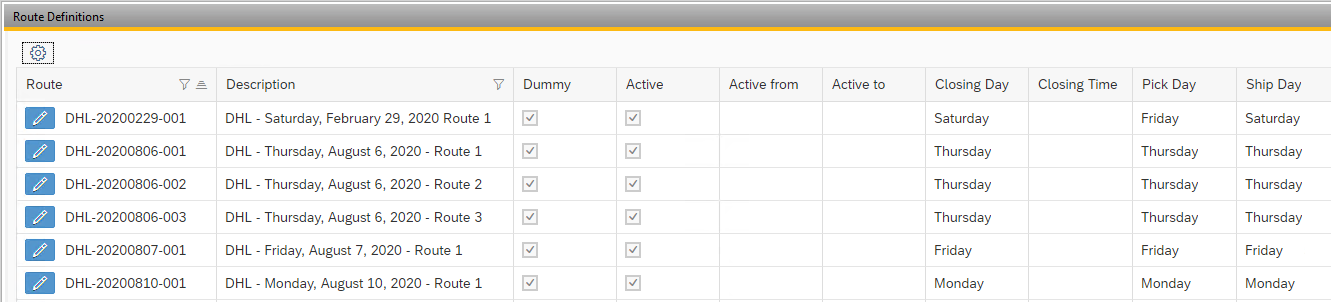
Click the pencil icon in front to edit the route when necessary.
Please note that editing a route is only possible when no open documents are linked. This also counts for pick lists that are linked to sales orders. If editing is needed first un-link all open documents and re-attach them after editing.
Creating or Editing Routes
When creating a new Route there are several (optional) settings for the route.
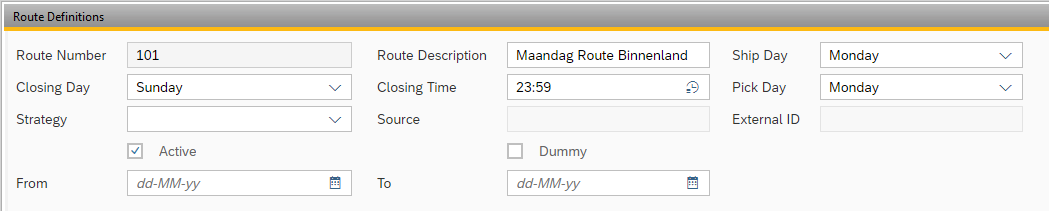
Explanation of settings:
Route Number (Mandatory) The actual unique route number (max. 50 characters). Can be determined manually.
Route Description Additional (mandatory) description for the route.
Ship Day The day of the week when the route will be shipped (based on Delivery Date of documents).
Closing Day The day of the week when route should be locked for receiving new documents.
In the example above documents must be created before the Closing Time on Sunday to be able to link to this route.
Closing Time The time of the Closing Day on which documents should be in the system to be able to link them to this route.
Pick Day The day of the week on which pick lists will be run for this route.
Strategy (Optional) Select the picking strategy that must be used when generating pick lists for this route.
Source (Not editable) Displays the source that created the route.
This field will only display information when the route was created externally using the TMS Web Service. It will display the account name of the external Transport Management System.
External ID (Not editable) Displays the external ID (if provided) when route was created by external TMS.
Active Specifies if the route is still active and accepting new documents.
Setting is optionally linked to From and To fields to specify a limited period of activation.
Dummy Specifies if the route is used as "place holder" for documents that do not fit any recurring route for a delivery day. Any document with the correct Delivery Date can be linked to a Dummy Route.
The table in the bottom half of the screens holds the business partner addresses that are linked to this route. To add an address to the list, first click the :plus_button: button. To remove a line from the list, use the :trash_icon: button. Use the :up_icon: and :down_icon: button to move a line higher or lower in the list.
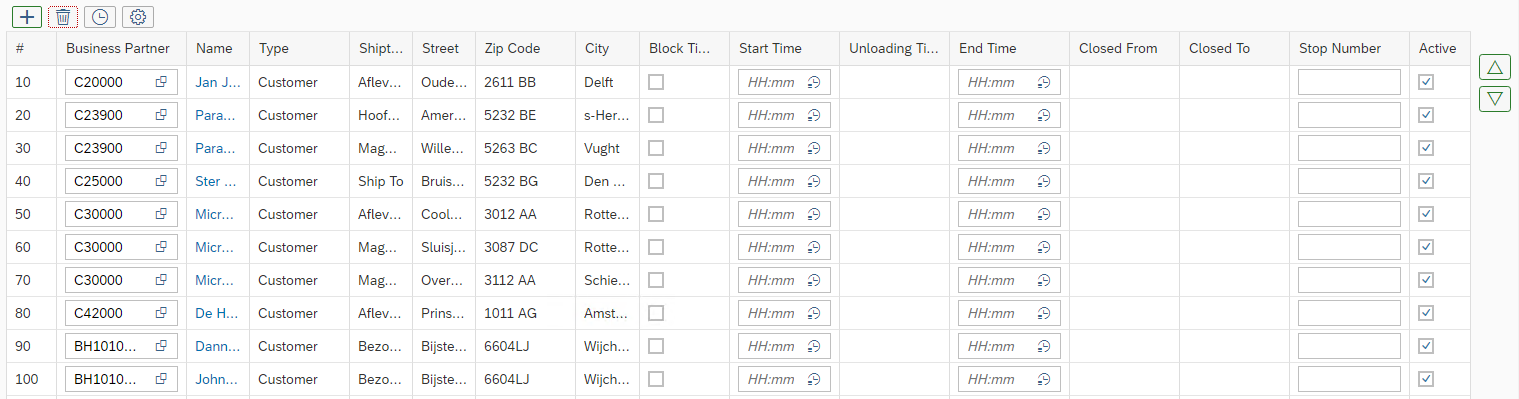
Note that the line number in the first column counts with steps of 10. This leaves room for additional and unplanned documents to be added to the route's planning.
Use the :config_icon: button to select which columns should be visible. Below a list of available columns and a short explanation.
Business Partner The Code of the selected Business Partner.
When selecting a business partner, the address (Ship To) is also being selected.
Name The Name of the selected Business Partner.
The name holds a link to the Business Partner Master Data window in SAP Business One.
Type Specifies if the selected Business Partner is a Customer or Supplier type business partner.
Ship To The name of the selected Ship To address.
Street The street name of the selected address.
Zip Code The zip code of the selected address.
City The City of the selected address.
Block Times Specify if the address expects delivery in block times.
This field is for informational purposes only. Does not affect functionality.
Start Time The expected time of delivery for the selected address.
Unloading Time The calculated unloading time from Start Time and End Time.
End Time The expected finish time of delivery for the selected address.
Closed From Displays the Closed From time from Business Partner address' user defined field U_APD_Close_Fr.
Closed To Displays the Closed To time from Business Partner address' user defined field U_APD_Close_To.
Stop Number (Optional) Specify the stop number in the route. This gives the possibility to have multiple addresses at the same stop.
This field is for informational purposes only. Does not affect functionality.
Active Indicates if the address in the list is still active. When inactive the Business Partner's address will no longer automatically be linked to this route when a new document is created.
Shipping Docks
By clicking the Shipping Docks button (bottom right of the window) specific Shipping Locations per warehouse can be specified for this route. Simply use the :plus_button: button to add lines to the table. Use the :trash_icon: button to remove a highlighted line.
Only one location per warehouse can be added to this list.
When a location is manually specified in the pick list, than that location will always be used.
When no location is specified in the pick list, than the setting from the route will be used. If no location is set in the route, than the setting from the strategy will be used.
If there is still no location detected, than no stock transfer will be made after picking.
Functions
Besides adding or changing data the window has a few additional functions.
Use the Delete button to completely delete the route.
Deleting a route is only possibly when it was not previously used in any document. Once it has been used, you can only set the route to inactive.
Use the :clock_icon: button to change all Start Time and End Time with the given offset. Enter the value in minutes.
Route Planning
When addresses of business partners have been set up in Routes, Documents will automatically be linked to these Routes when the address and delivery date corresponds with data in the Route.
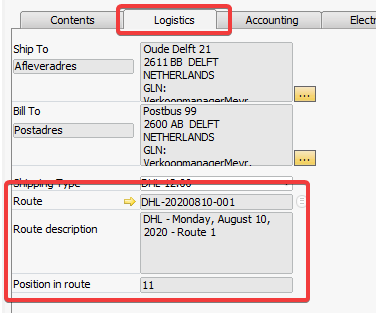
To make changes to the planning it is possible to change the configuration in the document's logistics tab or by using the Route Planning function. Navigate to WarehousePro > Route Planning to use this function.
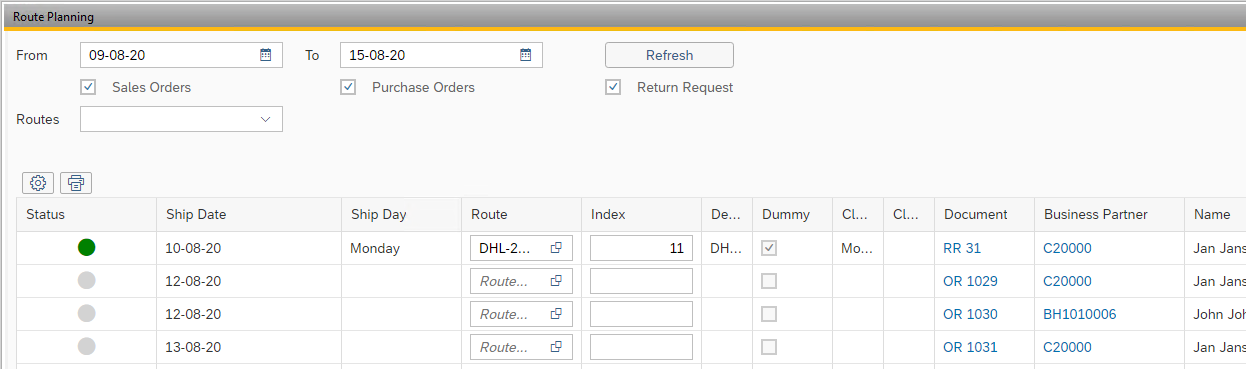
The top of the screen gives the option to change filters and list a specific range of Documents. Choose what date range should be used and which document types should be checked.
It is possible to limit to a specific Route. Multiple Routes can be added to the filter.
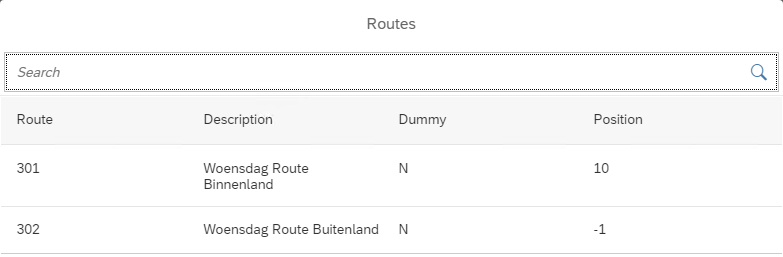
From this view the linked route can be changed by selecting a different route from the list. The list will show all routes for the specific delivery day sorted by Route Number and position. Routes containing the specific business partner and address will display the Position in the route. Other routes will display -1 as the position.
The list also takes the route's Closing Time into account.
By using the :print_icon: button, the route planning can be printed.
To use print functionality the corresponding Print Event "Route_Planning_Addon" and "Route_Documents_Planning_Addon" must be configured.