
Stock Counting
Stock/Inventory Counting
WarehousePro contains options with which stock counting can be performed. Due to limitations in the standard counting options of SAP Business One regarding serial number items, it was decided to create a WarehousePro variant for this.
Settings
The WarehousePro Stock/Inventory Counting module contains several options that can be used to determine how to handle counting.
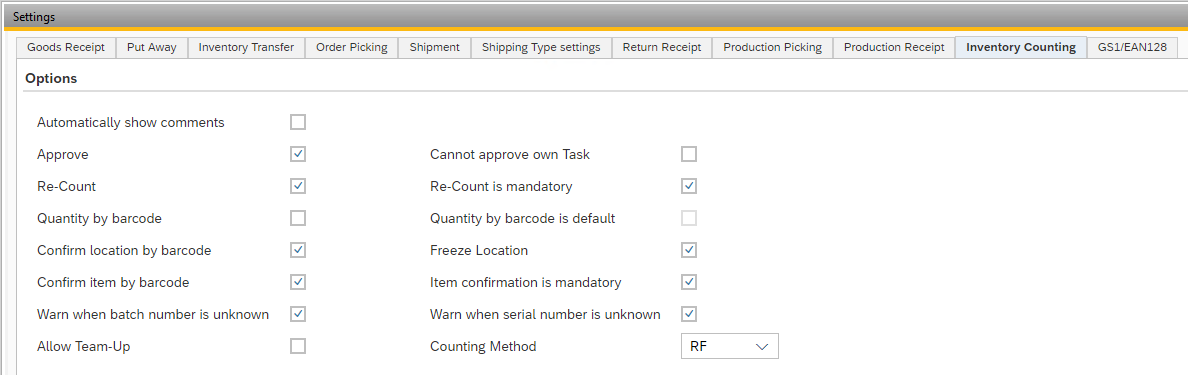
Via these settings it can be determined whether for counting list:
the result must be approved; and/or
a (mandatory) re-count must take place; and/or
the locations to be counted must be frozen for other activities
In order to keep flexibility in the picking process, frozen marked locations will be released as soon as the specific Counting List has been completed
In addition, the usual settings for confirming information about articles and locations are available.
A warning can be generated for a user when an unknown batch or serial number is counted.
If the result must first be approved, it must be specified which SAP Business One users are authorized to perform this approval.
It can be determined which WarehousePro Client users can start a new inventory from the Client application.
Under the Remarks tab, a text can be defined which will be used as a comment for the correction entries.
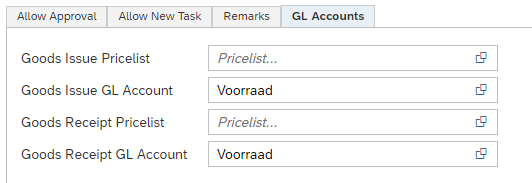
Under the tab GL Accounts it can be specified which specific price list or ledger account should be used for the correction entries.
If no specific price list or ledger account is assigned, this will be entered by SAP Business One default settings.
Task Group settings
Provide a complete set-up of the task groups and task group profiles so that use can be made of the inventory functions of WarehousePro in the WarehousePro Client.
Generate Counting Tasks from SAP Business One
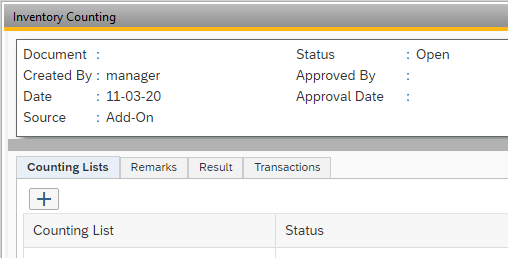
To create an counting task it can be generated from the SAP Business One Client. To do this, follow the menu path: WarehousePro > Inventory Counting > New Inventory Counting task . As soon as this function is started, an empty inventory task will immediately appear on the screen.
Create Counting Lists
An inventory counting task can only be performed when count lists are added to it. To do this, press the "+" icon under the Counting Lists tab.
This counting list must then be filled with "counting" lines. This can be done in a number of different ways:
Specific items on specific location
When the counting list is filled with specific location / warehouse and a specific item, only that specific item at that location is expected as a result. Any extra items at the relevant location are not included in the result.

If an item with batch or serial numbers is managed, this can also be specifically included in the counting list so that only those concerning batch or serial numbers need to be counted.
Specific location
When a counter list is filled with only a list of locations, it is expected that all items at those locations will be counted. Items that are not counted are considered "not present" and appear as a difference in the inventory task.

The WarehousePro Client user will perform a "blind count" in this way.
Add lines using filters
All lines in the count list can be entered manually in the table. It is also possible to use the Item selection button to fill the task with filters.
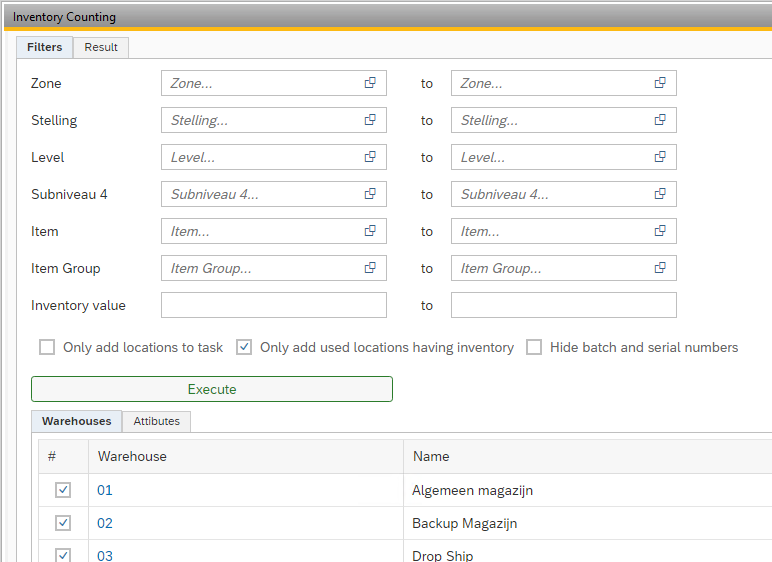
With these filters, a range of the warehouse can be selected to be included in the count list. The options Only add locations to task , Only add used locations having inventory and Hide batch and serial numbers can also be used to determine what the task should be filled with.
A result of these filters is presented by pressing the Execute button. It is possible to exclude lines by unchecking the box in the first column.

If certain locations, or articles at a certain location already appear in another not yet completed count list, it cannot be added again.
After determining the selection, press the Add button at the bottom right of the screen to add the lines to the count list. These operations can be repeated more often to supplement the counting list.
For a counting list, a Remark can be entered which can be viewed by the WarehousePro Client user (depending on the settings, this will or will not be displayed automatically).
A count list has a few options. Determine how the Counting Method should take place. The choice RF makes the counting list available in the WarehousePro Client.
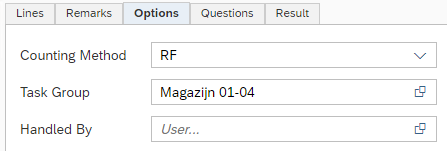
The Task Group determines to which task group the count list is assigned and thus to which users the count list becomes visible in the WarehousePro Client. Only task groups to which the Inventory Counting function has been added can be selected here.
If the Counting Mehod is set to RF, the Treated by field is automatically filled when a user picks up the count list in the WarehousePro Client. If the handling is Manual, this must be filled manually before the counting list can be completed.
Press Update to add the count list to the inventory counting task. Multiple counting lists can be added to a task.
Questionnaires
Questionnaires can also be linked to a counting list. Follow the menu path: Administration > Setup > WarehousePro Settings > Questions > Settings for Questionnaires and within it the Inventory Counting tab to set this up.
Generate inventory counting from WarehousePro Client
When a user of the WarehousePro Client has access to the Inventory Counting module and has been authorized to create a new task, a new task can be started via the New button.
A Inventory Counting task will be created and supplemented per user. After processing and completing that task, a new task with a counting list is created.
You will first be asked to enter a location. A warehouse without locations can optionally be selected via the F2 - Warehouse button. A question immediately follows. Count specific items?
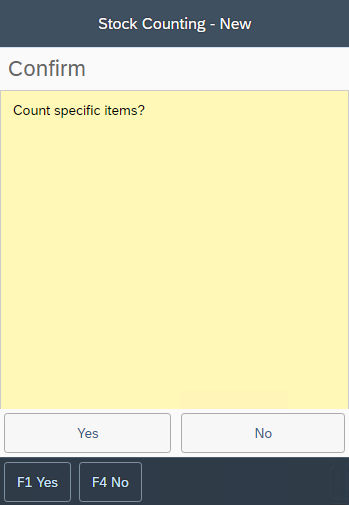
If the question is answered with No, the relevant location is added to the count list.
If the question is answered with Yes, a follow-up screen will appear in which items can be added. After adding, press the Start button to start the inventory.
Cycle Counting
Settings
To enable cycle counting functions there are several settings that must be configured. Navigate to Administration > Setup > WarehousePro Settings > Inventory Counting for these settings.
Tracker
First thing to enable is the Tracker. This mechanism will monitor or "track" events on items or locations in the warehouse. Check the Active box to enable the tracker and specify the number of days the data for the tracker must be preserved.
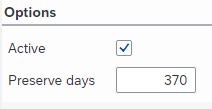
Click the Data button to see the data collected by the Tracker.
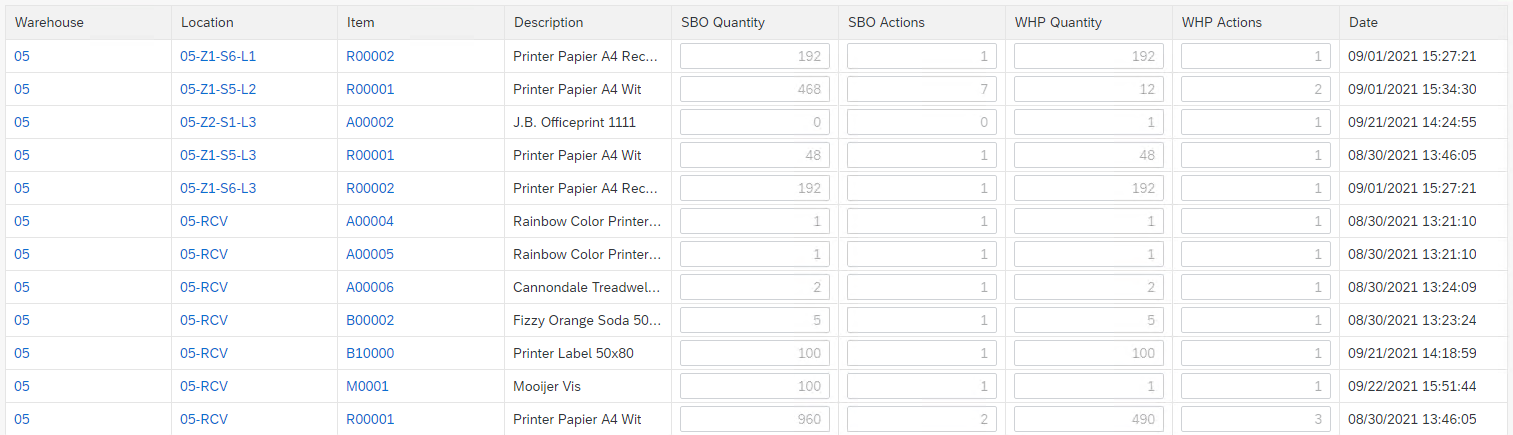
As displayed in the image above, the tracker "tracks" data from both WarehousePro and SAP Business One actions.
Cycle
With "cycles" it is possible to create recurring tasks that help get inventory counting done in smaller portions or at least have them created automatically.
Multiple cycles can be created with different selection criteria.
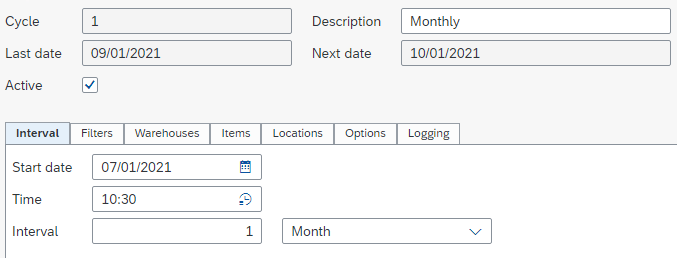
Interval
First specify the interval. Select the Start date and Time to execute the cycle.
Also specify the Interval for cycle and select the period (select one of Day, Week, Month or Year).
Filters
If required it is possible to create a custom SQL Filter to select a range of Items or Locations to include in the cycle. Only use this feature when tabs for Items or Locations do not give enough flexibility.
Navigate to Administration > Setup > WarehousePro Settings > Inventory Counting > SQL Filters to set this up.
When creating custom query, make sure to only return either a list of ItemCodes or location AbsEntry (depending on the type of query).
When not using custom queries, specify in the following tabs which warehouses, items and locations.
Warehouses
Simply select the warehouses on which the cycle should be active.
Items
Add the items that should be included in the cycle. Specify whether the trigger should be when a specific Quantity in transactions is reached and/or when a specific amount of Transactions for the item is reached (in this case the quantity in a transaction is not relevant).
Adding these values will trigger the inventory counting task when the quantity of the trigger is reached which could be earlier than the cycle is set-up for. All items that did not reach the setup triggers will be added to the task at the end of the cycle.
Tip
It is also possible to add items by right-clicking on the Item Master data window and selecting Cycle from the menu. Make sure to have the WarehousePro add-on running to see this option in the menu.
Locations
The same settings as mentioned above for Items, can be set up for the complete bin locations in the warehouse. In this case the triggers are set up for all items combined in the location specified.
Tip
It is also possible to add locations by right-clicking on the Bin Location Master data window and selecting Cycle from the menu. Make sure to have the WarehousePro add-on running to see this option in the menu.
Options
In the Options tab some options for the Inventory Counting tasks can be set.
Release Generates the task with the Released status.
Note
Unreleased tasks cannot be counted.
Freeze When enabled all items and location in the task will be frozen for other tasks and therefor blocking transactions.
Only add locations to task When enabled only the location will be added to the task and not specifying which items to count. All items in the locations must be counted. Items that are expected and were not counted will be added to the list of differences.
Only add used locations having inventory When enabled a location that does not hold stock according to SAP Business One data will not be included in the counting task.
Hide batch and serial numbers When enabled the counter is not asked to specify batch or serial numbers during counting. When differences are detected it is mandatory to still specify them.
Ignore when counted When enabled the filtered item or location will be skipped when it was already counted during the cycle.
Counting Method Specify whether the counting task should be generated for the WarehousePro Client (Terminal) or should be printed (Manual).
Task Group Specify which task group should receive the new generated tasks.
Maximum number of locations Specify how many locations are allowed in a single counting task. Select 0 (zero) for unlimited quantity.
Maximum number of items Specify how many items are allowed in a single task.
Logging
In the Logging tab it is possible to specify how long logging is to be saved. To view this logging click the Logging button in the bottom of the Cycle definition.
Location Audit
By configuring this Location Audit function it is possible to create tiny tasks during warehouse tasks when touching bin locations.
At this point only Order Picking can display these tasks.
There are several options to set up for this function:
Active Mark this setting to enable the audit function.
Confirm location is empty When enabled the user of the warehouse task needs to confirm if the location is indeed empty when last item was picked according to SAP Business One data.
Note
When the user's response was not what was expected according to SAP Business One data, a counting task can be generated from the audit report.
Confirm Picking shortage When enabled the user needs to confirm if there was a picking shortage when picking a lower quantity than the picking list suggested.
Note
When the user's response was not what was expected according to SAP Business One data, a counting task can be generated from the audit report.
Preserve days Specify how many days this data history should remain available.
It is also possible to add specific locations to always audit. When adding locations it is required to specify triggers. When using 0 (zero) then no threshold is set.
Quantity Trigger When set the user will need to count all items in the location when number of quantity is taken from the location. Quantity is counted over all items that were in the location during the given preservation period.
Transaction Trigger When set the user will need to count all items in the location when the amount of transactions on the location is reached.
Stock Trigger When set the user will need to count all items in the location when total stock for all items becomes below the given treshold.
Location Audit Report
Every action based on Location Audits will be displayed in the Location Audit report. Navigate to WarehousePro > Inventory Counting > Location Audit in SAP Business One menu. Records in the report will be available during the given Preservation Period.

The report displays all locations on which the audit was requested. Depending on the trigger method the result will be visible in the corresponding columns.
When the result is different than expected a red "N" will be displayed in the Result column. Also the Error column will be checked.
When checking the first # column all errors can be collected in a new to be generated Inventory Counting task. This will be a specific task to count the differences in the selected locations. When the location is already added to an existing task it is not possible to select the location.
Processing Counting Tasks
A WarehousePro inventory inventory can be handled both via SAP Business One and via the WarehousePro client. Both methods result in a result in a list of differences.
In practice, an inventory task that will be handled via SAP Business One will be a task where specific items must be counted at locations. This task will also be printed on which the counted values can be recorded.
Via SAP Business One
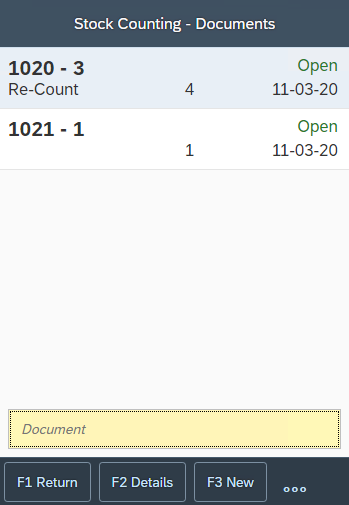
Navigate to the Inventory Counting overview menu path: WarehousePro > Inventory Counting > Overview for a complete overview of inventory tasks.
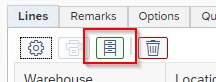
Select a task (click on document number) and open the relevant counting list by clicking on the "edit" icon.

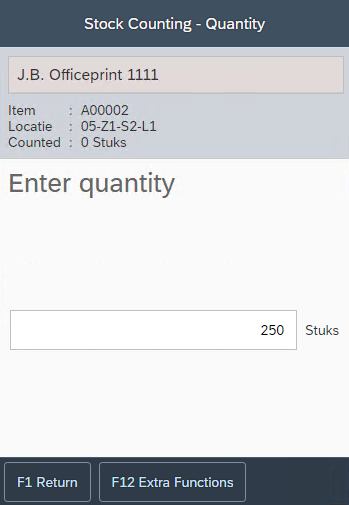
Mark a line as Counted and enter the counted quantity. When an item is managed by batch or serial numbers, this information must also be entered in the counting list.

If an item at a location in the list was not found at the location, the relevant line must be marked as Counted, but the counted number remains 0 (zero).
Update the count list to save entered data. To permanently save the count list and compare the counted data against the data known in SAP Business One, the count list must be completed. To do this, press the Complete button. To complete the task, a user must be selected in the Handled by field under the Options tab.
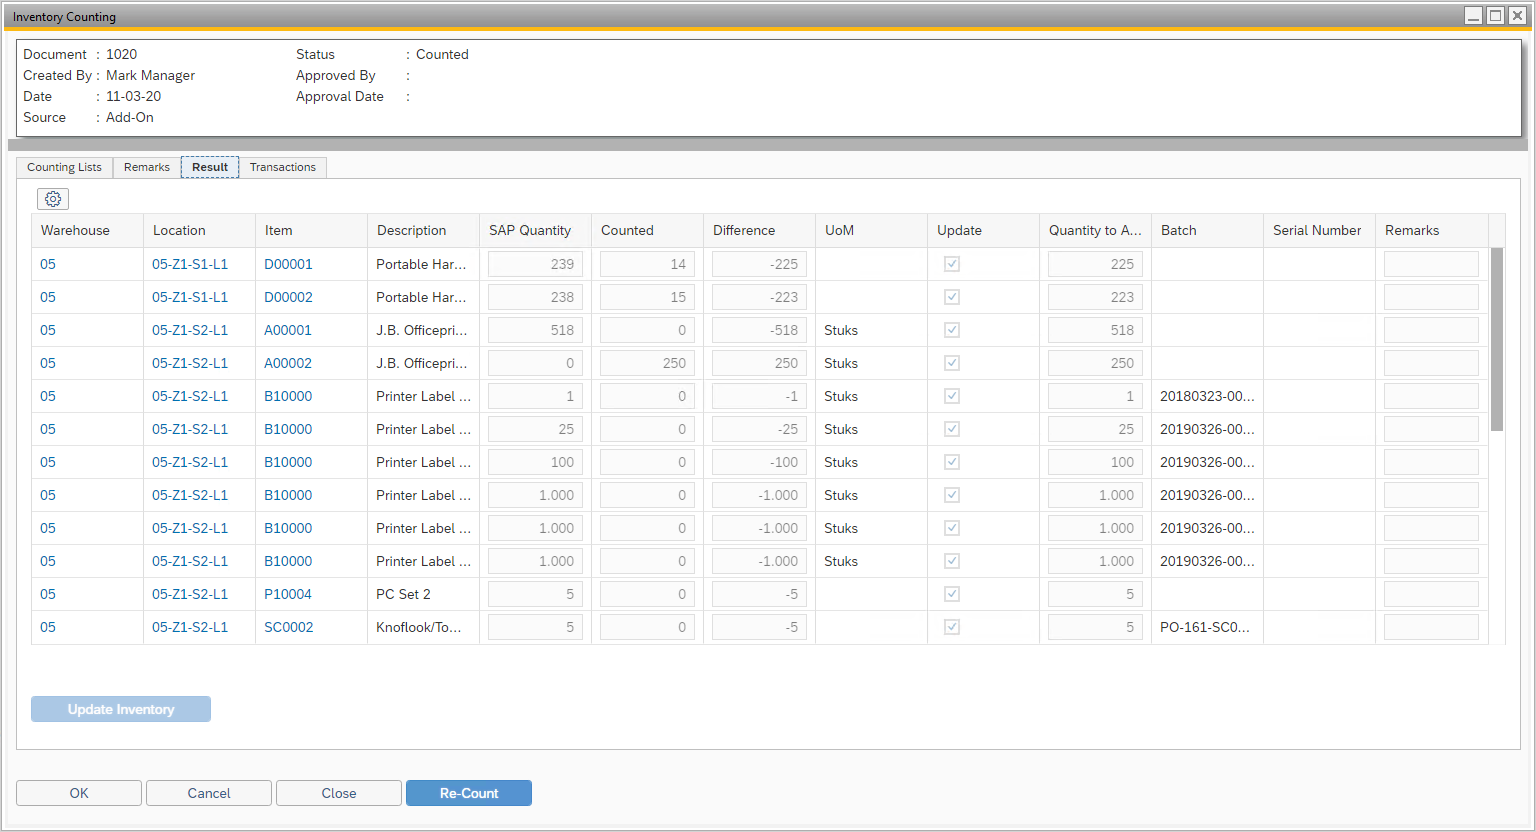
After completion, a list of differences will be presented in the Results tab. This difference list will be merged on the Inventory Counting task with the results of other counting lists from the task.

Via the Delete button a counting list can be removed from the Inventory Counting task. Any entered counts from a deleted count list are not included in the result.
Via WarehousePro Client
Before WarehousePro Inventory Counting tasks can be handled via WarehousePro Client, the user must be linked to a task group in which the Inventory Counting task has been added. Inventory Counting tasks, linked to that task group and whose handling is set to RF, become visible and can be picked up by a user.
An Inventory Counting task in which items are established, only expects those concerning items. A task where this was not specified (a blind count) expects the user to specify which items were counted.
In a task where items were specified in advance, it is not possible to add additional items.
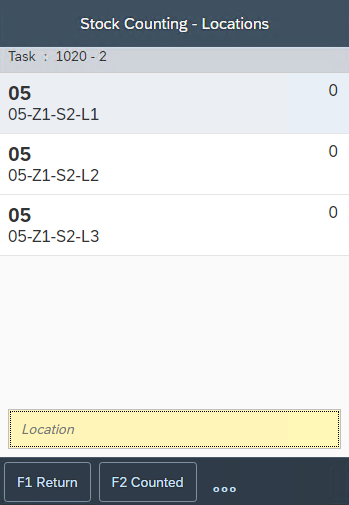
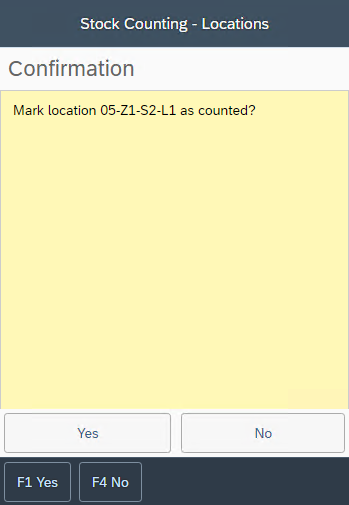
Confirm each location that appears in the count list and confirm specified items from the task or confirm a "found" item.
A user must specifically indicate when a location is fully counted and can be marked as such (green indicator). A question appears when a location is left.
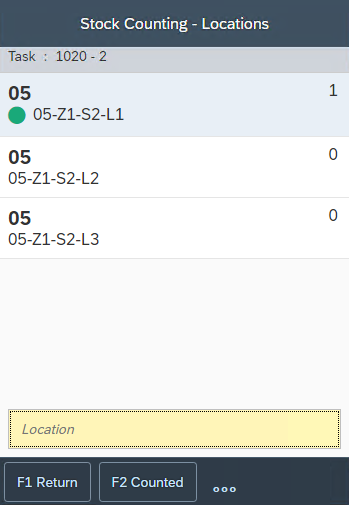
Empty locations should also be marked as Counted. This can be done by opening the location and jumping out again or by directly clicking the Counted button when the location is highlighted.
Refresh button
In case the stock counting inventory process gets stuck on a client, the screen can be refreshed by using the refresh button.
Processing results
When all count lists have been completed, the WarehousePro Inventory Counting Task contains a Result in the task tab of the same name. Processing Inventory Counting tasks is only possible from SAP Business One and not from the WarehousePro Client application.
Depending on the settings in SAP Business One (menu path: Administration > Setup > WarehousePro Settings > Configuration > Settings and then the Inventory Counting tab) a possible difference can be approved and / or a re-count (possibly even required) must first take place.
Re-Count
If this is expected according to settings, a Re-Count can be generated from the Result of the WarehousePro Inventory Counting task via the Re-Count button. This re-count will be added as a new counting list within the relevant task. This counting list will always contain a specific selection of items and locations (including specific batch and serial numbers).
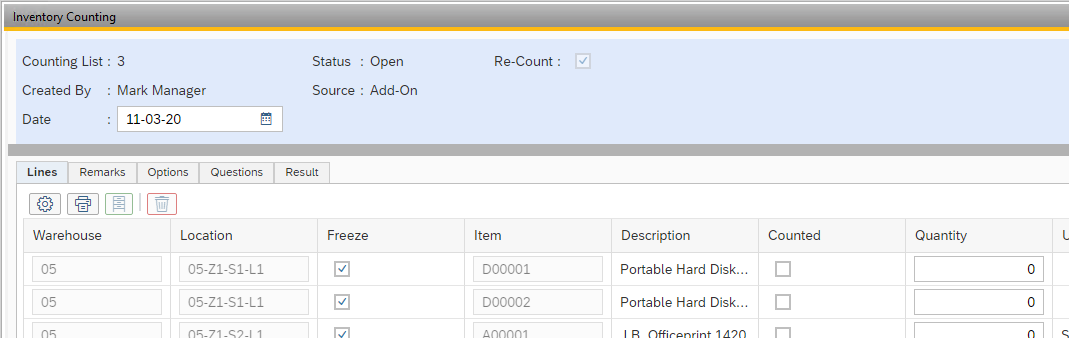
In addition, the lines of the relevant Re-Count can no longer be edited. Only the Counted checkmark and the Quantity may be changed. This continues in the same way as for a normal Counting list.
Once the re-count has been completed, a Result will appear in the task again.
Approve result
If this is expected according to settings, the Result of the WarehousePro Inventory Counting Task must be approved.
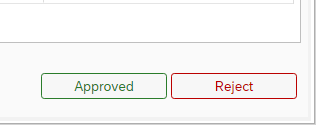
These buttons are only available for authorized SAP Business One users. menu path: Administration > Setup > WarehousePro Settings > Configuration > Settings and then the Inventory Counting tab this can be set. Here it is possible to determine that the inspection must be done by a user other than the one who created the task.
When the result is Approved, the Update Inventory button in the Result tab becomes active. When the result is rejected, the status of the task changes to rejected and a new count list can be added to arrive at a new result.
Update Inventory
Once the result is Approved (depending on settings), an inventory correction can be posted via the Update Inventory button. This button is located in the Result tab.
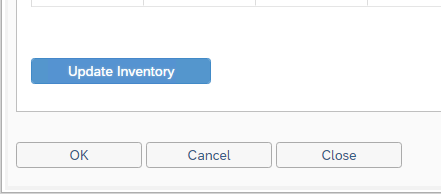
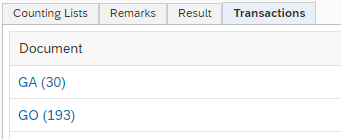
Depending on the difference (positive or negative), a Goods Issue or Goods Receipt will be created in SAP Business One.
If a serial number of an item has been counted at a location other than where it should be according to SAP Business One, a stock transfer for this serial number is posted.