Replenishment (available in 3.1.3.2 and higher)
Introduction
As of WarehousePro version 3.1.3.2 the replenishment functionality was changed from ad-hoc generation from WarehousePro Client to a more advanced Generating function from SAP Business One addon. These tasks can be generated manually or completely automated using profiles.
The replenishment functionality will not only check for a minimum amount, but also take sales orders, sales invoices and production orders within a certain time period in account when determining the amount to replenish.
Picking functionality is also expanded with options to ignore locations that are being replenished. When not ignored, a location could be selected for a pick list when there is not enough quantity available.
WarehousePro: Task Group Settings
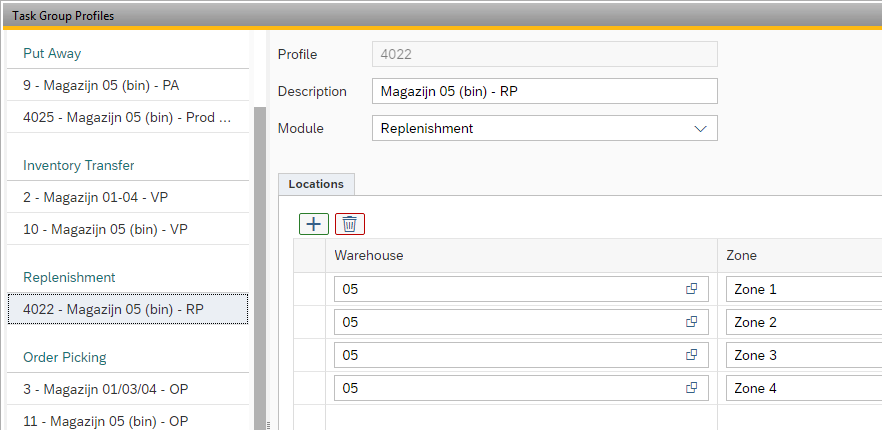
To determine which warehouse locations may be replenished by which users, Task Groups must be defined with a Task Group Profile for the application Replenishment in which it is determined which warehouses and sub levels are accessible to this group.
This can be set by the following menu path within the SAP Business One Client: Administration > Setup > WarehousePro Settings > User settings > Task Group Profiles.
Next, a Task Group must be created to which this profile is linked.
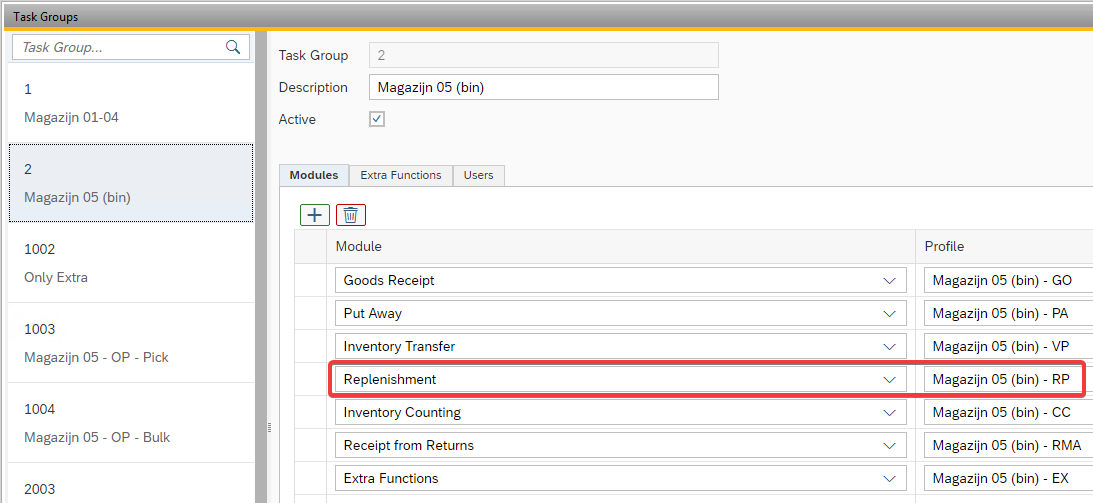
To do this, follow the menu path: Administration > Setup > WarehouseProSettings > User settings> TaskGroup.
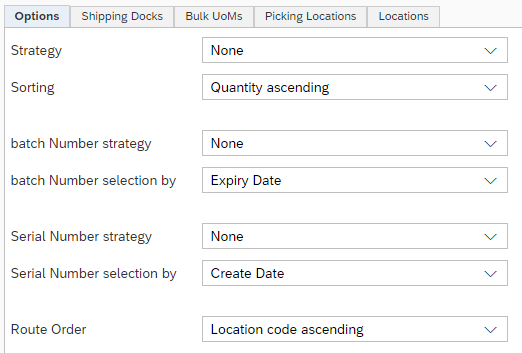

In the strategy in the Options tab, determine how the stock should be selected (such as for batch numbers, for example, by expiration date) and in the Locations tab, from which warehouse locations the stock can be selected. Bear in mind that a replenishment remains within the administrative SAP Business One warehouse. If the location to be replenished is in warehouse 05, this must also be replenished from warehouse 05.
Then link this strategy under the Replenishment tab of the Strategy Documents screen. To do this, follow the menu path: Administration > Setup > WarehouseProSettings > Strategy > Documents.

WarehousePro: Replenishment Settings
To access Replenishment settings, follow the menu path: Administration > Setup > WarehousePro Settings >Configuration> Settings .
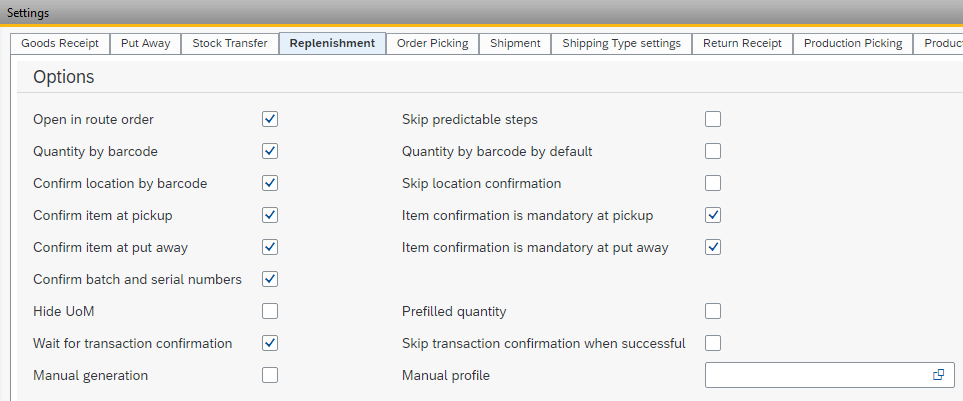
These settings determine the work flow for WarehousePro Client users.
Additional settings can be found menu path: Administration > Setup > WarehousePro Settings > Replenishment . The first menu option Settings contains settings to limit the replenishment tasks that are being generated. Limits can be set on the maximum number of lines, number of units and from locations.
Tip
It is advised to keep replenishment tasks as small as possible. The user should be able to pickup all items in the task in a single action, so that the transactions can be registered directly.
WarehousePro: Strategy
After WarehousePro can determine which warehouse locations can be replenished with which items / numbers by which users, it must still be determined from which warehouse locations additional replenishment can be made. For this, use is made of the same strategies that the Orderpicking application (for example) uses.
Create a separate strategy for the replenishment functionality. In practice, this will deviate from the order picking strategy. There, for example, we will look at picking locations where a replenishment strategy will look at bulk locations.
To do this, follow the menu path: Administration > Setup > WarehousePro Settings > Strategy > Strategy .

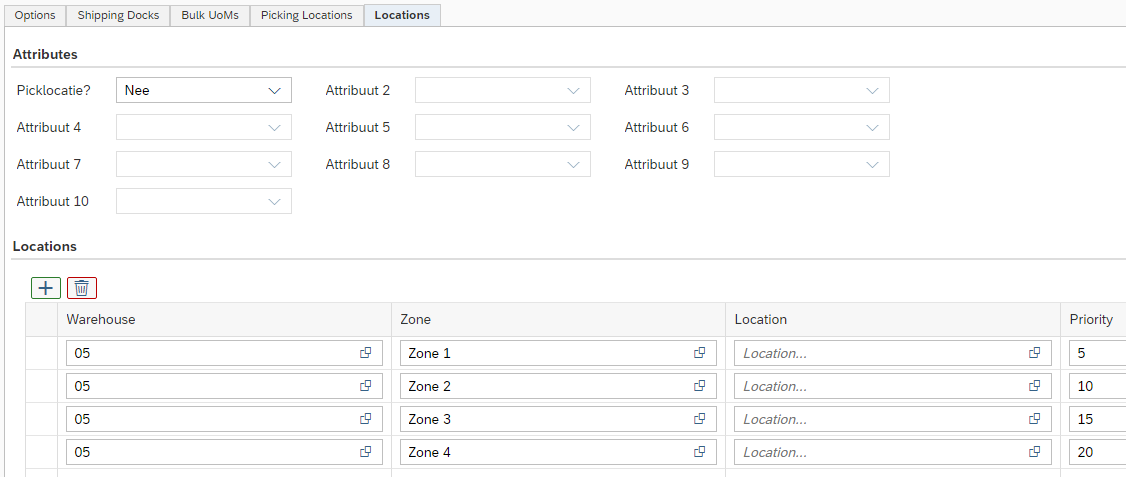
In the strategy in the Options tab, determine how the stock should be selected (such as for batch numbers, for example, by expiration date) and in the Locations tab, from which warehouse locations the stock can be selected. Bear in mind that a replenishment remains within the administrative SAP Business One warehouse. If the location to be replenished is in warehouse 05, this must also be replenished from warehouse 05.
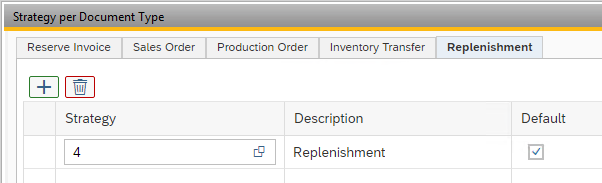
Then link this strategy under the Replenishment tab of the Strategy Documents screen. To do this, follow the menu path: Administration > Setup > WarehouseProSettings > Strategy > Documents .
SAP Business One: Bin Location Master Data
In order to be able to determine which location should be replenished with which item, some master data must be set at the warehouse location.
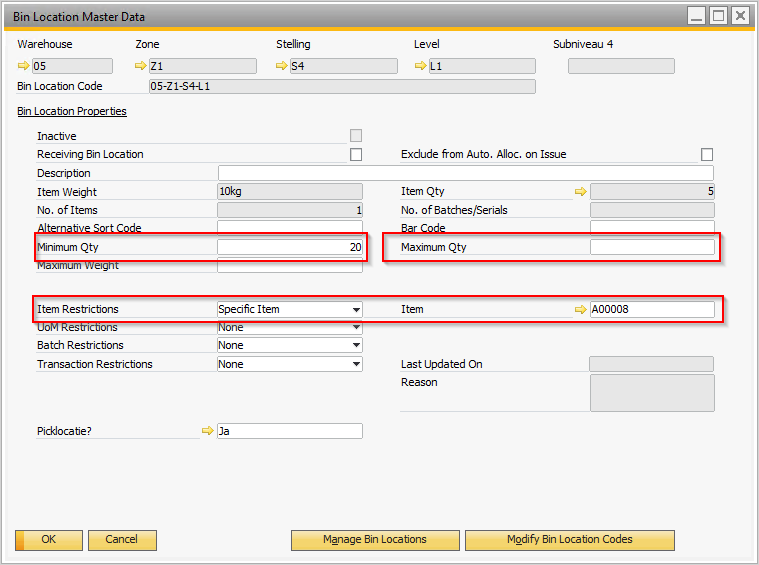
Minimum Qty This value determines the level when the item needs to be replenished.
Maximum Qty (optional) This value determines the number to which the replenishment must be made.
Item Restrictions This must be set to "Specific Item" or "Specific Item Only".
Item The relevant article must be indicated here.
With the help of this data, WarehousePro knows which locations require a specific stock of a specific item.
Bear in mind that these settings will ensure that no other item can be placed in the relevant warehouse location. In addition, the Maximum Qty entered is an absolute maximum. No more may be placed in the warehouse location than what is indicated here.
In some cases it is not possible to use a dedicated bin location as a preferred location. WarehousePro adds additional Replenishment Item Locations to create a more flexible setup.
WarehousePro: Replenishment Item Locations
From this configuration option (found menu path: Administration > Setup > WarehousePro Settings > Replenishment > Item Locations ) a range of bin locations can be assigned to a specific item. The range of locations can be defined by specifying sub levels and use the bin locations attributes to limit to specific locations within those sub levels.
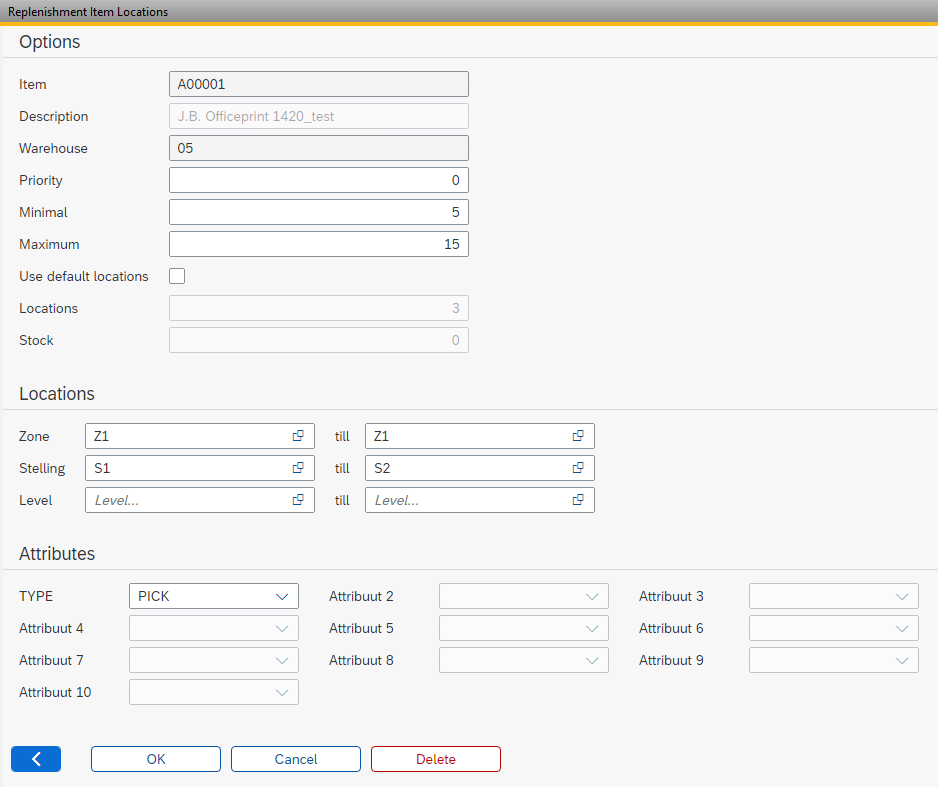
Multiple ranges for a single items can be setup.
For a range in a warehouse a minimal and maximum quantity (inventory UoM) can be set. Within the set range the replenishment functionality will try to replenish to the maximum amount as soon as the stock reaches the minimal amount.
Use default locations
When checkbox is activated, It is possible to perform replenishment to a location that is also designated as the Default Warehouse Location for another item.
Generate Replenishment Tasks
WarehousePro Replenishment Tasks can be generated by navigating to path: WarehousePro > Replenishment > Generate . A generation wizard will appear. First specify how many days ahead (Peek Days) additional documents should be taken into account.
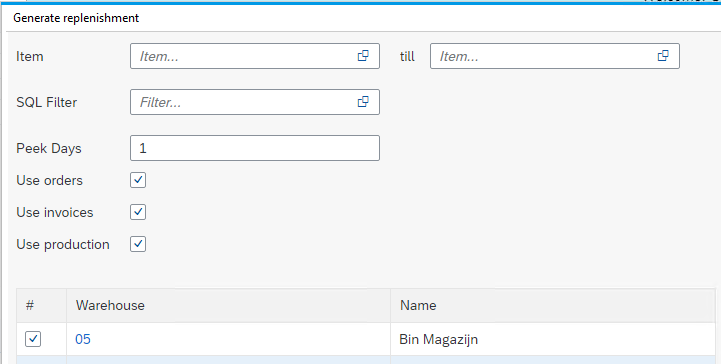
You can select a range or a single item for which replenishment must be generated. Leave blank to check for all items.
Additionally, a SQL filter, as configured in Custom SQL Filters, can be used for (specific) tasks.
Also select for which warehouse the replenishment should be checked. Note that only bin managed warehouses can be selected.
After clicking the Next button a list of items that need to be replenished is displayed.

The Inventory column displays (in color) if replenishment will be possible with the selected strategy (in upper left corner).
Green indicates that there is enough quantity available to replenish to the required amount.
Orange indicates that there is stock available, but not enough to match the required amount.
Red indicates that no stock is available for replenishment.
The Required amount column is calculated on the minimum amount set for that item in the bin location range and the required amount needed for the selected document types. The latter is displayed in the Document Shortage column.
The Quantity indicates the amount to replenish and can be adjusted when desired and sufficient stock is Available.
Automatic generation of Replenishment Tasks
The steps described in chapter 3.6 of this document can also be captured in a Automatic Generation Profile. To set this up you must go to path: Administration > Setup > WarehousePro Settings > Replenishment > Automatic Generation.
Here it is possible to create profiles with the necessary Filters (which items, SQL Filter, number of Days ahead and which documents should be taken into account), Warehouses and Options (Strategy, Task Group, maximum number of lines or units).
A profile can be executed at specific Execution Times or by Interval between a specific Start and End Time on specific days of the week. .
The interval must be set to at least 10 minutes or higher.
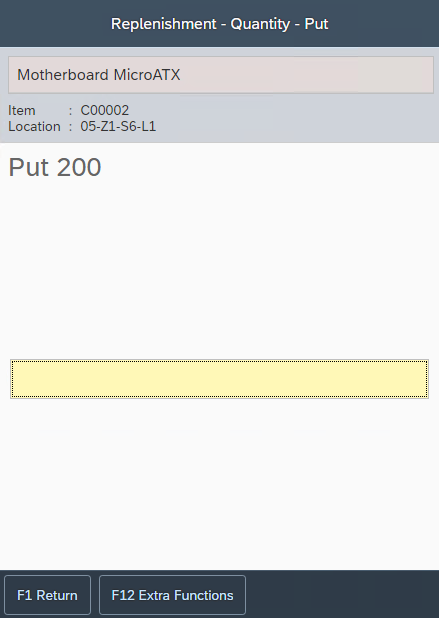
WarehousePro Client functionality
In WarehousePro Client application the user will be instructed to retrieve the required items (including batch and serial numbers) that were selected by the strategy.
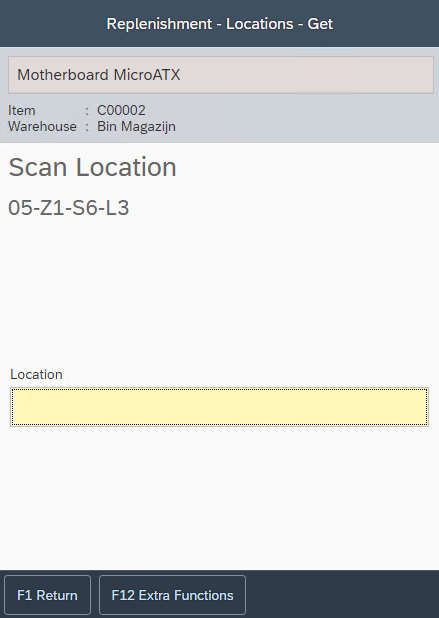
After collecting all the items in the task, the user will be instructed to place each item in a specific bin location.