Routes
Route Summary
When Route Summery and Task List are not activated in menu Config > Functional Settings > Overview this screen will be skipped.
After logging in the Route Summary screen appears.
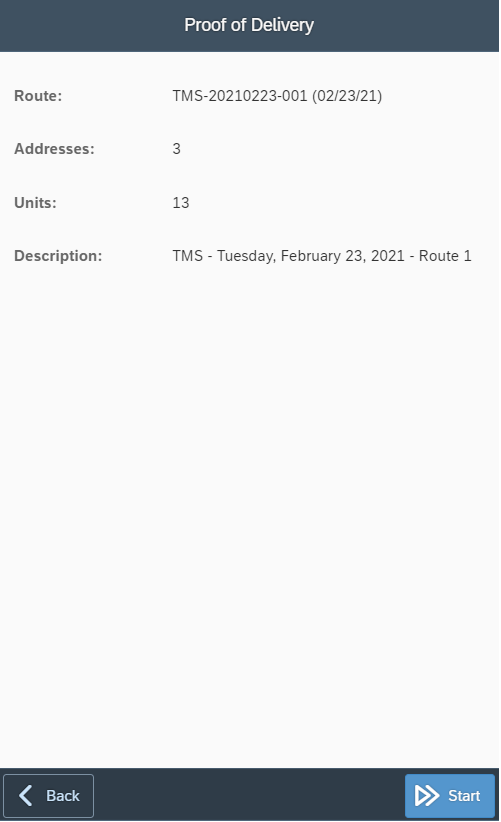
The screen displays
Route The Route ID and Route Date.
Addresses The total number of addresses/stops in the route.
Units The total number of Items in the route.
Description The Route Description.
Click the Start button to start the route.
Click the Back button to cancel and return to the previous screen.
Starting the Route will save a timestamp to measure total delivery time.
Start Route
When Starting the Route, depending on the settings a brief summary of addresses will appear.
This overview is for informational purposes only. The overview does not contain functions to have the user select which address to navigate to.
After leaving the summary screen (if enabled) the first address in the route will be presented.
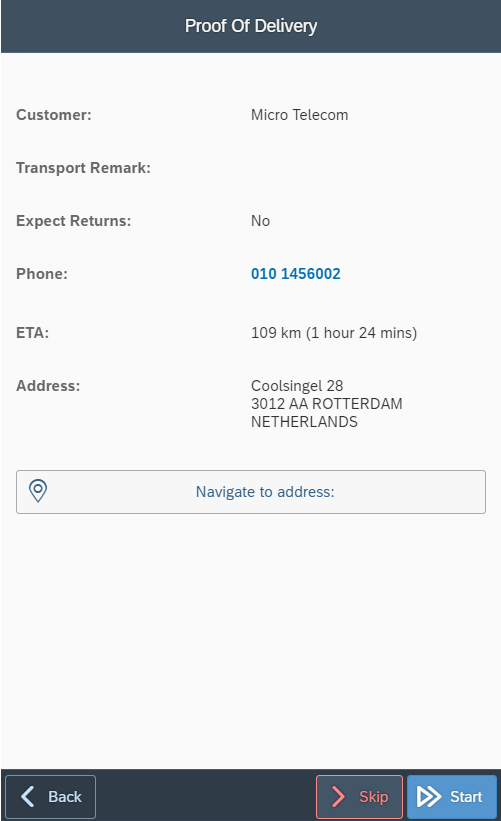
The screen displays information for the Route's next address/stop:
Subject | Explanation | Remarks |
|---|---|---|
Customer | Displays the Name of the next customer | |
Transport Remark | Lists the logistics remarks (if provided) of the documents in the stop | |
Expect Returns | Displays "Yes" when return request documents are in the stop | |
Phone | Displays a list of available phone numbers to contact the customer |
When running the application on a smart phone, the phone number acts as a link to open the default "dialer app" with the number pre-filled. |
ETA | Displays the actual driving distance and travel duration from the device's current geographical location |
Information is provided using the Google Maps API. This API only supports car navigation and therefor does not take into account that trucks can't access all of the same roads. |
Adress | Displays the full address of the current stop |
Use the button Navigate to address to open a link to Google Maps.
If the Google Maps App is installed, this will be opened by default
If for some reason the customer cannot be contacted or cannot be reached due to traffic, the stop can be skipped by using the Skip button.
When arrived at the address, press the Start button.
Skip Address
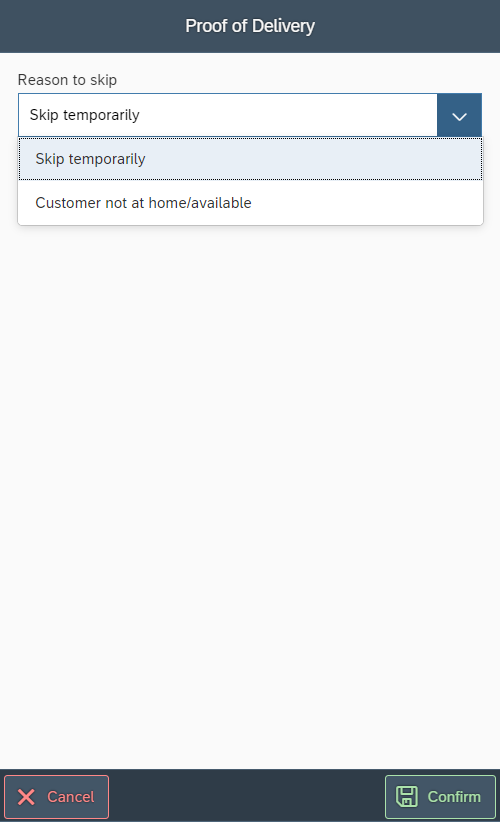
When the Skip button is pressed, you can select from two options:
Skip temporarily The address will be skipped once and will return after the next address/stop.
Customer not at home/available The address will be skipped completely. Status of documents will be changed to "NotHome" in Proof of Delivery Monitor.
Documents that were skipped completely will be Returned once the stop in the route is completed
Start Delivery
When the Start button was pressed, a list of items to be delivered or returned is presented.
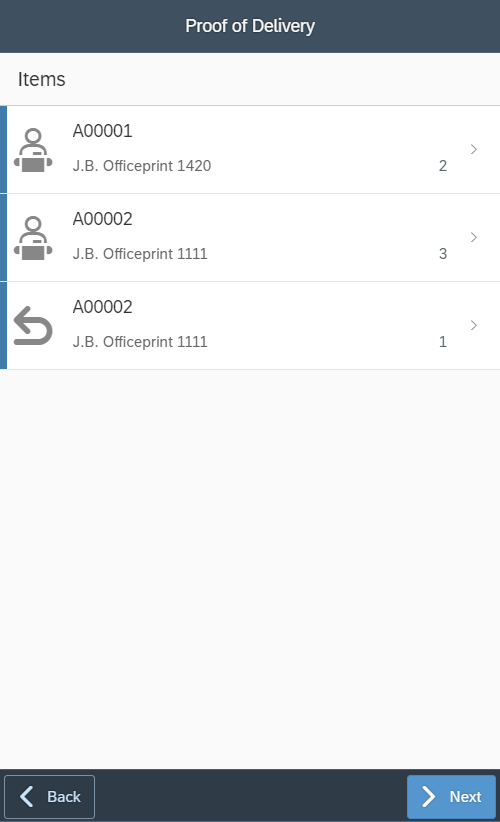
Items for Delivery are marked with the :1: icon.
Items for Return are marked with the :2: icon.
Click on a line to Confirm or Reject the delivery or return.
Confirm / Reject Items
Specify the quantity to Confirm or Reject by clicking the + or - icons.
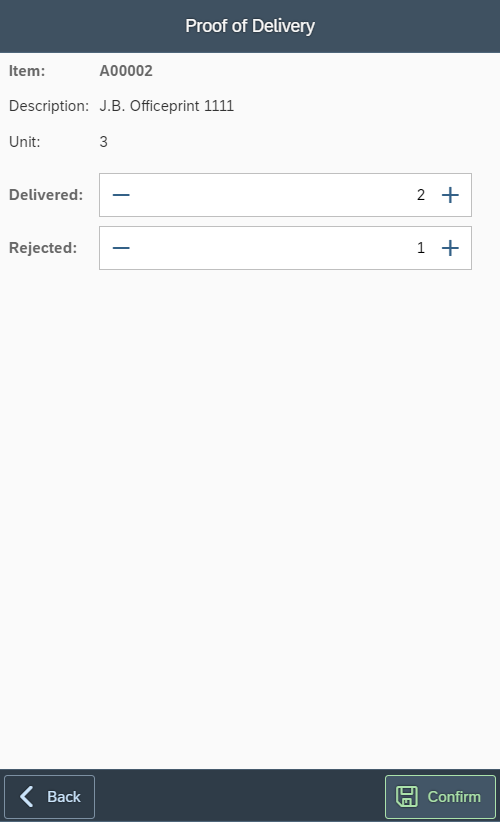
Quantity fields are linked. Clicking - for Delivered/Returned items will automatically + the Rejected quantity
Click the Confirm button to save changes.
Different colors
After confirming / rejecting Items in the Items screen, there will be different colors presented.
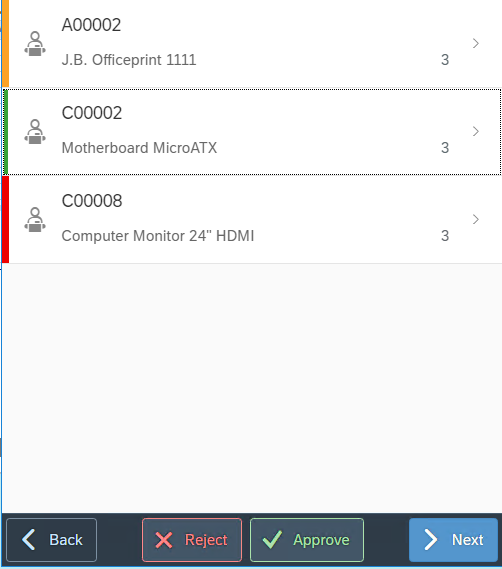
Green color full quantity of item number has been approved.
Yellow color quantity of item number has been partially approved / rejected.
Red color full quantity of item number has been rejected.
It is possible to reject or approve all items by one click on the buttons Reject or Approve below.
After confirming or rejecting all items click Next to jump to the next step in the process.
Specify Reject Reasons
When Items were rejected, there will be a list displayed from where each rejected item must be confirmed and reasons must be specified.
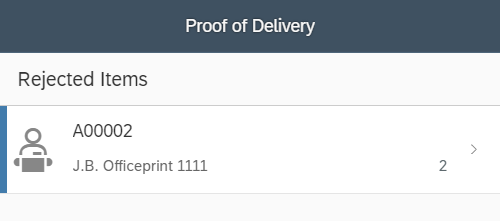
Click on an item to specify (different) reject reasons per Item or click on Reject all button (below on the screen) to specify the same reject reason for all items.
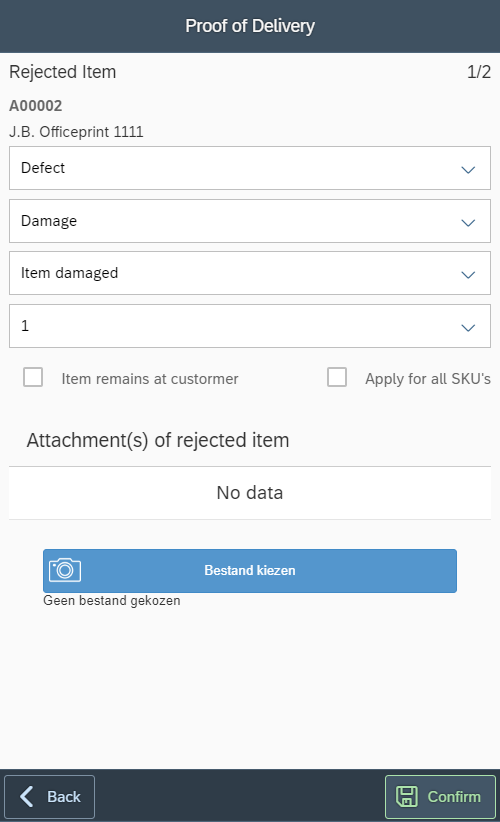
Per SKU (stock keeping unit) a reason can be specified. Select (from top to bottom) in 3 fields a valid reason for the reject.
If the same reason is valid for the complete quantity of the item (in the example above 2 SKU) check the Apply for all SKU's box.
Check the Item remains at customer box if the rejected item will still be delivered but action should be taken at a later stage.
Attach files or photo's to illustrate the reject reason by pressing the blue button.
When running the app on a mobile device with integrated camera, the default Camera App will open to shoot a photo. Depending on the app it will also be possinle to browse through existing photo's and attach them. Multiple attachments can be added if required
Photo's will be automatically resized to a maximum width and height of 1000 pixels
Click the Confirm button to save changes. All items that have confirmed reject reasons will be marked in Green.
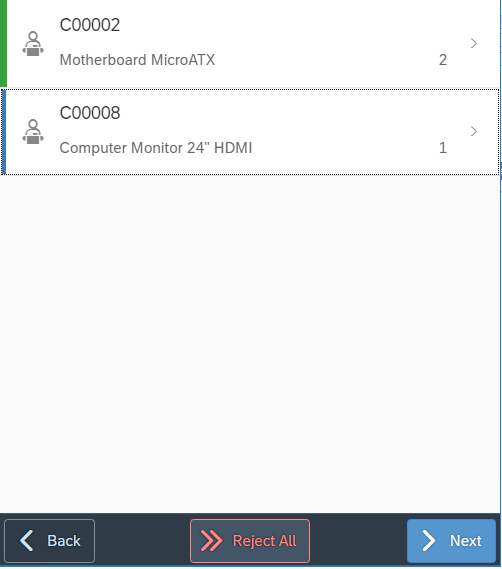
Specify reject reasons for all items in the list and click the Next button.
The color indicator in the items list will turn green if reject reasons are entered
Transporter reject reason
If one or more items are rejected by customer and the Reject Reason box in menu Proof of Delivery Monitor > Config > Functional Settings > Overview is checked, there will be a remark field for the Transporter to fill in reject reason(s) for all rejected items.
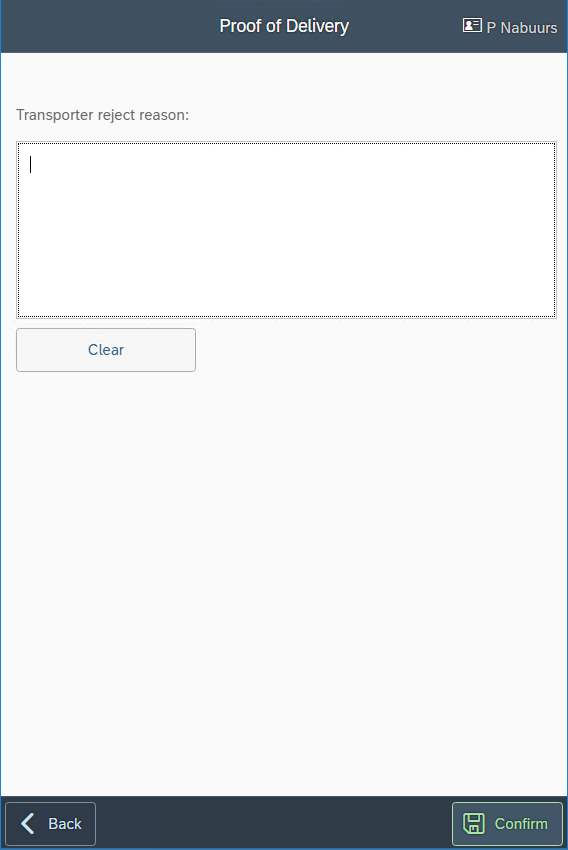
In this case it is not possible to determine if a rejected Item stays at customer. All reject items are caused to a Return document in the ERP system
For specification or analysing reject reasons per item it is advised to use the App Reject Reasons as described in Specify Reject Reasons
