
Configuring Proof of Delivery App
Introduction
The Proof of Delivery application is the actual application that contains functionality that end-users will use. It is used to monitor the process of a route and to monitor transactions that are created in the ERP system. It also holds the interface that is used when delivering items to the customers.
After successful installation of the Proof of Delivery App package, there are several settings that need to be configured.
First determine the URL for the configuration site by checking the following components from the B1ProSuite platform package:

The SSL field determines if the URL should start with "http://" (N) or "https://" (Y).
For the Proof of Delivery App package this should always be SSL = "Y". This is required for Google Maps functions to work.
Make sure to use a valid and signed certificate and match the address of the application. This is needed to mark the website as Trusted by browsers.
The IP field determines the address of the server. If left blank then any corresponding address for the server will be valid.
The Port field specifies the IP communication port for the application.
Since the app's website should be available from outside the network, you must make sure to set firewall rules to make sure the communications port is accessible.
Also make sure that the configured B1ProSuite web server's port is also made accessible. Check B1ProSuite Software Platform documentation for more details on this topic. Make sure the web server is also accessible through the same "trusted" address as the application.
In the image above, the URL to access the Settings is: https://192.168.4.52:21050/PoDMonitor/
It is also possible to click the Open button at the bottom of the B1ProSuite Platform after highlighting the package.
Login with the created config user and open the Config menu.
Config
Config - User Accounts
To be able to login to the PoDMonitor URL, there must be at least one User Account configured.
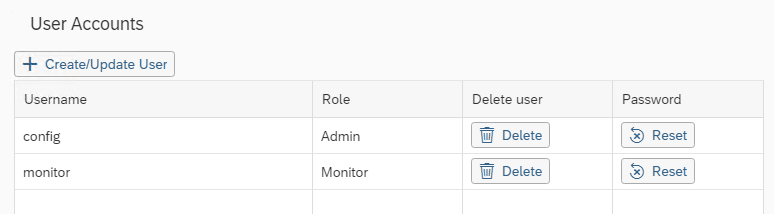
Create at least one user with the Admin role. This role can adjust settings and also monitor and release routes.

Create limited users by assigning them the Monitor role. The Config menu will not be available for these accounts.
When opening the config site for the first time, the creation of users will be forced.
Config - Fields
The Proof of Delivery App contains several fields that can be set mandatory or can be activated if required.
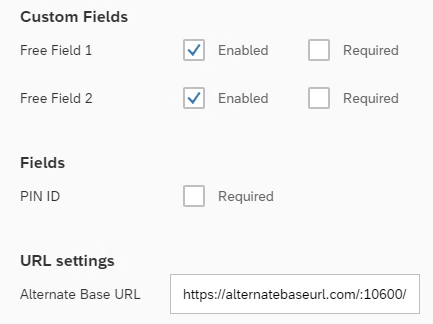
There are two Custom Fields available to enable and which you can make mandatory by checking the Required field. Use Translations to change the text and messages for these fields.
There's a standard field PIN ID which can be set as mandatory by checking it's Required field.
It is possible to specify an Alternate Base URL. This can be helpful when working behing a reversed proxy configuration. When setting is left blank, the default URL is used.
Make sure to click the Save button to save any changes made.
Config - Functional Settings
There are some settings that affect the appearance of some screens.
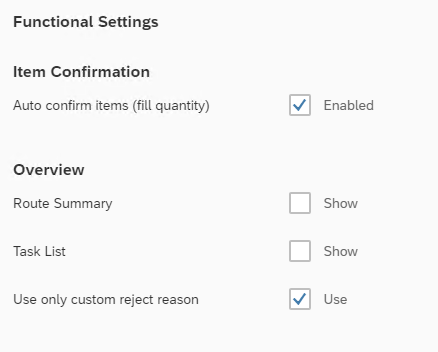
The option Auto confirm items in the Item Confirmation section determines whether all items are automatically marked as Confirmed (or Accepted). When unchecked the user must mark all items as confirmed or rejected manually.
The option Route Summary gives an overview of routeID, number of addresses and units and a description.
The option Task List in the Overview section lets you Show a list of all addresses in the route when starting them. If unchecked the user will be automatically presented the first address from the list. The Task List is for informational purposes only.
The user cannot select an address from the list to start with. The user will always be presented with the first address according to the sorting order of the route.
The option Use only custom reject reason gives an option to fill in a reject reason from the Transporter for rejected items.
When this option is activated it replaces specification of return reason per rejected item as described in Specify Reject Reasons.
In this case it is not possible to determine if a rejected Item stays at customer. All reject items are caused to a Return document in the ERP system.
Make sure to click the Save button to save any changes made.
Config - Payment Methods
The Proof of Delivery app has options to register payments made by the customer at delivery. Specify what Payment Methods are accepted.
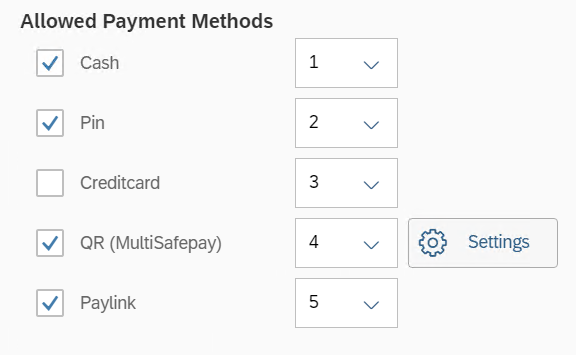
The Proof of Delivery Application does support an integration with Payment Service Provider MultiSafepay. This allows to create payments via QR-code scanning. All other Payment Methods only register the amount that was payed per transaction and method.
Make sure to use the Save button to save any changes made.
Config - Google Maps API Key
The Proof of Delivery Applications has a feature to calculate the distance and travel duration from the device's current location. For this feature a Google Maps API Key is required.

If no key is provided, the message "No API key" will be presented in the distance field.
To retrieve a Google Maps API Key you need to have a Google account. Check or configure your API's by navigating to your account's Google Cloud Platform > Google Maps Platform (link) and navigate to the Credentials section. Make sure to enable at least the "Directions API".
Make sure to click the Save button to save the changes.
Config - Email Settings
The Proof of Delivery Application can generate confirmation emails after a delivery was made using the application. To enable this, a mail server must be configured:
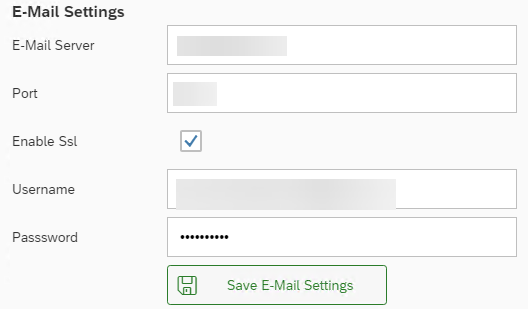
When enabled configure all E-Mail Settings. Contact your company's administrator to obtain relevant account information.
Also configure the Sender and Extra Recipients for the emails.
Determine the body of the emails to be sent.
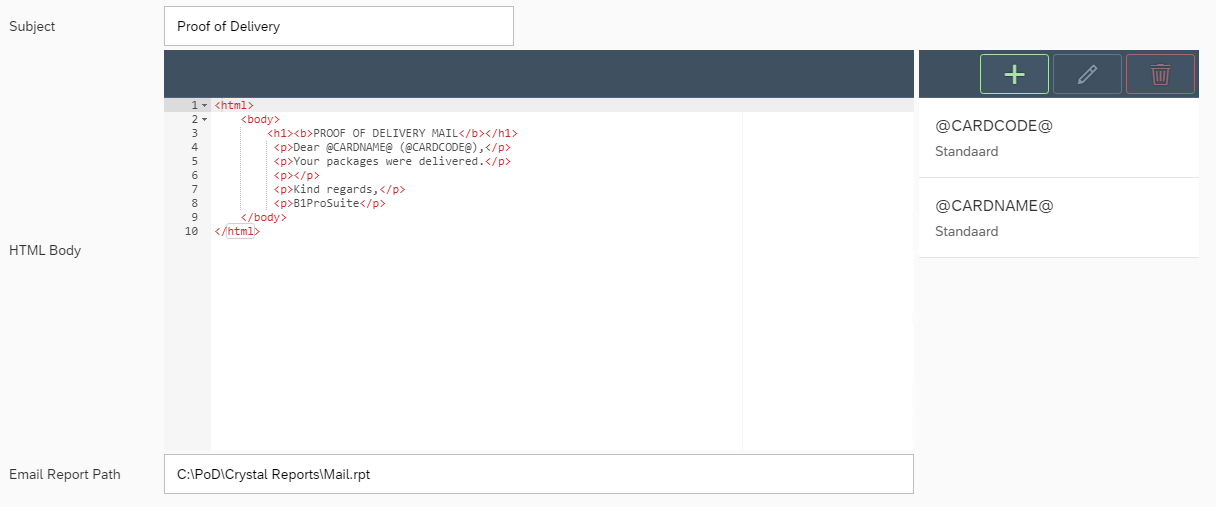
Specify the Subject of the emails sent by Proof of Delivery.
The application sends delivery confirmation emails (Receipt confirmation tab) and internal transaction messages (Transaction Message tab).
Enter the HTML Body of the email. Use variables to make the email body more personal for the recipients. It is possible to create extra variables based on several available input parameters.
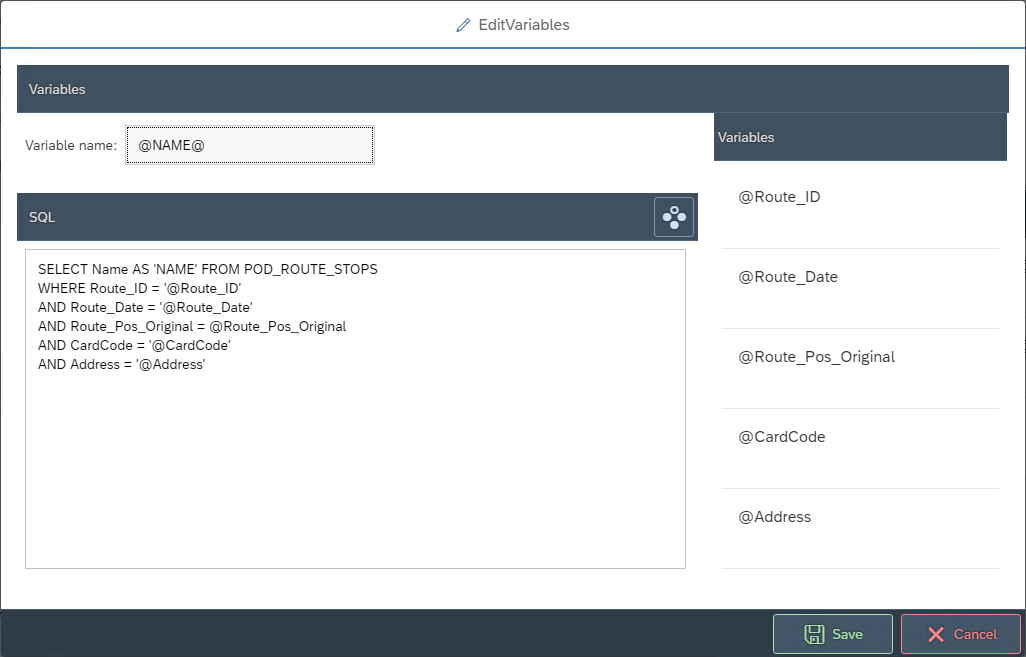
Specify the Variable name to create.
Tip
Use @ signs in front of and after the name (like @NAME@) of the variable to make the string more unique. The variable name will be used as a placeholder and will be replaced with the output of the SQL.
Specify the SQL to retrieve the data from the Proof of Delivery database.
Tip
Write your SQL query's based on POD_ROUTE tables and join additional tables if necessary. Use ALL input variables when writing your query to guarantee you selecting the correct records.
Make sure that the query only outputs a single value.
After saving the data, the new variable is ready to be used in the email's HTML body.
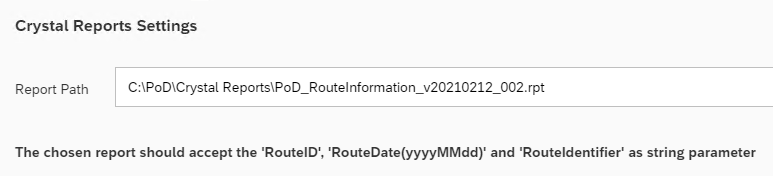
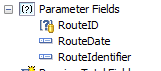
Link a Crystal Reports file as Email Report Path which will be linked to the email as a PDF file attachment. Specify the complete path including the filename and file extension.
Design your Crystal Reports file using the same input parameters as available for Variables in email body. Add them in the specific order as displayed in the image below. Strip the @-sign and only use the name of the variable.
Make sure to save your changes by clicking the Save button.
Fill in the Email Receipt Report Save Folder and Email Transaction Report Save Folder . This can be a central shared folder or one specific folder on the local disk.
Config - Crystal Reports
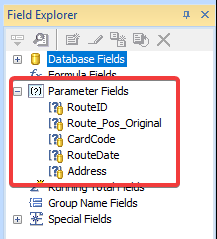
There is a print function in Proof of Delivery when routes are released. The printout can be designed using Crystal Reports and should be linked here.
Specify the complete path including file name.
Design the Crystal Reports file and add the following input parameters:
Make sure to save your changes by clicking the Save button.
Config - Reject Reasons
The Proof of Delivery application requires the definition of Reject Reasons. After successful installation of Proof of Delivery Service package, a User Defined Table is created in the SAP Business One database named Service Reasoncodes.
Navigate in SAP Business One Client to Tools > User-Defined Windows > APD_POD_SVC_PROB

Enter a unique Code and Name and specify Reasoncode A, Reasoncode B and Reasoncode C to create a hierarchy of reject reasons for the users to select from.
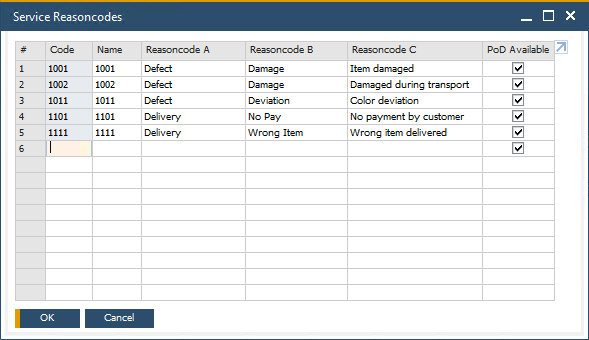
Creating multiple lines for the same Reasoncode A or Reasoncode B will result in selection options in the Proof of Delivery Application when reject reasons must be selected.
Multi Language
Language - Configuration
The Proof of Delivery Application supports multiple languages. By default English and Dutch are available, but administrators can add additional languages or make changes to labels of fields in the application. First specify what the default language System language for logging and the Standard Language for the Proof of Delivery Application should be. Users can select their desired language when logging in.

Make sure to use the Update button to save the changes.
Language - Translation
Proof of Delivery supports multiple languages. By default English and Dutch are available for users.

Changes to the translations can be made by clicking the :Edit: icon.
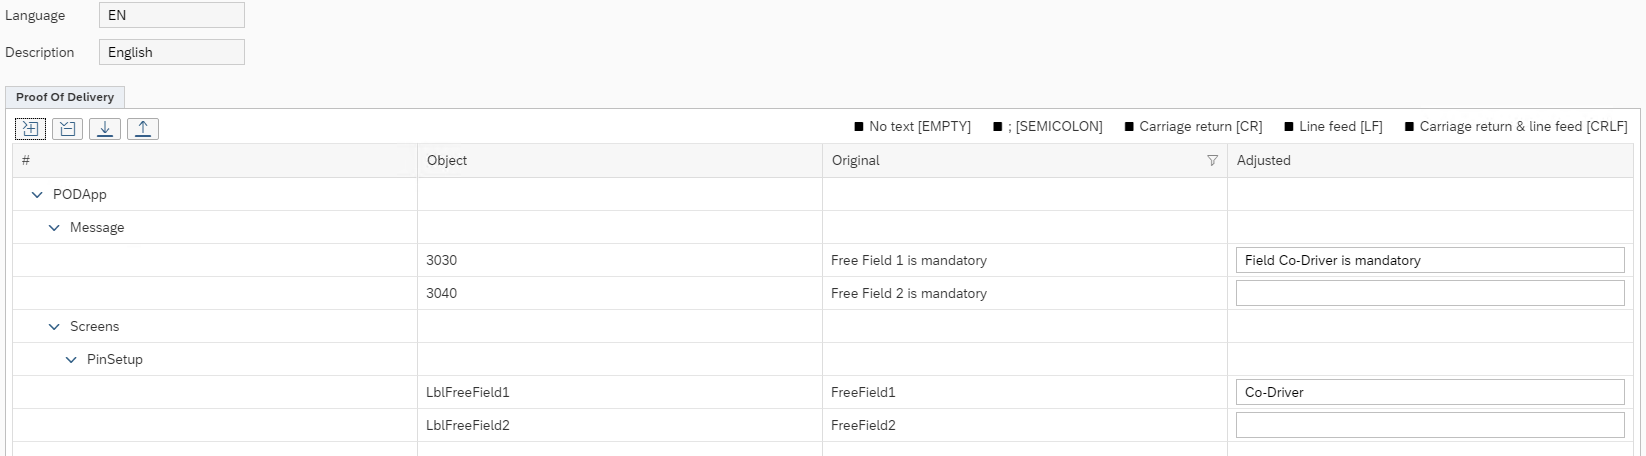
Add the (custom) translation in the Adjusted column.
Tip
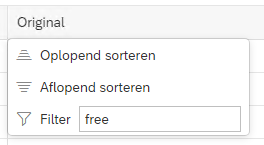
Right-Click on the columns to set filters or to use sorting options to easily find specific fields. Such as the Free text fields mentioned before.
A restart of the application and re-open of the website might be necessary to see the changes made in translations.
Make sure to use the Update button to save the changes.
If desired additional languages can be added. Simply click the :new: button to add a new language.
Now select the Template Language to base the new language on. All fields will have the Original column based on that language. Save the new language and edit translations as required.