Step 2: Managing and Editing a Page or Block
After creating a page or block using a template, you can manage and edit its content.
For a category description, you can create and edit a block as explained in steps 1 and 2. Then, select the desired category and manage it in the Page Builder (explained in Step 3).
You have created a page or block and applied a template. Now, we will proceed to edit and manage its content.
You have opened content management, the Page Builder, within the relevant page or block.
When using an existing template, you should ignore the Page Builder menu (on the left side). The edits you make should always be in the large right-hand section, not from the left-hand menu.
Step 2.1: Page Builder Workspace

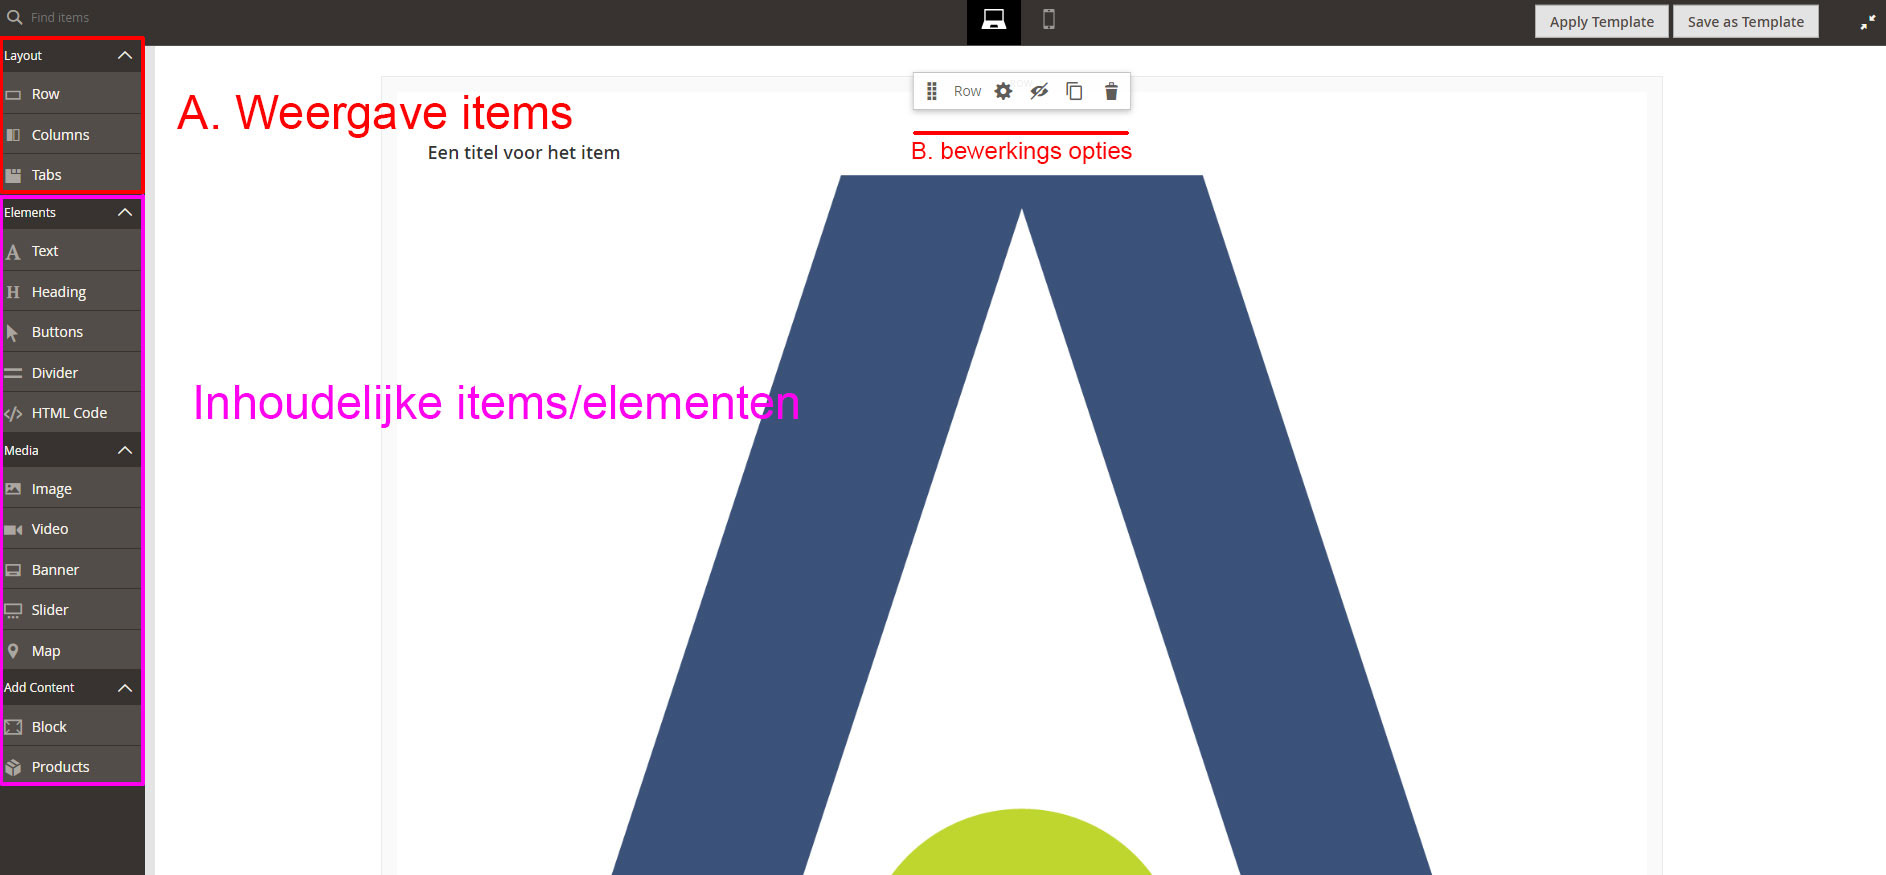
To understand the Page Builder environment, here is an overview. On the left side, you will find the Page Builder menu, which is divided into layout elements and content elements. This Page Builder menu is only used for adding a block. All other items in this menu can be ignored, as you are using a template as the basis for managing your content. Edits can be performed on the right side, directly within the page or block itself.
A: The Layout Items of the Page Builder
These are used during the development of the templates you are working with. You can ignore these options further, as edits are made directly within the page or block itself. See section B: Editing Options.
B: Editing Options
Here, you can make edits directly within the template itself.
Content Items/Elements
Here, you will find the block element that can be added to a category’s content. This is further explained in Step 3.1: Adding a Block with the Page Builder.
Step 2.2: Editing Template Content

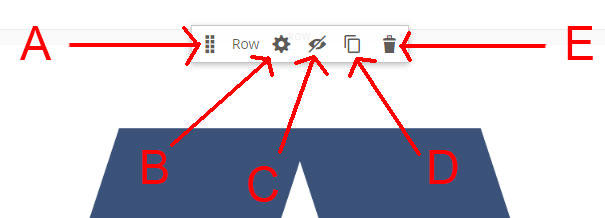
Hover over elements in the right-hand section of the Page Builder screen to see a pop-up with editing options. Use these to:
A. Move elements: You can change the position of this element by dragging it to another location within the page or block.
B. Edit settings: Here, you can, for example, assign an image or color to the background of this layout element. Other settings, such as configuring a link, can also be adjusted.
C. Show/hide elements: This allows you to hide everything within this element or make it visible again. This is useful for preparing content in advance.
D. Duplicate elements: This option lets you duplicate the element.
E. Delete elements: This removes the element permanently from the page. It is therefore not recommended to use this option. Instead, you can hide the element.
Step 2.3: Adjusting Settings

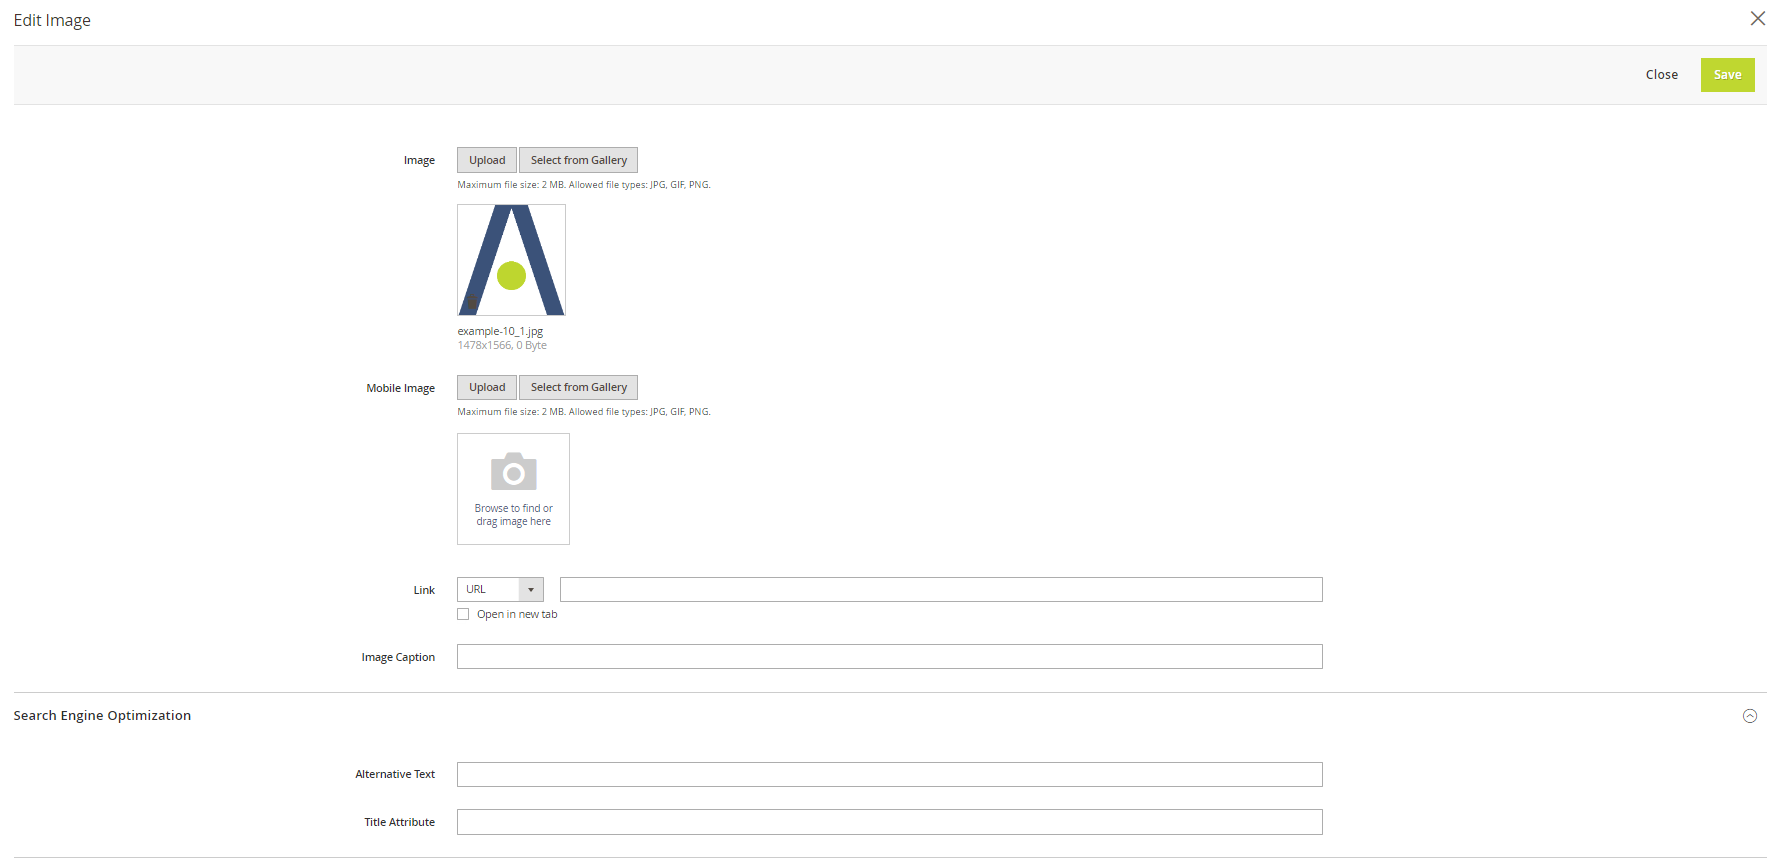
As an example, you can see the settings of an image opened. In these settings, you can:
Insert an image
Configure a link, and other similar options.
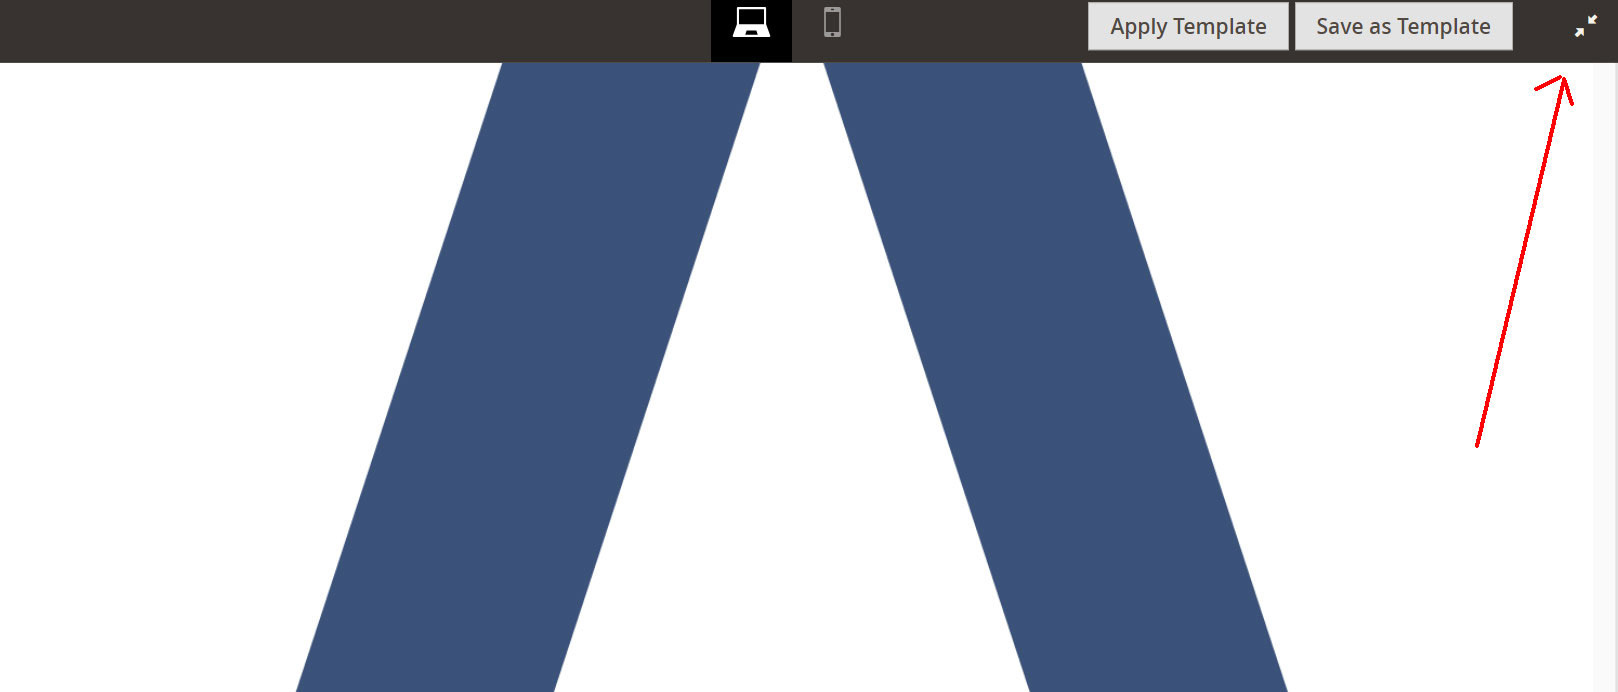
When you have finished editing the settings/content, click Save (located in the top-right corner).

Finally, to save your edits completely, click Close (located in the top-right corner).

After that, click Save in the Page Builder screen (located in the top-right corner).
