Store Management Portal
Management Portal
To manage settings for the store, an authorized user must login to the Management Portal.
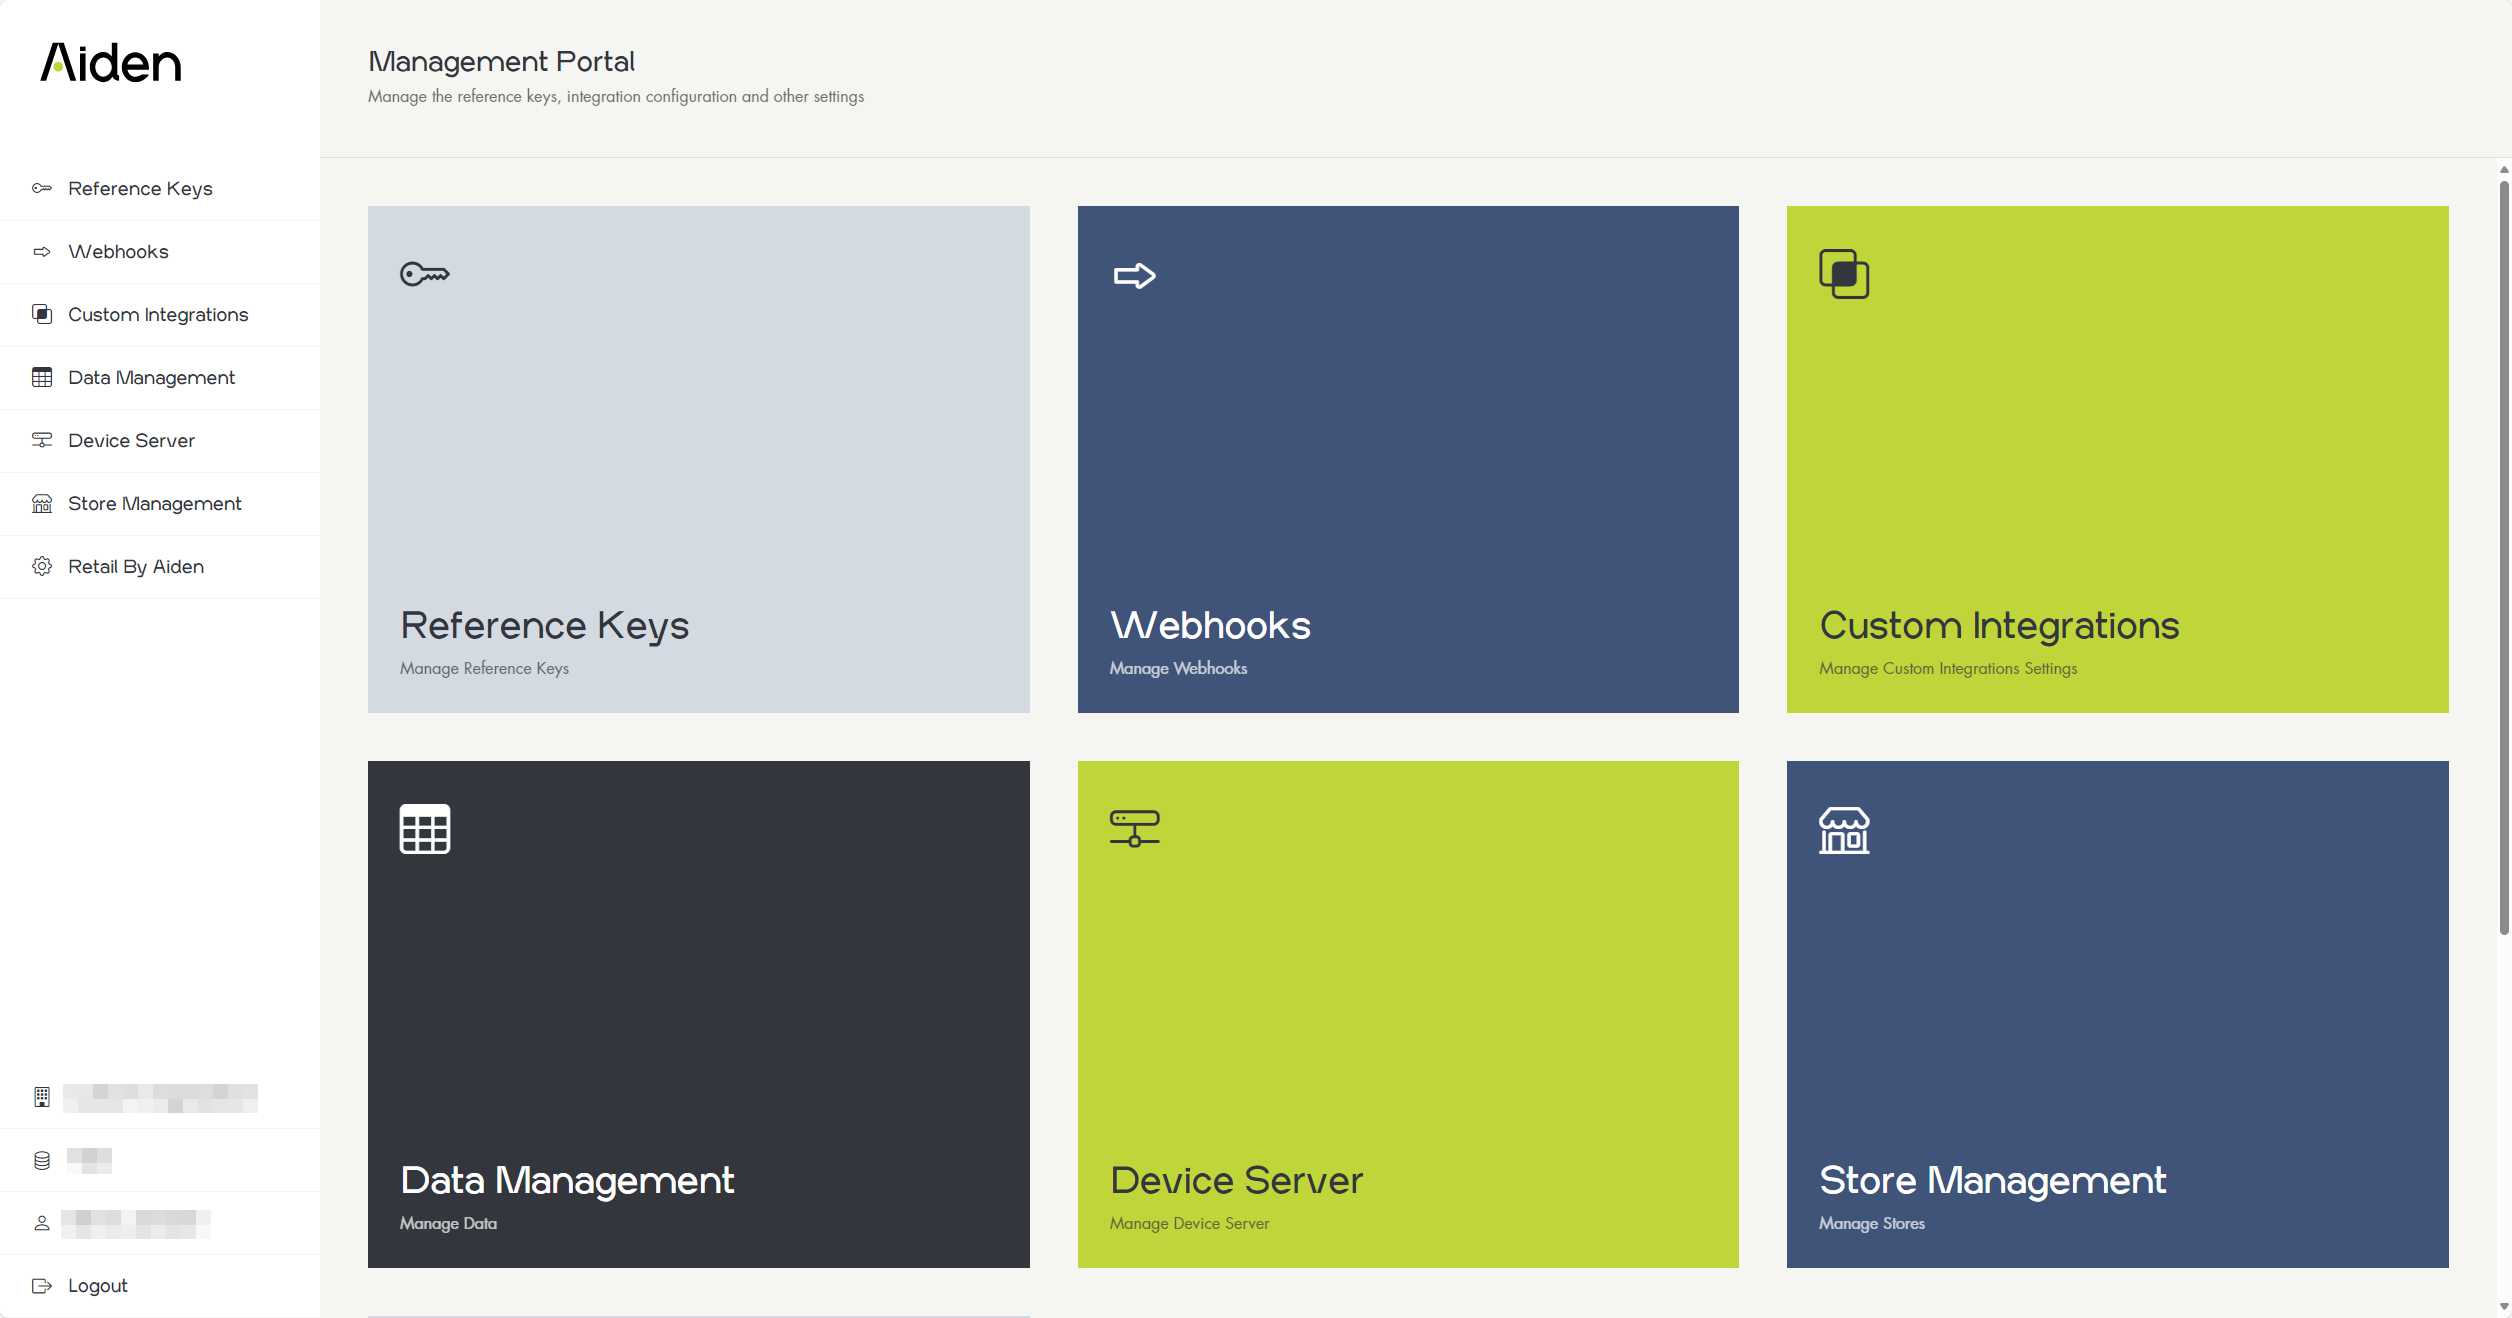
Settings for Reference Keys and Webhooks are intended for connections with Integration Platforms.
At Custom Prices there’s the option to enable (and configure) the use of an external Custom Prices API. When Configured, all pricing is done through this API. Local stored data in Retail by Aiden is no longer used.
At May Pay On Account there’s the option to enable (and configure) the use of an external validation whether is is allowed to pay on account. When Configured, the check is done through this API. Local stored data in Retail by Aiden is no longer used.
At Open Documents there’s the option to enable (and configure) the use of an external source to retrieve open documents and to add them to your transaction
The Device Server manages the link to your locally installed instance of the Aiden Device Server which will be used to print to your local printers or to link to the store’s card payment devices. Instructions on how to install and configure this device server will be sent separately.
The Store Management option gives access to creating new or changing existing stores.
The Retail by Aiden Settings option gives access to the store specific Retail by Aiden settings. Settings can be changed for All stores or a specific store. Settings that do not support multi store level, will be hidden when selecting a specific store. The chapters below describe the available options:
the Data Management option gives access to the Resend of transactions for all stores
General Store Settings
Configure these settings as desired. The settings are for visual and functional options for the Point of Sale application. Some settings should be applied after successfully installing and configuring the Local Device Server. Check General Store Settings for more detailed information of the options.
Discount Reasons
Configure as desired.
Name = Enter a name for the discount type which will be displayed in Point of Sale application.
Description = Enter an additional description.
Is active = Specify if the discount type can be used in Point of Sale application.
Is valid for line = Specify if discount can be used in item lines of a sales transaction.
Is valid for transaction = Specify if discount can be used on document level of a sales transaction.
Remarks required = Specify if an additional remark should be entered by sales employee when selecting this type in Point of Sale application.
Default editable = Specify if the discount can be edited in Point of Sale application.
Default percentage = Specify the (default) discount percentage
Default amount = Specify the (default) discount amount
Either use percentage or amount as a discount
Return Reasons
Configure as desired.
Return Reason Id = Specify the identifier for the Return Reason (will be used in transactions).
Name = Specify the name for the Return Reason which will be displayed when selecting in Point of Sale application.
Is active = Specify if the Return Reason can be used in Point of Sale application.
Remarks required = Specify if an additional remark should be entered by sales employee when selecting this Reason in Point of Sale application.
Payment Types
Configure as desired. All are activated by default. Adjust settings when required.
Rounded = When enabled, the payment will be rounded to 5 cent amounts.
Cancelable = When enabled, a saved payment of this type in a transaction can be removed.
Full amount default = When enabled, the remaining amount to be paid, is automatically filled in when selecting this payment type.
Active = When enabled, the Payment Type Button will be displayed in POS.
Selectable = When disabled, the Button is displayed, but cannot be selected by POS user (for example: when a fixed prepayment is attached).
Using cash drawer = When enabled, selecting this payment type will also open the physical cash drawer (when configured in Local Hardware Service).
Refundable = When enabled, this Payment Type can be selected as refund payment type. (if user has ElectronicPaymentRefund permission)
IconLink = When left empty default icons will be used.
Defaults:
 Pin (P) |  On Account (AC) |  Cash (C) |  Giftcard (GC) |
If you would like to change the default Icon or add a custom icon to a new payment type, simply select it from the list.
Refund Payment Type Id = When the paid amount is higher than total to be paid, then this Payment Type ID is used as a default for refund payment type.
Parent Payment Type Id = Specify the Payment Type ID which should be used as the technical payment type (for example: Credit Card payment can be added as additional payment type, but will effectively activate the same device as normal card payments. This is not yet implemented)
Can be combined with other payment Types = When this is NOT checked, this can be the only payment type of a transaction
Should be signed = when checked the receipt/bill should be (electronically) signed by the customer
Sign Type = type of signature
Signature Pad
Can be Paused = if Enabled, it is possible to Pause a transaction with an added payment of this type. We advice to disable this setting for On Account and Giftcard Payment Types.
Transportation Methods
Configure as desired. Configured Transportation Methods can be selected in Retail by Aiden Point of Sale application when editing a line. The first added method will be used as the default method.
Transportation method ID = Specify the identifier for the Transportation Method (will be used in transactions).
Name = Specify the name for the Transportation Method which will be displayed when selecting in Point of Sale application.
Active = Specify if the Transportation Method can be used in Point of Sale application.
Item Details
Configure which fields are displayed in Retail by Aiden Point of Sale application when displaying details page of a selected item. It is possible to change the following information:
Enable (Toggle on or off to display or hide the field)
DisplayName (Edit to change the default display name of the field - will be displayed when no translation was added for the language the Point of Sale app is displayed in)
Translations (Add translations for this field for the available languages)
Display Sorting Order (Simply move (drag and drop) a field to change the order in which it should be displayed in Point of Sale app)
Widgets
Configure which Widgets are displayed in Retail by Aiden Point of Sale application. Here it is possible to enable or disable widgets and change the display sorting order by simply moving them (drag and drop) in the list.
Not all widgets can be disabled because they depend on other logic or settings)
It is also possible to add new customizable “Quick Search“ widgets. The following can be configured for these widgets:
Name (Enter the default name to display in the widget’s button)
Translations (Optionally add translations for the available languages)
Icon (Select an icon to display in the widget’s button)
Icon Color (Select in which color the icon should be displayed. Select either Basic (for the default color) or Theme (for the configured highlighting color).)
Search Type (Select which type of Quick Search widget to create. Select from Item or Customer.)
Search Terms (Enter the search terms that should be used when using the widget)
The following widgets can be enabled/sorted:
Customer: Depending on Store Settings this tile can be used to select an existing customer.
Pause: When enabled, this tile will give users the option to pause a transaction.
Resume: When enabled, this tile will give users the option to view a list of all paused transaction. This overview can also be used to display historic transactions.
Returns: When enabled, this tile gives users the option to register returned goods.
Attachments: When enabled, this tile gives users the option to attach files to the current transaction.
Cash Procedures: When enabled and depending on user authorizations, this tile gives users the option to use Cash Procedure functions.
Some widgets can be configured by users via the Add Widget button

Open Documents: when enabled and depending on authorizations and customer, this tile give the users to retrieve the open documents for the chosen customer
Quick Search: when created and enabled, this tile gives the user to option to run a predefined query on either items or business partners. Multiple Quick Search tiles can be created.
External URL: opens a URL in an external tab. Currently a static URL but if needed this can be filled dynamically with data used from POS (e.g. link to PIM of eCommerce platform for selected items or CRM for selected customer).
Widgets are displayed in the Additional Functions section of the Point of Sale app.
Customers
Configure which fields are displayed in Retail by Aiden Point of Sale application when adding or editing a Business Partner. It is possible to change the following information:
Visible (When enabled the field will display in the Create or Edit Business Partner screen in Point of Sale application)
Mandatory (When enabled the field cannot be left empty when creating or editing a Business Partner in Point of Sale application)
Some fields are mandatory from database logic. The portal does not check these validations, yet.
Theme Settings
Configure how the Retail by Aiden application should be displayed. The following settings can be changed (per store):
Theme color: Specify the color to be used as a highlighting color. Make sure to use a color that works for both light and dark theme. You can use the color picker or add hexadecimal value for the color directly.
Customer logo link: Specify the hyperlink to the logo to be presented in the top left corner of the application.
Theme Rounded: Specify if the screens should have a rounded look. When disabled, the screens and buttons will have square edges.

File Settings
Configure the maximum file size per file and per transaction. Also specify which file type should be allowed to be uploaded.

Cashbooking Reasons
Create and manage Cashbooking Reasons which are to be used in Point of Sale functions. Per reason it is possible to
Specify an ID (ID cannot be changed after creation, make sure this ID corresponds with entities or logic in target system)
Specify label text (includes optional translations)
Mark a Reason as Active
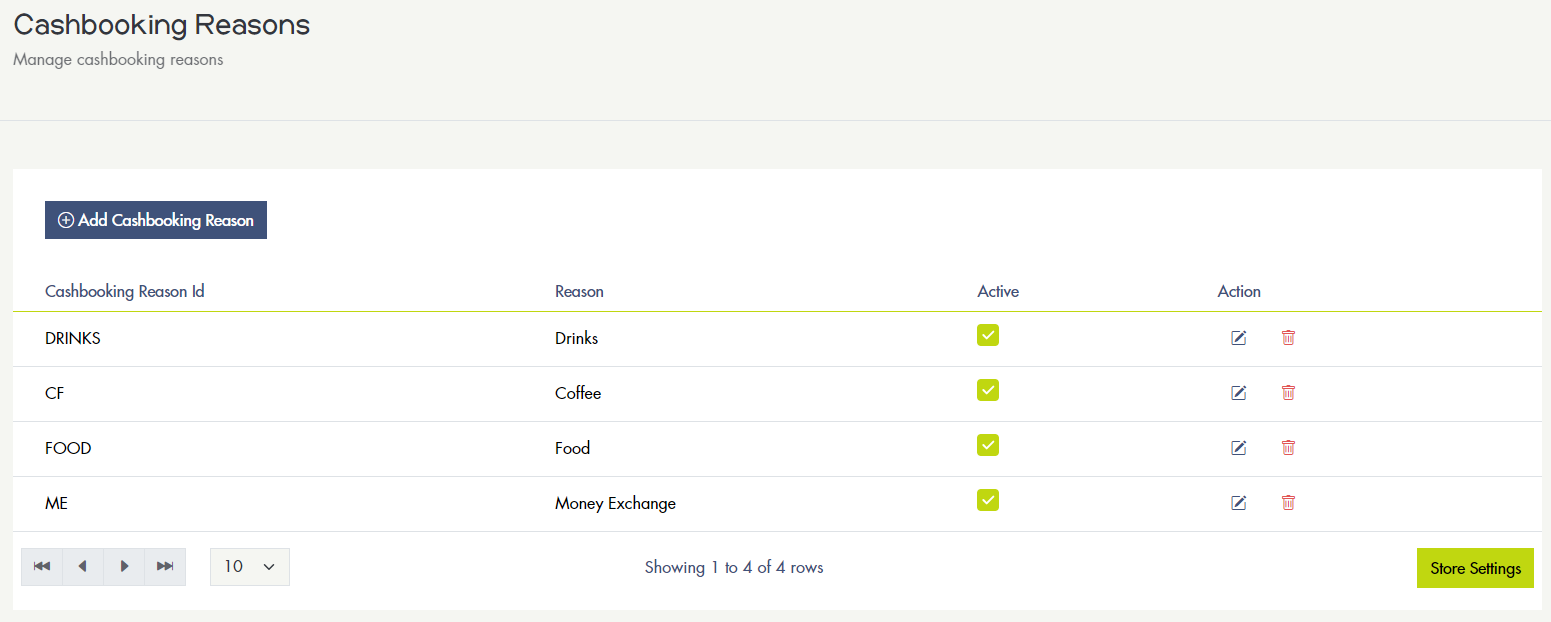
Existing Reason can be Deleted by pressing the ![]() button.
button.
Hardware Settings
Create and manage hardware settings
Payment Devices
Windows Printers (not yet active)
Pos Printers (not yet active)
Drawers (not yet active)
Payment Devices
Create and manage payment devices used in the POS.
Device id (leave empty, this will be generated)
Specify a store (if no store is specified the device is valid for all stores)
Specify a location
Specify a description (this is shown as the name of the payment device in POS)
Set active
Set Type (currently Pay or CCV Cloud)
Set parameters according to the Type (see tables below)
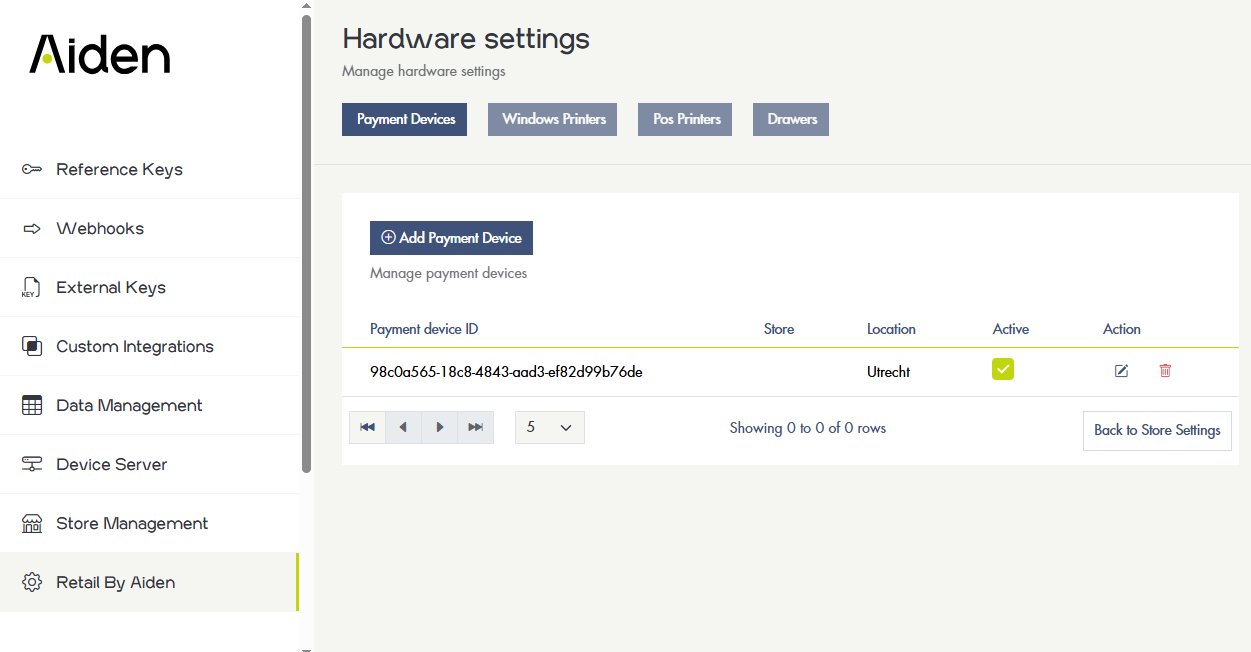
Overview Payment Devices
CCV Cloud
Property | Description |
|---|---|
Base Url | https://api.psp.ccv.eu/api/v1 – fixed value For Test terminals: https://vpos-test.jforce.be/vpos/api/v1 |
ApiKey | The API key as Assigned by CCV (information provided by CCV) |
ManagementSystemId | GrundMasterNL For test terminals: |
TerminalId | The terminal id as assigned by CCV (information provided by CCV) |
Webhook | https://webhook.aiden.eu – fixed value |
Pay
Property | Description |
|---|---|
Base Url | https://rest-api.pay.nl/v16/Transaction/start/json – fixed value |
User Name | The UserName as assigned by Pay |
Password | The Password as assigned by Pay |
Service Id | The Service Id as assigned by Pay |
PaymentOptionSubId | Id as assigned by Pay |
