
Bridge
Introduction
The Bridge application allows your POS system to print directly to local devices such as receipt printers. Because cloud applications cannot normally access printers connected to your local network, the bridge acts as a connector between your POS in the cloud and your physical printer(s).
By installing this small application on a local device (for example, a PC or dedicated mini-computer), your POS can send print jobs to any supported printer in real time, just as if it were connected directly.
Prerequisites
Before you begin, make sure you have:
A local Windows device that will remain powered on and connected to the same network as the printer.
A stable internet connection.
.NET Runtime version 9 installed on this device.
Access to your printer and its drivers installed on the local device.
You have created a Bridge in the Management Portal of your POS application via:
Retail By Aiden > Hardware Settings > Bridge:

This provides you with a token which you need to use in Step 2.
Step 1: Download the Bridge Application
In the Management Portal of your POS application. Go to:
Retail By Aiden > Hardware Settings > Bridge:

Step 2: Install the Application
Step | Images | |
|---|---|---|
| 1 | Select the desired location for the installation of the Aiden Hardware Bridge application’s service. Click INSTALL to start the installation process. Before installation starts, additional required components might be downloaded and installed before the Aiden Hardware Bridge installer will appear. | 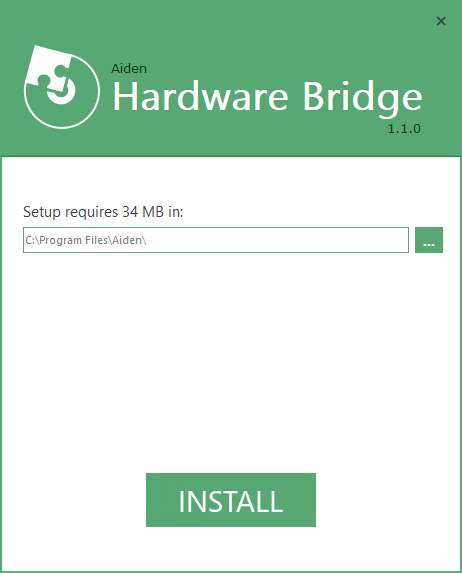 |
| 2 | When connecting to devices that require network or domain access, please ensure you enter valid credentials for the Windows Service. These can also be left empty (just press Next), the service will then run under “Local System”. | 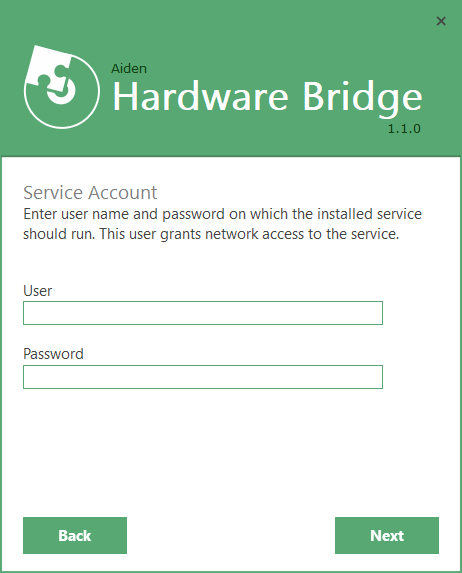 |
| 3 | Copy and Paste the generated Bridge Token and click on Add Bridge. This will add the Token to the Bridges section above. Click Next to install the Windows Service. | 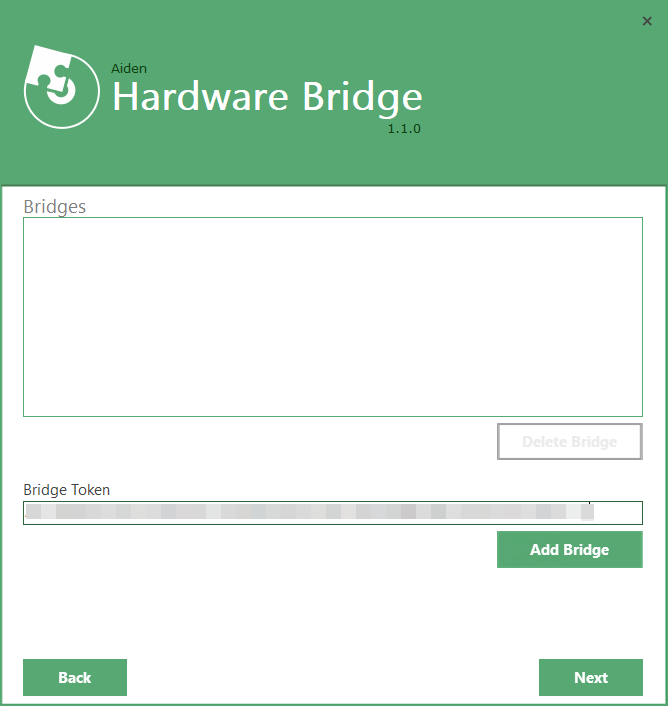 |
| 4 | Wait for the installation process to finish. Click Finish to close the installer. | 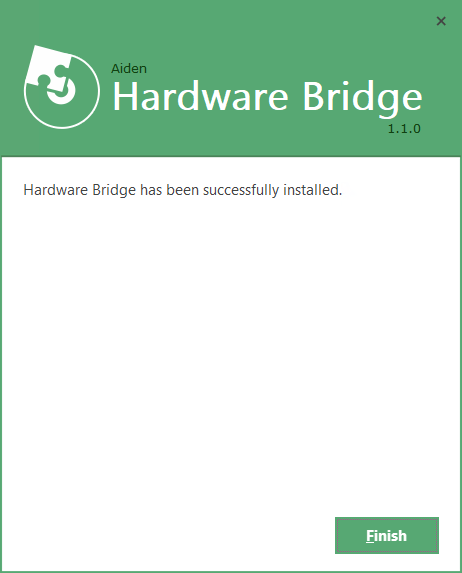 |
To make changes to the installation, simply run the installation wizard again.
It is possible to add tokens from different environments to the same installation.
It is possible to change the Service Account using the installer or by changing it directly from Windows Services.
Step 4: Configure Your Printer
Ensure the printer is powered on and installed/shows on the local device.
Add a Printer (e.g. Receipt Printer) via:
Retail By Aiden > Hardware Settings > POS Printers:

Send a test print to verify the setup.
Best Practices
Keep the device running: The bridge must remain active to process print jobs.
Automatic startup: Set The :”Hardware Bridge” service startup type to “Automatic”, so it runs automatically when the device restarts.
Troubleshooting
If the printer does not appear, ensure the bridge application is running and that the printer is installed on the local device. Make sure the device can print from this local device.
Check firewall or antivirus settings if the bridge cannot connect to the internet.